Chromebook Minecraft Installation Guide
Author : Alexander
Mar 14,2025
Minecraft's popularity spans nearly every device, and Chromebooks are no exception. Running on Chrome OS, these devices present a unique challenge for Minecraft installation, but it's entirely achievable. This guide provides a comprehensive walkthrough, covering installation and performance optimization tips.
Table of Contents
- General Information About Minecraft on a Chromebook
- Enabling Developer Mode
- Installing Minecraft on a Chromebook
- Running the Game
- How to Play Minecraft on a Chromebook with Low Specs
- Enhancing Performance on Chrome OS
General Information About Minecraft on a Chromebook
For smooth gameplay, your Chromebook needs to meet these minimum requirements:
- System Architecture: 64-bit (x86_64, arm64-v8a)
- Processor: AMD A4-9120C, Intel Celeron N4000, Intel 3865U, Intel i3-7130U, Intel m3-8100Y, Mediatek Kompanio 500 (MT8183), Qualcomm SC7180 or better
- RAM: 4 GB
- Storage: At least 1 GB of free space
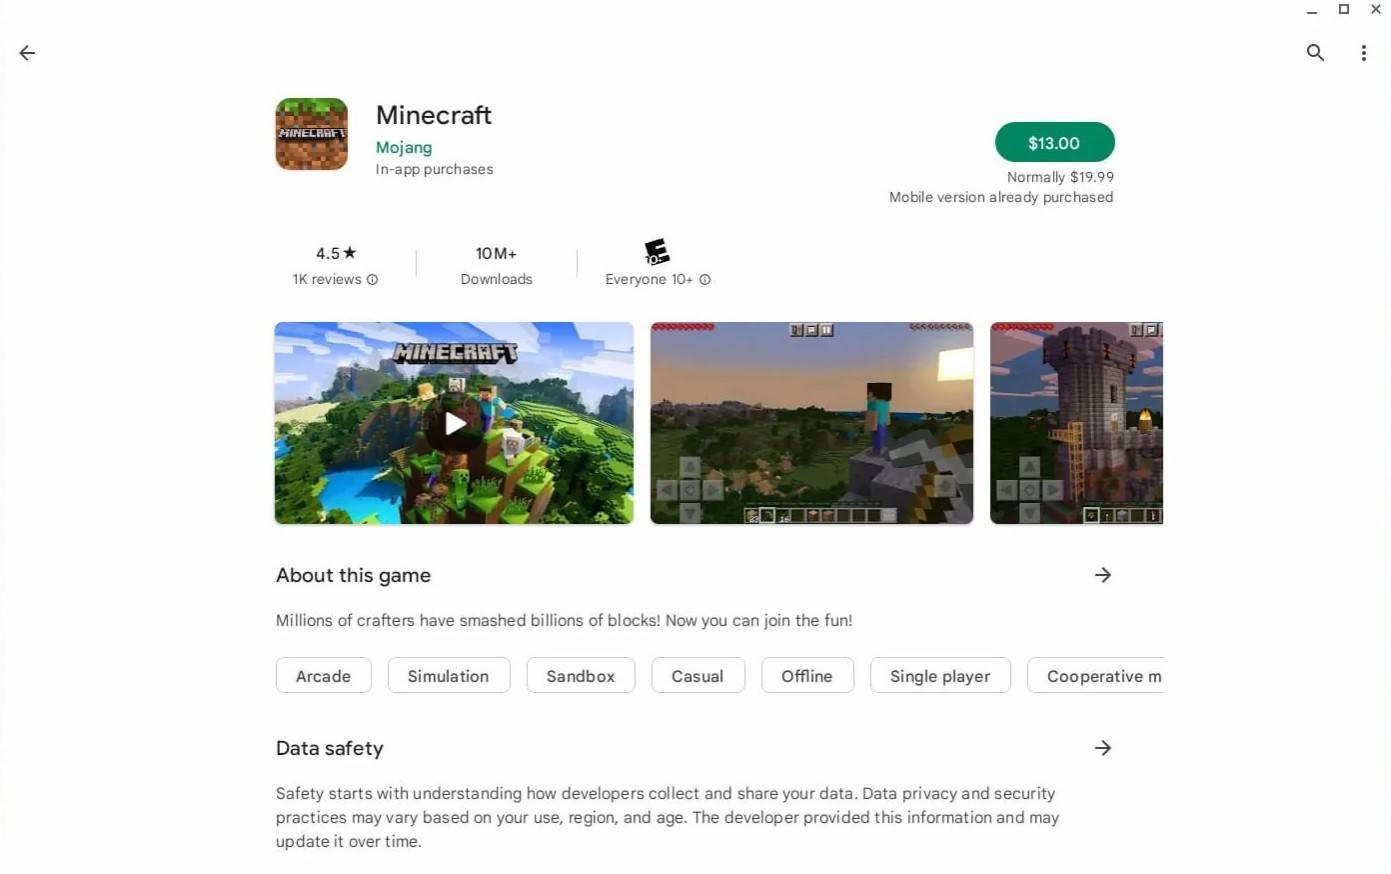
These are minimum specs. If performance is still an issue, we'll address that later. Let's start with installation. The easiest method is installing the Bedrock Edition directly from the Google Play Store. Simply search for Minecraft, and purchase it for $20 (or $13 if you already own the Android version). This is a convenient option for those who prefer simplicity.
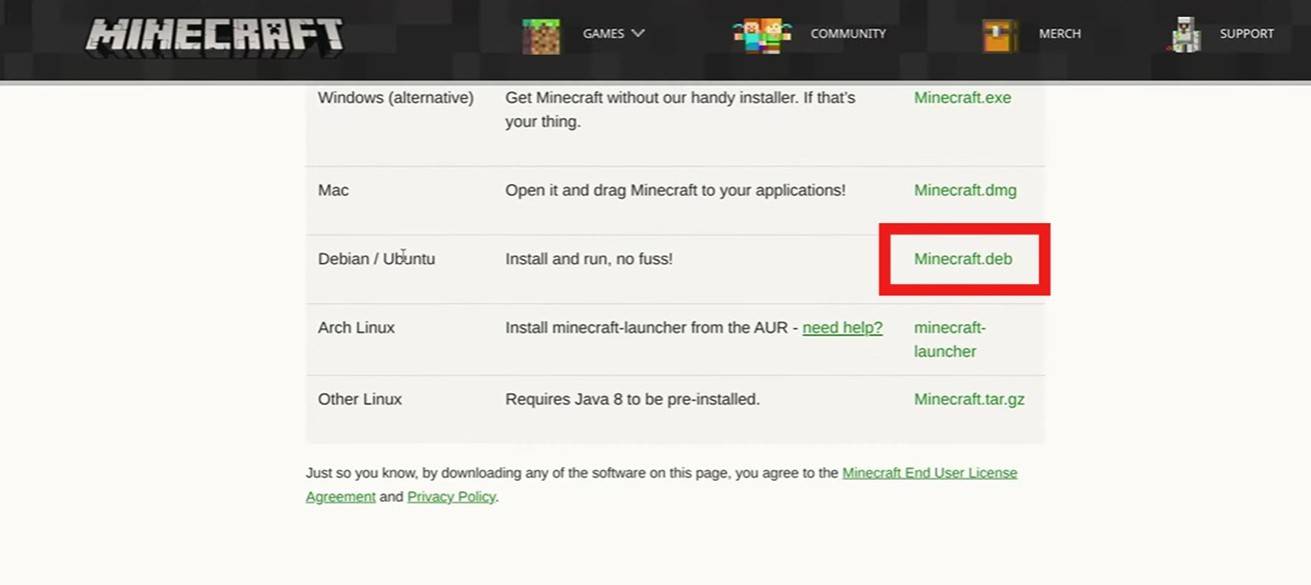
However, if you prefer other versions, remember Chrome OS is Linux-based, offering broader Minecraft compatibility. This method requires more technical steps, but we'll guide you through it.
Enabling Developer Mode
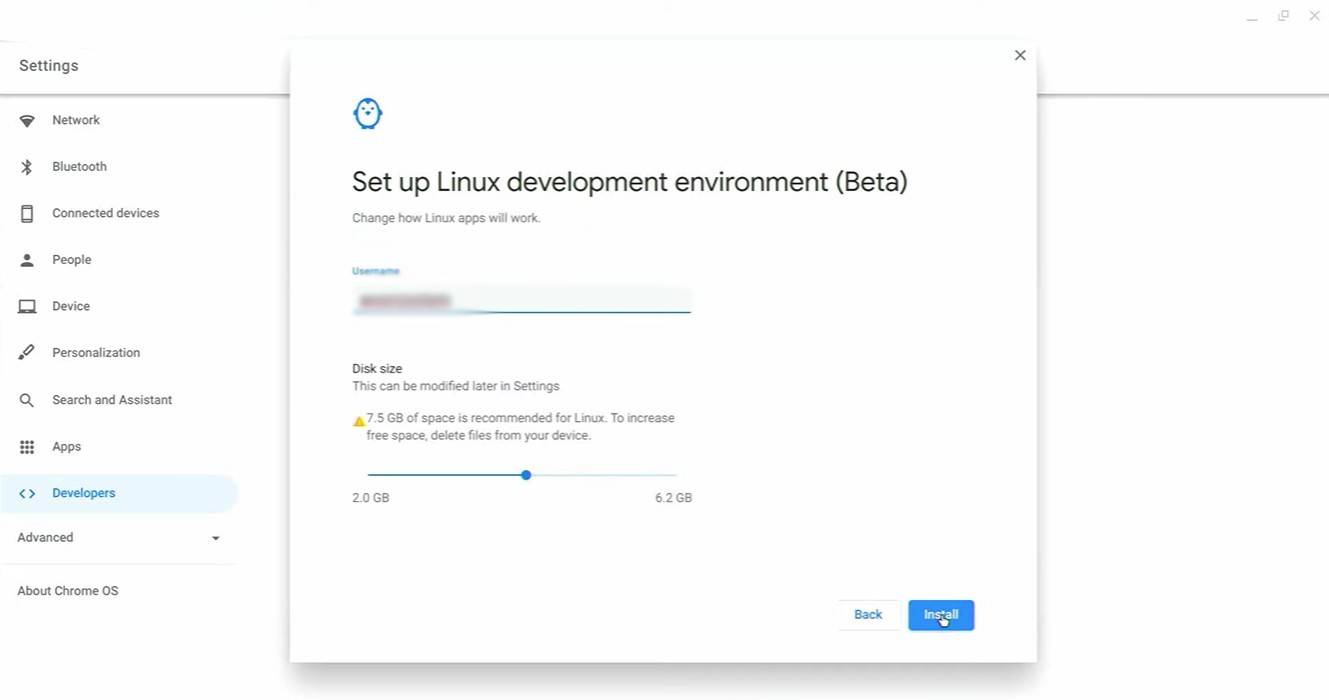
First, you need to enable Developer Mode. Access your Chromebook's settings (similar to a "Start" menu), navigate to the "Developers" section, and enable the "Linux development environment." Follow the on-screen instructions. Once complete, the Terminal (Chrome OS's command line interface) will open, ready for the next steps.
Installing Minecraft on Chromebook
[ttpp]
Latest Articles
Goblin Valley: Cozy Home Game Opens Pre-Registration
Build and expand your thriving goblin farm villageInteract with quirky goblins, each with unique personalitiesMonitor and fulfill your goblin residents' needsUnimob Global has recently launched pre-registrations for Idle Goblin Valley: Chill Farm, of
Heartopia is kicking off its first closed beta test next month
The initial CBT runs from November 4th through the 18thEngage in hobbies such as fishing, birdwatching, and cookingAdopt pets, customize your home interior, and design unique outfitsHeartopia, XD Games’ highly anticipated life simulation title announ

Summoners War set to host collaboration with the iconic fantasy book series The Lord of the Rings
Summoners War: Sky Arena has teamed up with none other than The Lord of the Rings.
Set to launch later this month, the collaboration brings iconic characters from the Fellowship and beyond into the game.
The Lord of the Rings needs no introduction—it
Another Eden expands its Chrono Cross collaboration content with Glenn and new story
Another Eden is introducing fresh content to its existing Chrono Cross collaboration materialThe release includes a beloved character named Glenn from The Cursed DragoonA new character and upcoming events are also being added to honor Japan Cat DayAl

The $13 FrSara Portable Neck Fan Is an Inexpensive Solution to Beating the Summer Heat
Summer has arrived, and neck fans are seeing a surge in popularity. These portable fans offer a simple, effective, and affordable way to stay cool and comfortable. Amazon is currently offering 50% off the FrSara Rechargeable Portable Neck Fan with th
Hand-Drawn Photography Adventure Game TOEM Opens Pre-Registration on Mobile
BAFTA-winning title TOEM: A Photo Adventure arrives on mobile devices worldwide.
Developed by Swedish indie studio Something We Made, pre-registration for TOEM is now available on Android. The official release date is set for October 22nd.
Fun fact:
Latest Games

Lenguaje 6 años
Educational丨33.7 MB

Squla
Educational丨60.6 MB

XXXTentacion Tiles Rush Hop
Music丨71.6 MB

Mis Primeras Notas Musicales
Music丨16.9 MB

Rhythm Patrol
Music丨151.7 MB

Piano Star
Music丨88.3 MB

XTrem Racing
Racing丨140.1 MB
Jeep Drive : Cherokee SRT8
Racing丨91.2 MB


Top News
MORE +

01
01-07
BREAKING: Flight Simulator 2024 Login Woes Ground Players
Flight Simulator 2024 Launch Plagued by Technical Difficulties
The highly anticipated launch of Flight Simulator 2024 has been significantly hampered by widespread technical problems, leaving many players grounded before they could even take to the virtual skies. This article details the reported d
02
01-06
CDPR acknowledged weak gameplay in The Witcher 3
The Witcher 3, while critically acclaimed, wasn't without its flaws. Many fans felt the combat system fell short.
In a recent interview, Witcher 4's game director, Sebastian Kalemba, acknowledged weaknesses in the previous game's gameplay, specifically highlighting the need for significant improvem
03
11-17
Hogwarts Legacy 2 is "One of the Biggest Priorities" for WB Games
Following the successful launch of Quidditch Champions this week, Warner Bros. Discovery has confirmed its plans for a sequel to last year's Harry Potter-based action RPG hit Hogwarts Legacy—2023's best-selling game.Hogwarts Legacy Sequel Plans Confirmed by Warner Bros. DiscoveryExpected in
04
11-16
Airplane Chefs Brings The Ultimate Snack, Pringles, On Board!
Buckle up for some snacks as Nordcurrent has just dropped an exciting event for their cooking game. It’s the most unexpected collab of Airplane Chefs and Pringles. If you’ve been enjoying your virtual life as a flight attendant, things are about to get a lot tastier.The game developer behind p
05
11-16
Play Together to collaborate with Sanrio and introduce new My Melody and Kuromi content
Play Together is bringing back its Sanrio collab with the appearance of My Melody and KuromiYou can collect coins by completing their themed missions that can then be used to draw exclusive itemsAs a bonus there's also new summer-themed content and events, including a major bug huntPlay Together, th
Topics
More +