Master Dual Blades in Monster Hunter Wilds: Complete Moves and Combo Guide
Author : Ethan
May 16,2025
In the thrilling world of *Monster Hunter Wilds*, victory isn't solely determined by brute strength. Speed and strategic positioning can be just as crucial, allowing even the most agile hunters to take down formidable beasts. This is where the Dual Blades shine, offering a dynamic playstyle perfect for those who thrive on speed and precision. Here's a comprehensive guide on how to master the Dual Blades in *Monster Hunter Wilds*.
Dual Blades in Monster Hunter Wilds
The Dual Blades are renowned for their rapid and relentless attacks, allowing you to strike multiple times in quick succession. Mastering both of their modes is essential to adapt to various combat scenarios effectively.
All Moves
| Command | Move | Description |
|---|---|---|
| Triangle/Y | Double Slash/Circle Slash | A basic combo starter. Press Triangle/Y to perform a Double Slash, and follow up with Triangle/Y again to perform Circle Slash. |
| Circle/B | Lunging Strike/Roundslash | A slashing attack that advances in the direction of the analog stick. Press the command again for a Roundslash. |
| R2/RT | Demon Mode | Entering Demon Mode will boost the attack, movement speed, and evasion of hunters. It also grants immunity to knockbacks. |
| Triangle/Y + Circle/B (In Demon Mode) | Blade Dance I, II, III | In Demon Mode, these powerful attacks can be chained together and will consume the Demon Gauge. |
| Triangle/Y + Circle/B (In Archdemon Mode) | Demon Flurry I, II | A series of attacks that can only be unleashed in Archdemon Mode and consumes the Demon Gauge. Use the analog stick to control the direction. |
| Cross/A (During Demon/Archdemon Mode) | Demon Dodge | In the respective modes, pressing the button will initiate a dodge that is faster than normal. A Perfect Evade will let players attack while dodging, and provide a short-term buff. Demon Dodge will not consume the Demon Gauge while in Demon Mode. |
| L2/LT + R1/RB | Focus Strike: Turning Tide | A slashing attack effective against wounds, hitting a monster’s wound will perform a Midair Spinning Blade Dance. This attack spans the length of the monster and can destroy multiple wounds. |
Demon Mode/Demon Gauge and Archdemon Mode
The Dual Blades feature a unique gauge mechanic. Enter Demon Mode to benefit from increased attack, movement speed, and evasion, as well as knockback immunity. However, Demon Mode continuously depletes your stamina, ending when you cancel it manually or when your stamina hits zero. By landing attacks in Demon Mode, you fill the Demon Gauge. Once full, you transition into Archdemon Mode, where the Demon Gauge depletes over time and can be consumed by certain attacks, enabling boosted attacks.
Both modes can be utilized simultaneously, and when mounted on a monster, the Demon Gauge stops decreasing, giving you time to strategize your next move.
Demon Dodge
Achieve an empowered state after a successful Perfect Evade with Demon Dodge, which increases regular and elemental damage and allows attacks during dodging. Demon Dodge grants a 12-second damage buff, and subsequent dodges cause damage as you spin forward.
Combos
 Image Source: Capcom via The Escapist
The Dual Blades' combos revolve around Demon and Archdemon Modes, enabling you to chain attacks for maximum damage.
Basic Combo
Chain the standard Triangle/Y attack three times to execute Double Slash, Double Slash Return Stroke, and Circle Slash, offering reliable damage in various hunting scenarios. Alternatively, use the Circle/B Demon Flurry Rush – Spinning Slash – Double Roundslash combo to quickly fill your Demon Gauge.
Demon Mode Basic Combo
In Demon Mode, your basic combo becomes more potent and faster, starting with Demon Fangs, followed by Twofold Demon Slash, and Sixfold Demon Slash. Conclude the sequence with Triangle/Y + Circle/B for Demon Flurry I.
Archdemon Mode Blade Dance Combo
Once your Demon Gauge is full, enter Archdemon Mode for swift and concentrated attacks. Begin with Blade Dance (Triangle/Y + Circle/B) in Demon Mode, follow with four more presses of R2/RT for Demon Flurry I into Blade Dance II, and finish with Demon Flurry II and Blade Dance III. This seamless transition between modes delivers immense damage swiftly.
Dual Blade Tips
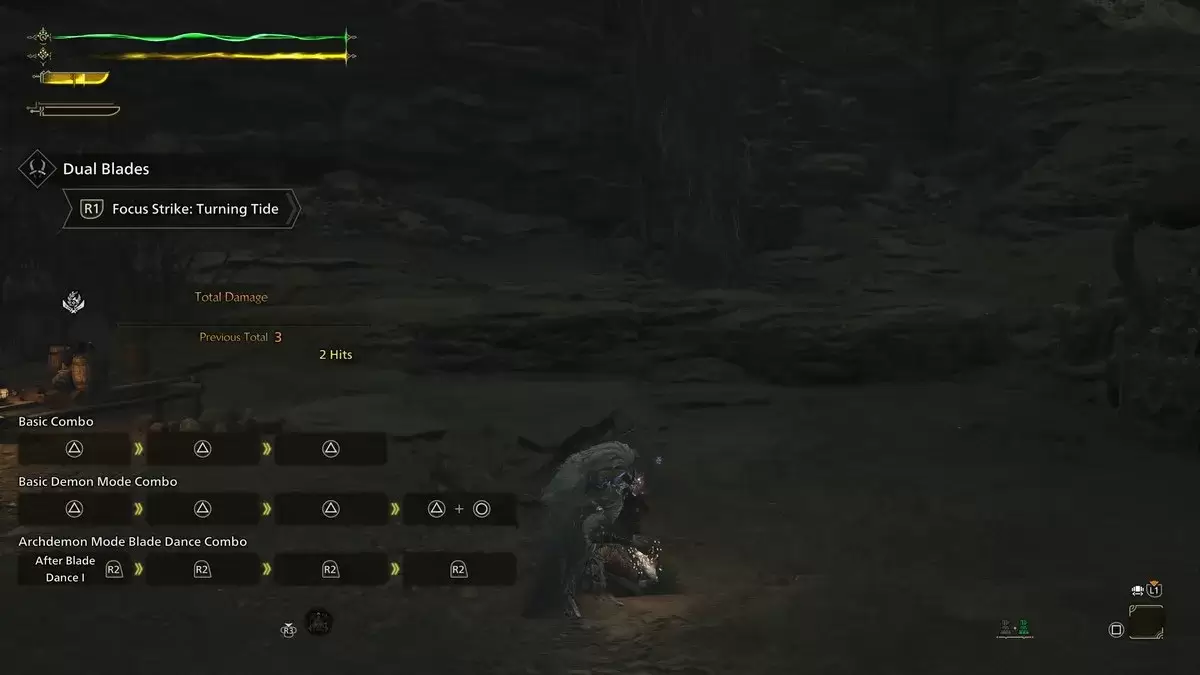 Image Source: Capcom via The Escapist
Mastering the Dual Blades involves seamlessly switching between modes to maximize your damage output.
Always Follow Up
Start with the basic Demon Flurry Rush combo (Circle/B + Circle/B + Circle/B), then transition into a full Demon or Archdemon Mode combo with three sets of Triangle/Y + Circle/B. This approach fills your Demon Gauge quickly and converts it into swift, damaging attacks.
Keep Your Stamina Up
Since Demon Mode relies on your stamina, maintaining a good reserve is crucial. While you can exit the mode to recover, using Focus Strike on wounds during combat can stop stamina drain temporarily and still fill your Demon Gauge, allowing for aggressive follow-ups.
Dodging in Between Attacks
With no reliable defense, dodging is your key to survival. The Dual Blades' mobility allows you to dodge out of most attacks and combos without locking you in. Be patient and wait for the right moment to strike, avoiding early commitments.
Ensure Sharpness
The relentless attacks of the Dual Blades quickly dull your weapons. Utilize the Speed Sharpening skill in your build to minimize downtime and keep your blades sharp for continuous action.
With these strategies, you'll be well on your way to mastering the Dual Blades in *Monster Hunter Wilds*. For more tips and guides, be sure to check out The Escapist.
*Monster Hunter Wilds is available now on PlayStation, Xbox, and PC.*
Latest Articles

Japan Expansion for Ticket to Ride: Build the Bullet Train Network!
Ticket to Ride now lets you embark on a virtual train journey across Japan with its latest expansion. Marmalade Game Studio and Asmodee Entertainment have launched the Japan Expansion for their digital adaptation of the classic board game.
Help Build
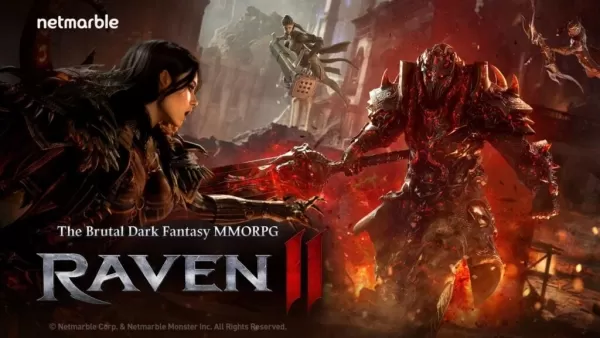
Raven2, Dark Fantasy MMORPG, Launches on Android
Netmarble has launched Raven2, its gritty dark fantasy MMORPG, on Android. The global release covers over 150 countries, including North America, Southeast Asia & Oceania, and Europe. The game also offers support for 16 languages.A wild adventure awa
Seven Knights: Boost Combat Power with Hero Training
Seven Knights Re:BIRTH, the direct sequel to the beloved turn-based RPG Seven Knights, has just launched worldwide and is already winning praise for its vibrant animations, strategic combat, and deep resource-gathering systems. At its heart, the game
Walmart's GeForce Week Sale Sees the First Ever Discounts on Nvidia RTX 50 Series Graphics Cards
Walmart has launched an exclusive "GeForce Week" sale, marking the first time ever that select GeForce RTX 50 series graphics cards are priced below MSRP. For months, these new Nvidia GPUs were sold at steep premiums due to high demand, limited stock
Konami Livestream: Metal Gear Solid Delta, Silent Hill f Details Revealed This Week
Play I'm particularly hopeful that Konami’s mention of "and more" will include No Code’s Silent Hill Townfall. It’s been years since we’ve received meaningful updates, and I’m eager to learn more. I’m also still waiting for news on future remakes or
Black Ops 7 Rating Hints at Premium Content Continuation
Call of Duty fans think they've found evidence suggesting that Call of Duty: Black Ops 7 will let players transfer their cosmetic skins from Black Ops 6.The ESRB rating has confirmed Black Ops 7 will be rated M for Mature 17+ and release on PC, PS5,
Latest Games

Color a Day
Board丨40.98MB


Streamer Rush
Simulation丨142.21MB
Golf Solitaire
Card丨17.96MB

The Better Deal
Casual丨262.60M

Cooking Express Cooking Games
Arcade丨107.18MB

Hắc Ảnh Vệ Thần - Gamota
Role Playing丨145.30M

Snow Cone Maker
Educational丨24.17MB


Top News
MORE +

01
01-07
BREAKING: Flight Simulator 2024 Login Woes Ground Players
Flight Simulator 2024 Launch Plagued by Technical Difficulties
The highly anticipated launch of Flight Simulator 2024 has been significantly hampered by widespread technical problems, leaving many players grounded before they could even take to the virtual skies. This article details the reported d
02
01-06
CDPR acknowledged weak gameplay in The Witcher 3
The Witcher 3, while critically acclaimed, wasn't without its flaws. Many fans felt the combat system fell short.
In a recent interview, Witcher 4's game director, Sebastian Kalemba, acknowledged weaknesses in the previous game's gameplay, specifically highlighting the need for significant improvem
03
11-17
Hogwarts Legacy 2 is "One of the Biggest Priorities" for WB Games
Following the successful launch of Quidditch Champions this week, Warner Bros. Discovery has confirmed its plans for a sequel to last year's Harry Potter-based action RPG hit Hogwarts Legacy—2023's best-selling game.Hogwarts Legacy Sequel Plans Confirmed by Warner Bros. DiscoveryExpected in
04
11-16
Airplane Chefs Brings The Ultimate Snack, Pringles, On Board!
Buckle up for some snacks as Nordcurrent has just dropped an exciting event for their cooking game. It’s the most unexpected collab of Airplane Chefs and Pringles. If you’ve been enjoying your virtual life as a flight attendant, things are about to get a lot tastier.The game developer behind p
05
11-16
Play Together to collaborate with Sanrio and introduce new My Melody and Kuromi content
Play Together is bringing back its Sanrio collab with the appearance of My Melody and KuromiYou can collect coins by completing their themed missions that can then be used to draw exclusive itemsAs a bonus there's also new summer-themed content and events, including a major bug huntPlay Together, th
Topics
More +