Dragon Quest III Citadel Guide for Google
Author : Harper
Feb 12,2025
This guide provides a comprehensive walkthrough of Zoma's Citadel in the Dragon Quest 3 Remake, including strategies for defeating each boss and locating all treasure. Prepare for the ultimate challenge!
Quick Links
- Reaching Zoma's Citadel
- 1F Walkthrough
- B1 Walkthrough
- B2 Walkthrough (including Directional Tiles)
- B3 Walkthrough
- B4 Walkthrough
- Defeating Zoma
- Citadel Monsters
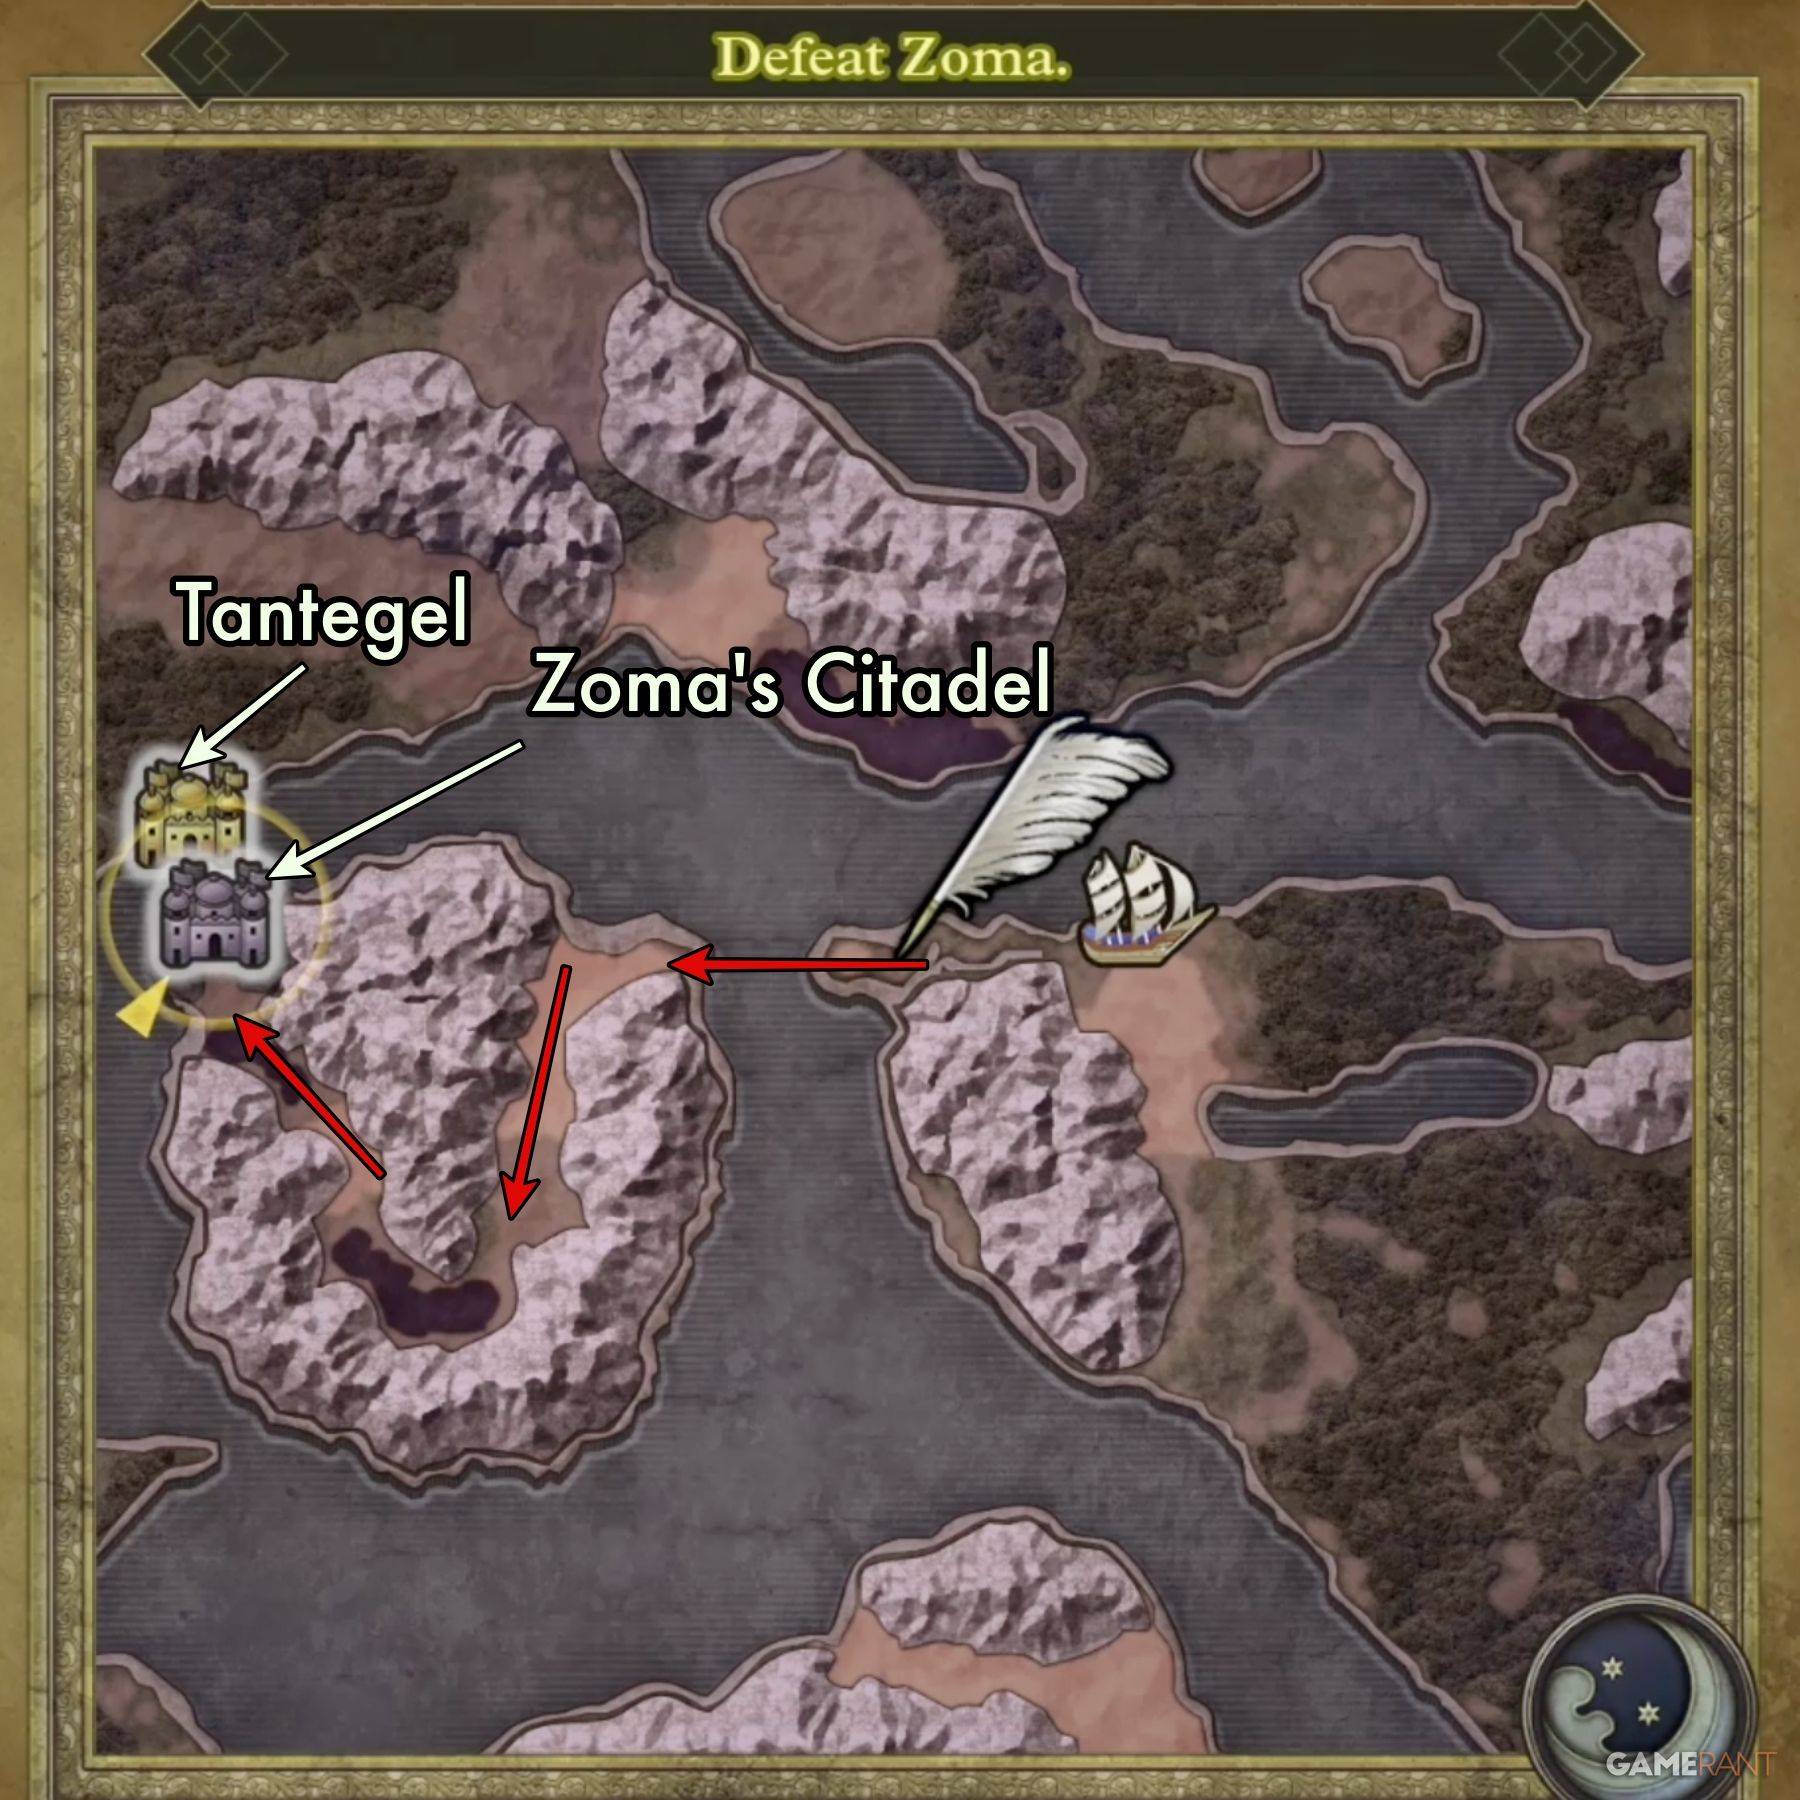
After conquering Archfiend Baramos, you'll enter Alefgard's perpetually dark realm. Zoma's Citadel awaits – the final, formidable test. To reach it, you must assemble the Rainbow Drop:
Reaching Zoma's Citadel
- Sunstone: Found in Tantegel Castle.
- Staff of Rain: Located in the Shrine of the Spirit.
- Sacred Amulet: Received from Rubiss after rescuing her atop the Tower of Rubiss (requires the Faerie Flute).
Combine these items to create the Rainbow Drop, forming the bridge to Zoma's Citadel.
1F Walkthrough
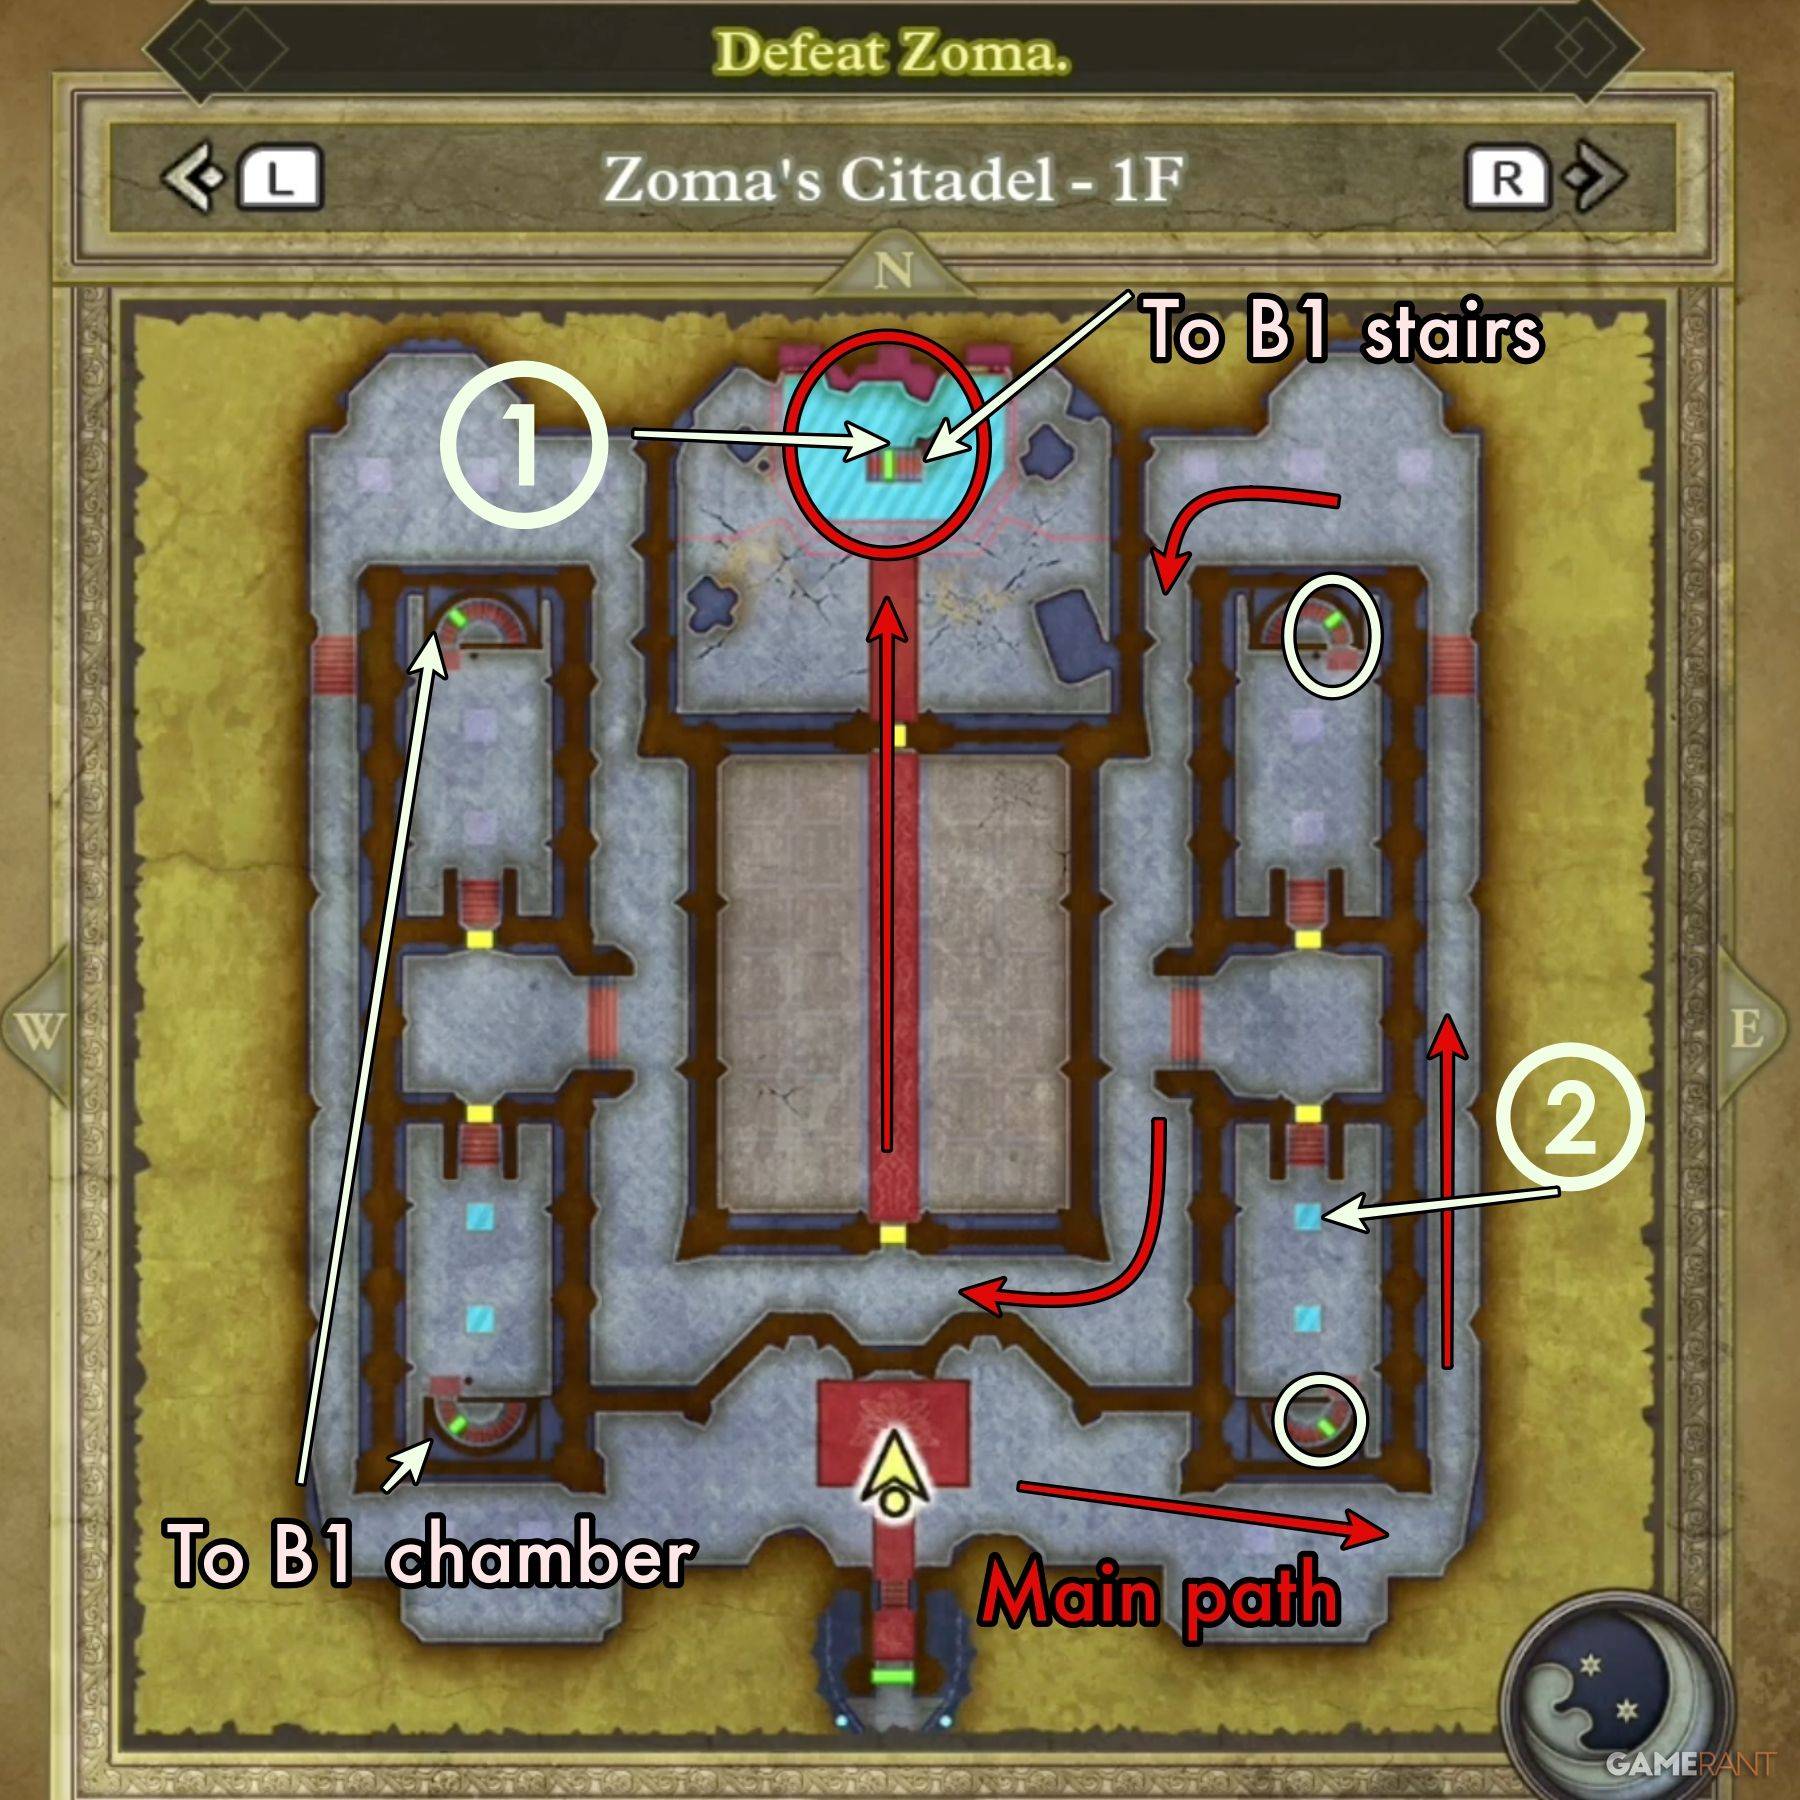
Navigate the first floor to the throne in the north. Activating it reveals a hidden passage. Explore side chambers for treasure:
- Treasure 1 (Buried): Mini Medal (behind the throne).
- Treasure 2 (Buried): Seed of Magic (near the electrified panel).
Prepare for a challenging encounter with Living Statues in the central chamber.
B1 Walkthrough
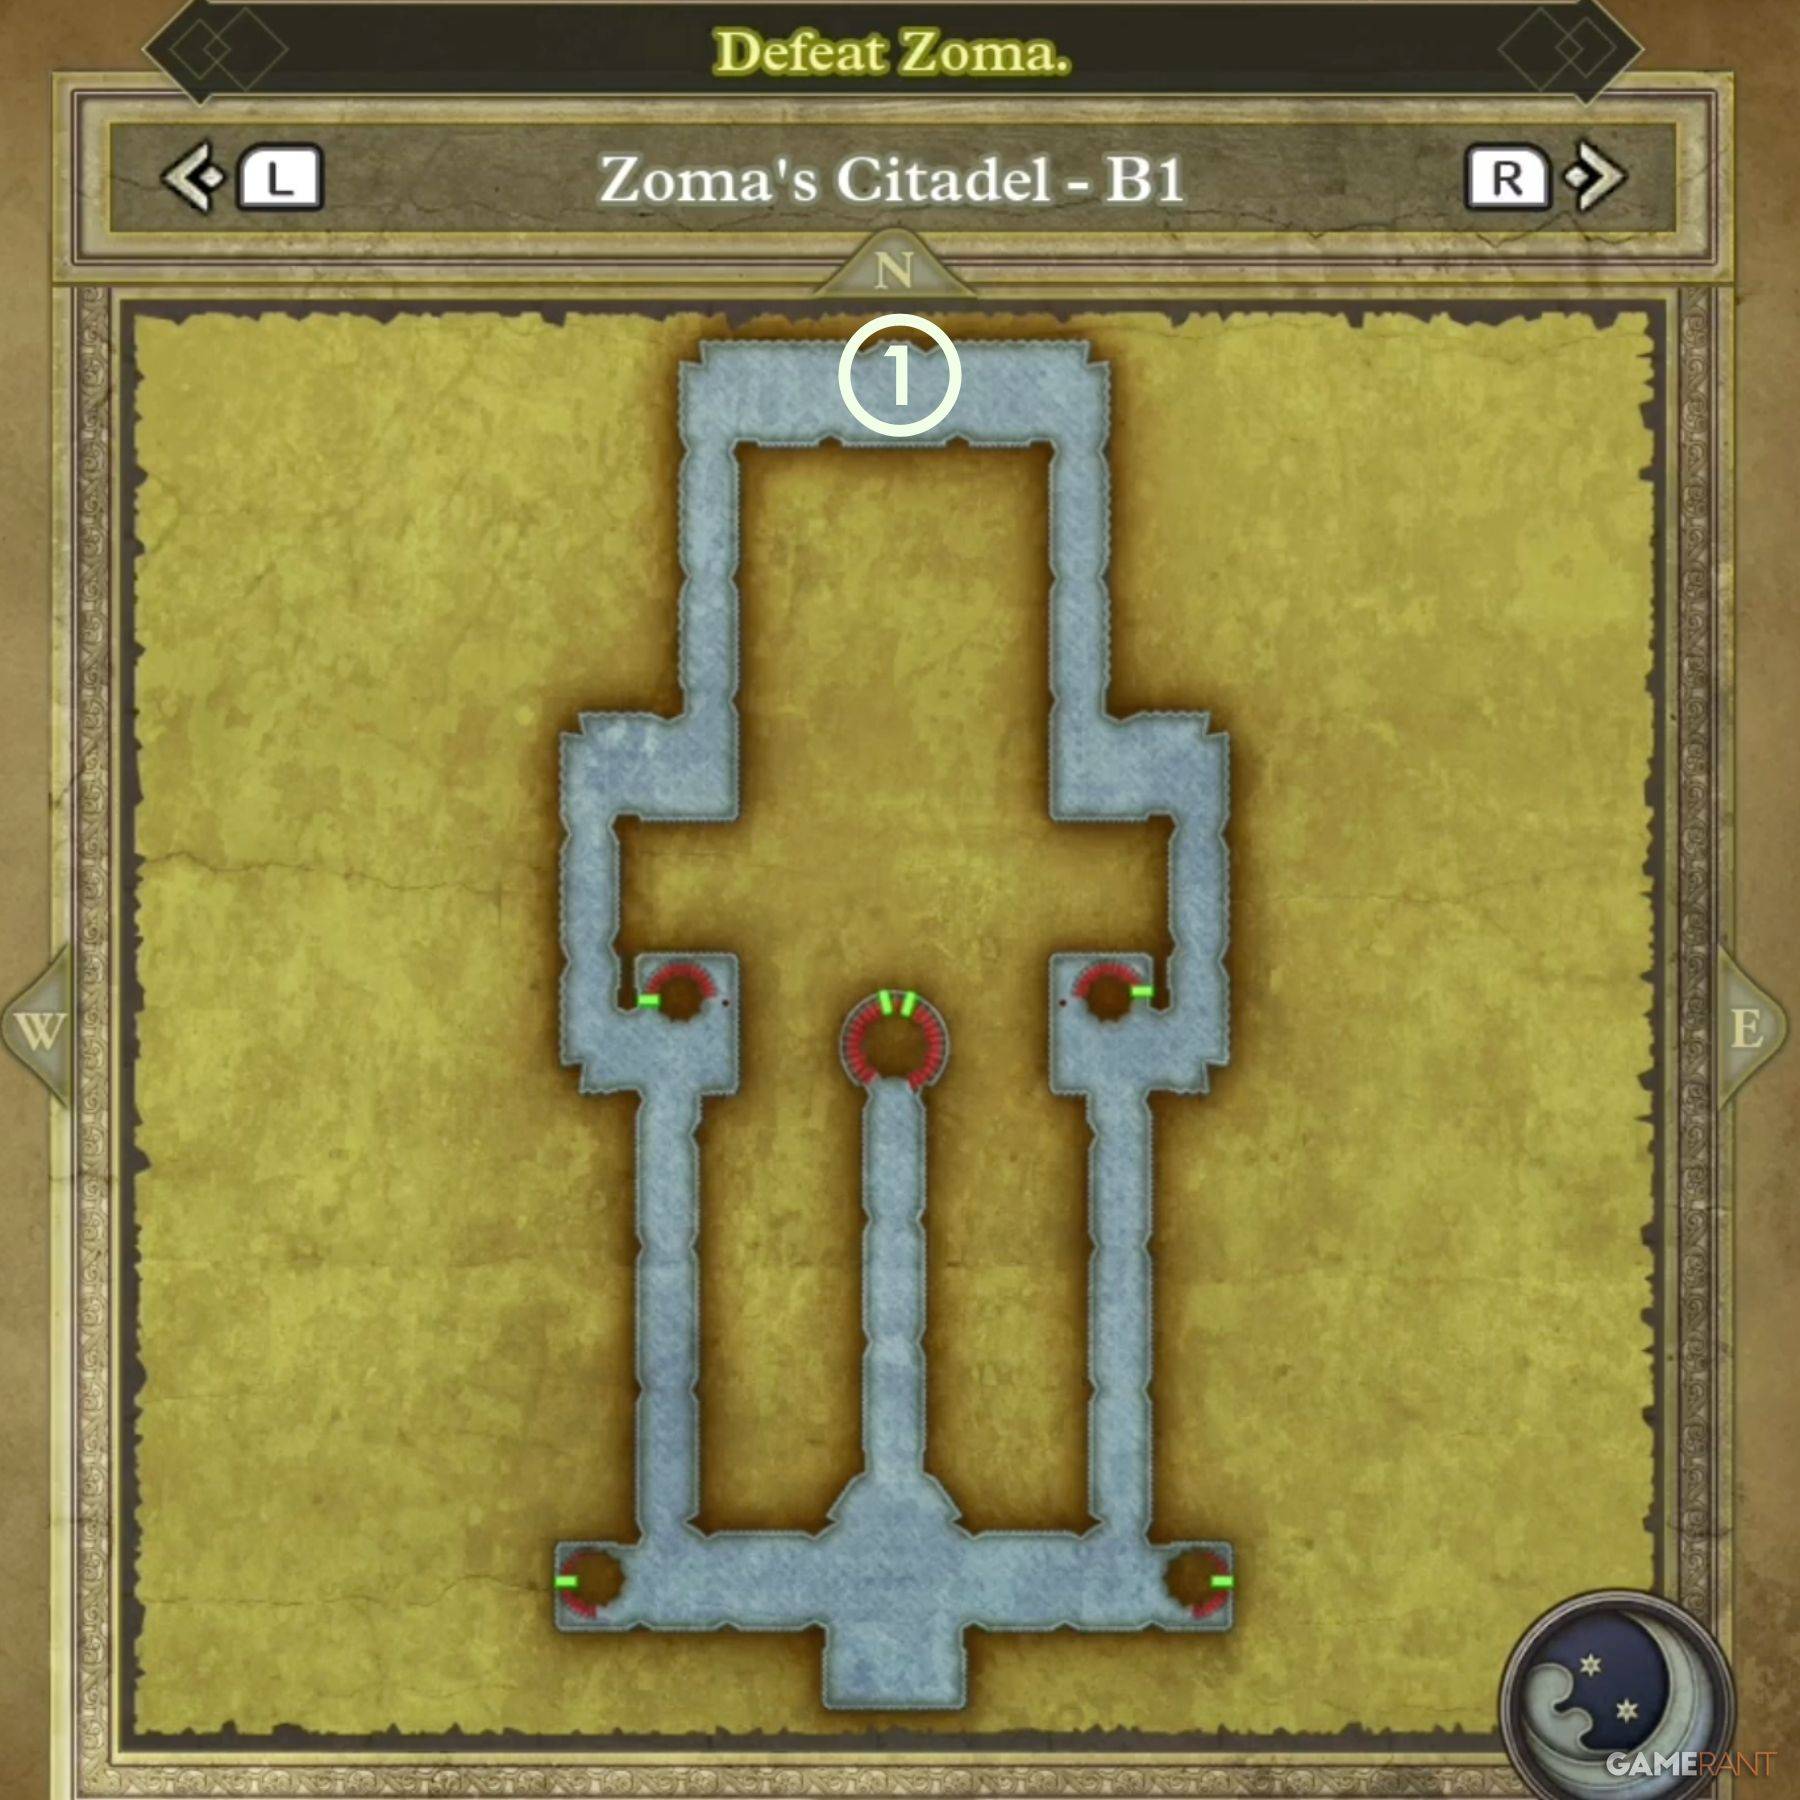
B1 is straightforward, leading to B2 via stairs. However, taking alternate stairs from 1F leads to an isolated chamber containing:
- Treasure 1 (Chest): Hapless Helm
B2 Walkthrough
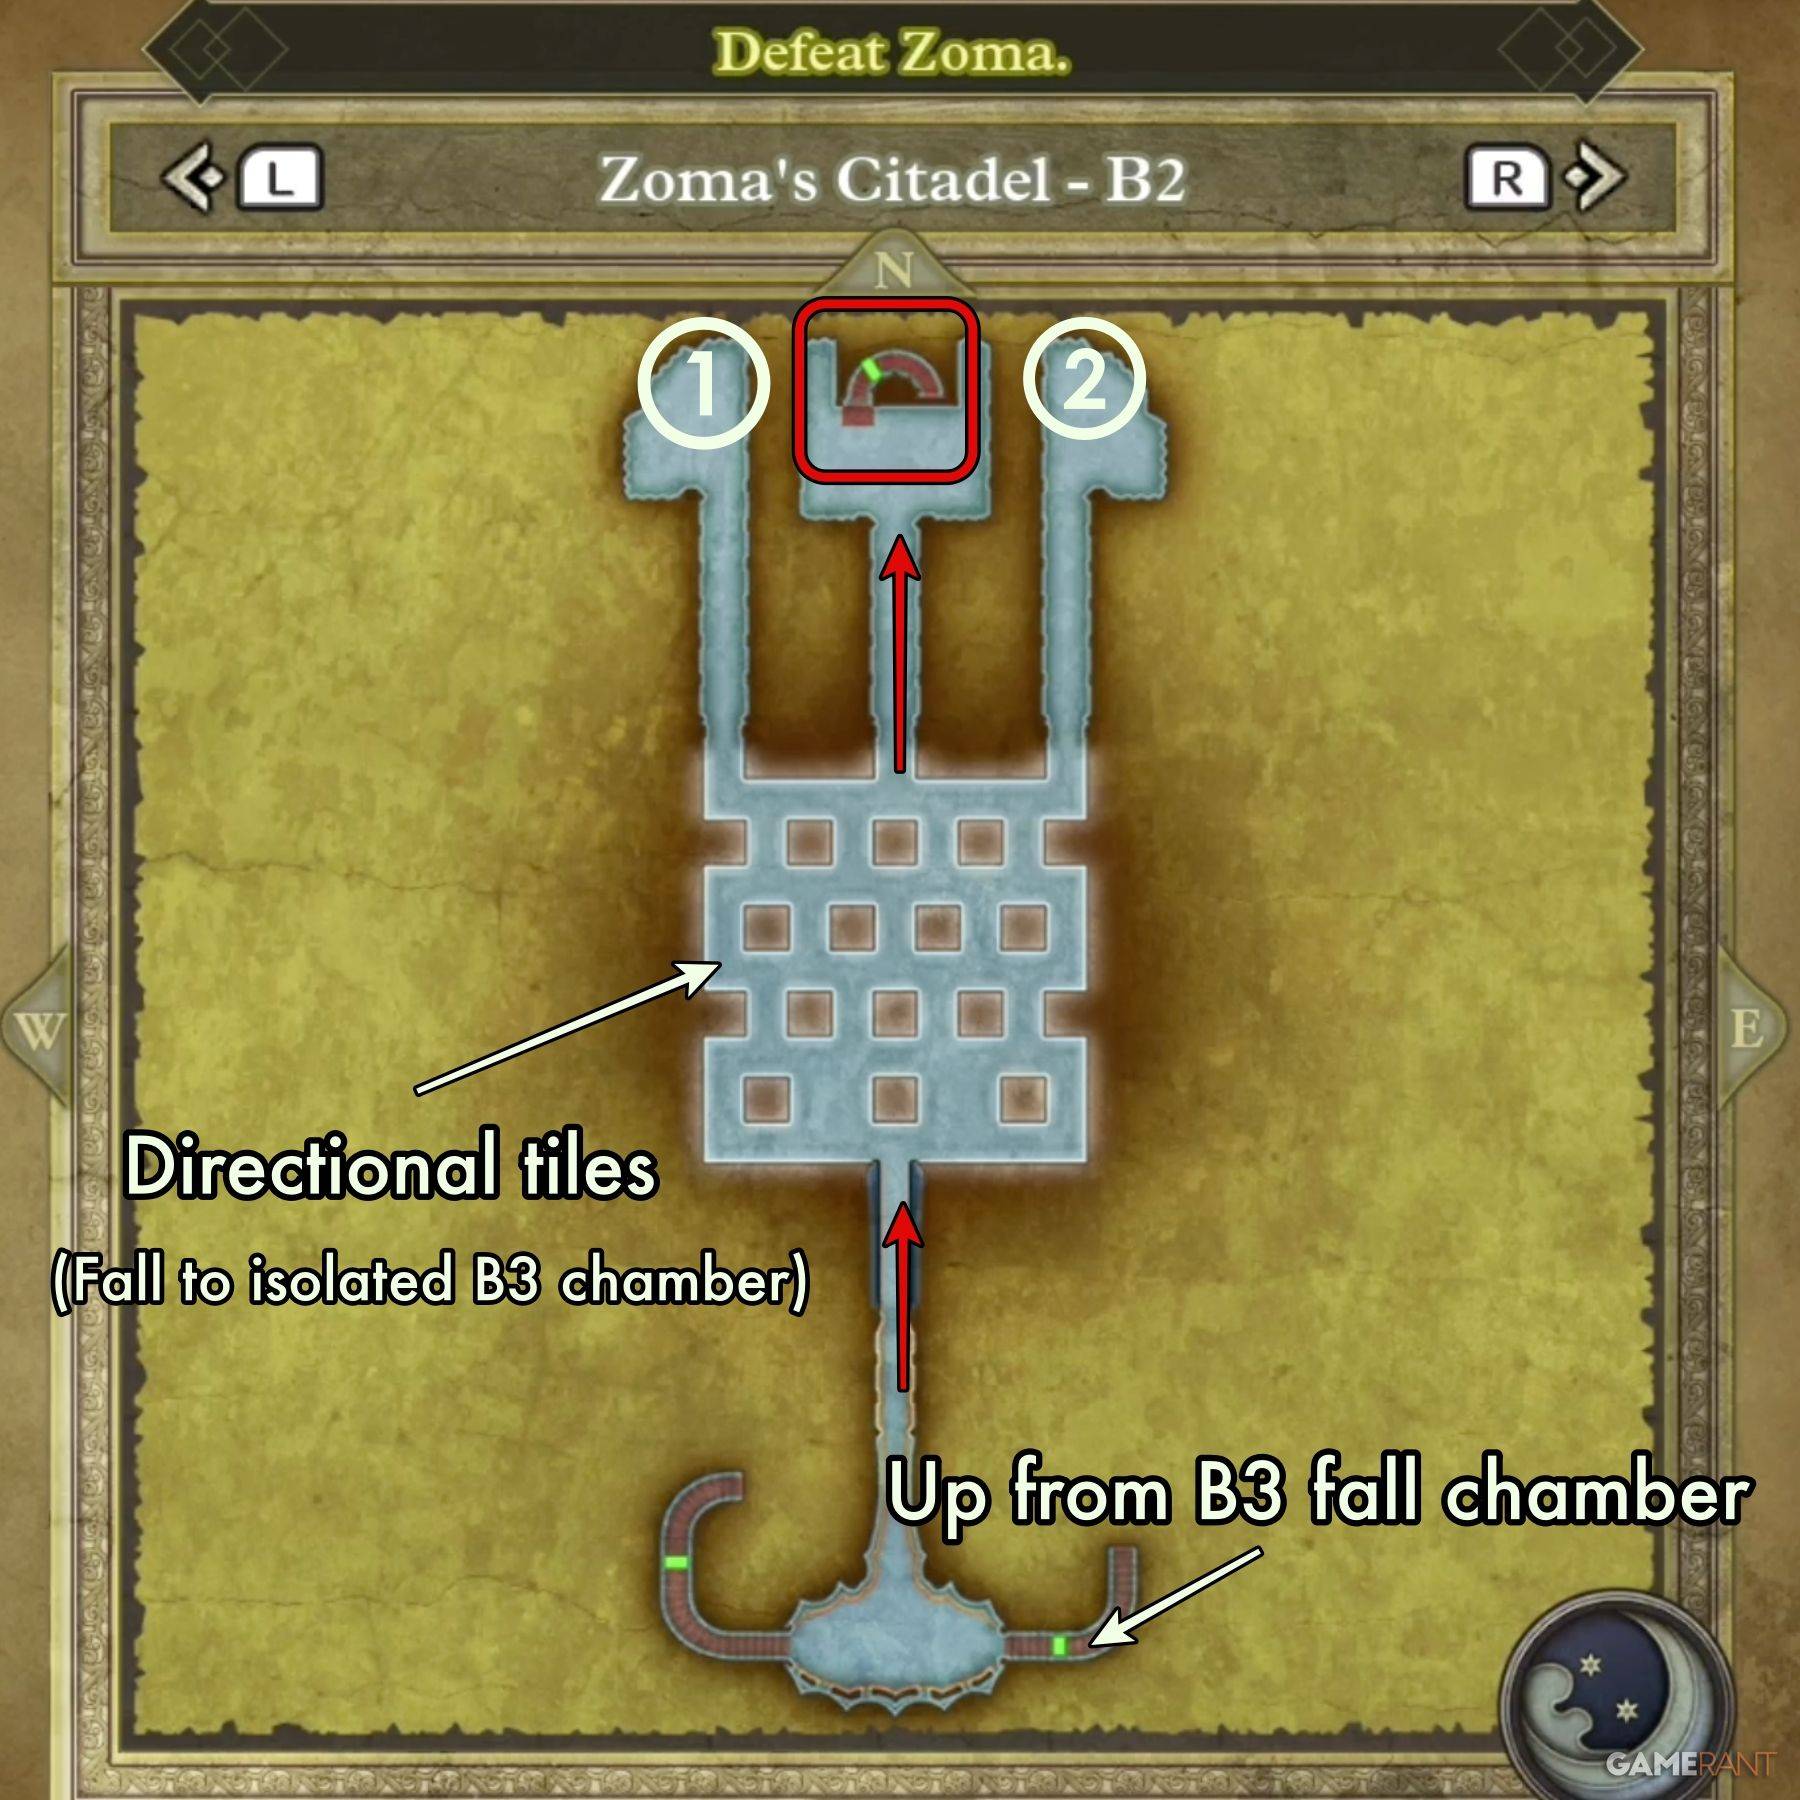
This floor features directional tiles. Mastering them is crucial. The Tower of Rubiss (3rd floor, NW corner) offers practice tiles. The key is understanding the tile's color-coded directional indicators. Practice makes perfect!
- Treasure 1 (Chest): Scourge Whip
- Treasure 2 (Chest): 4,989 Gold Coins
B3 Walkthrough
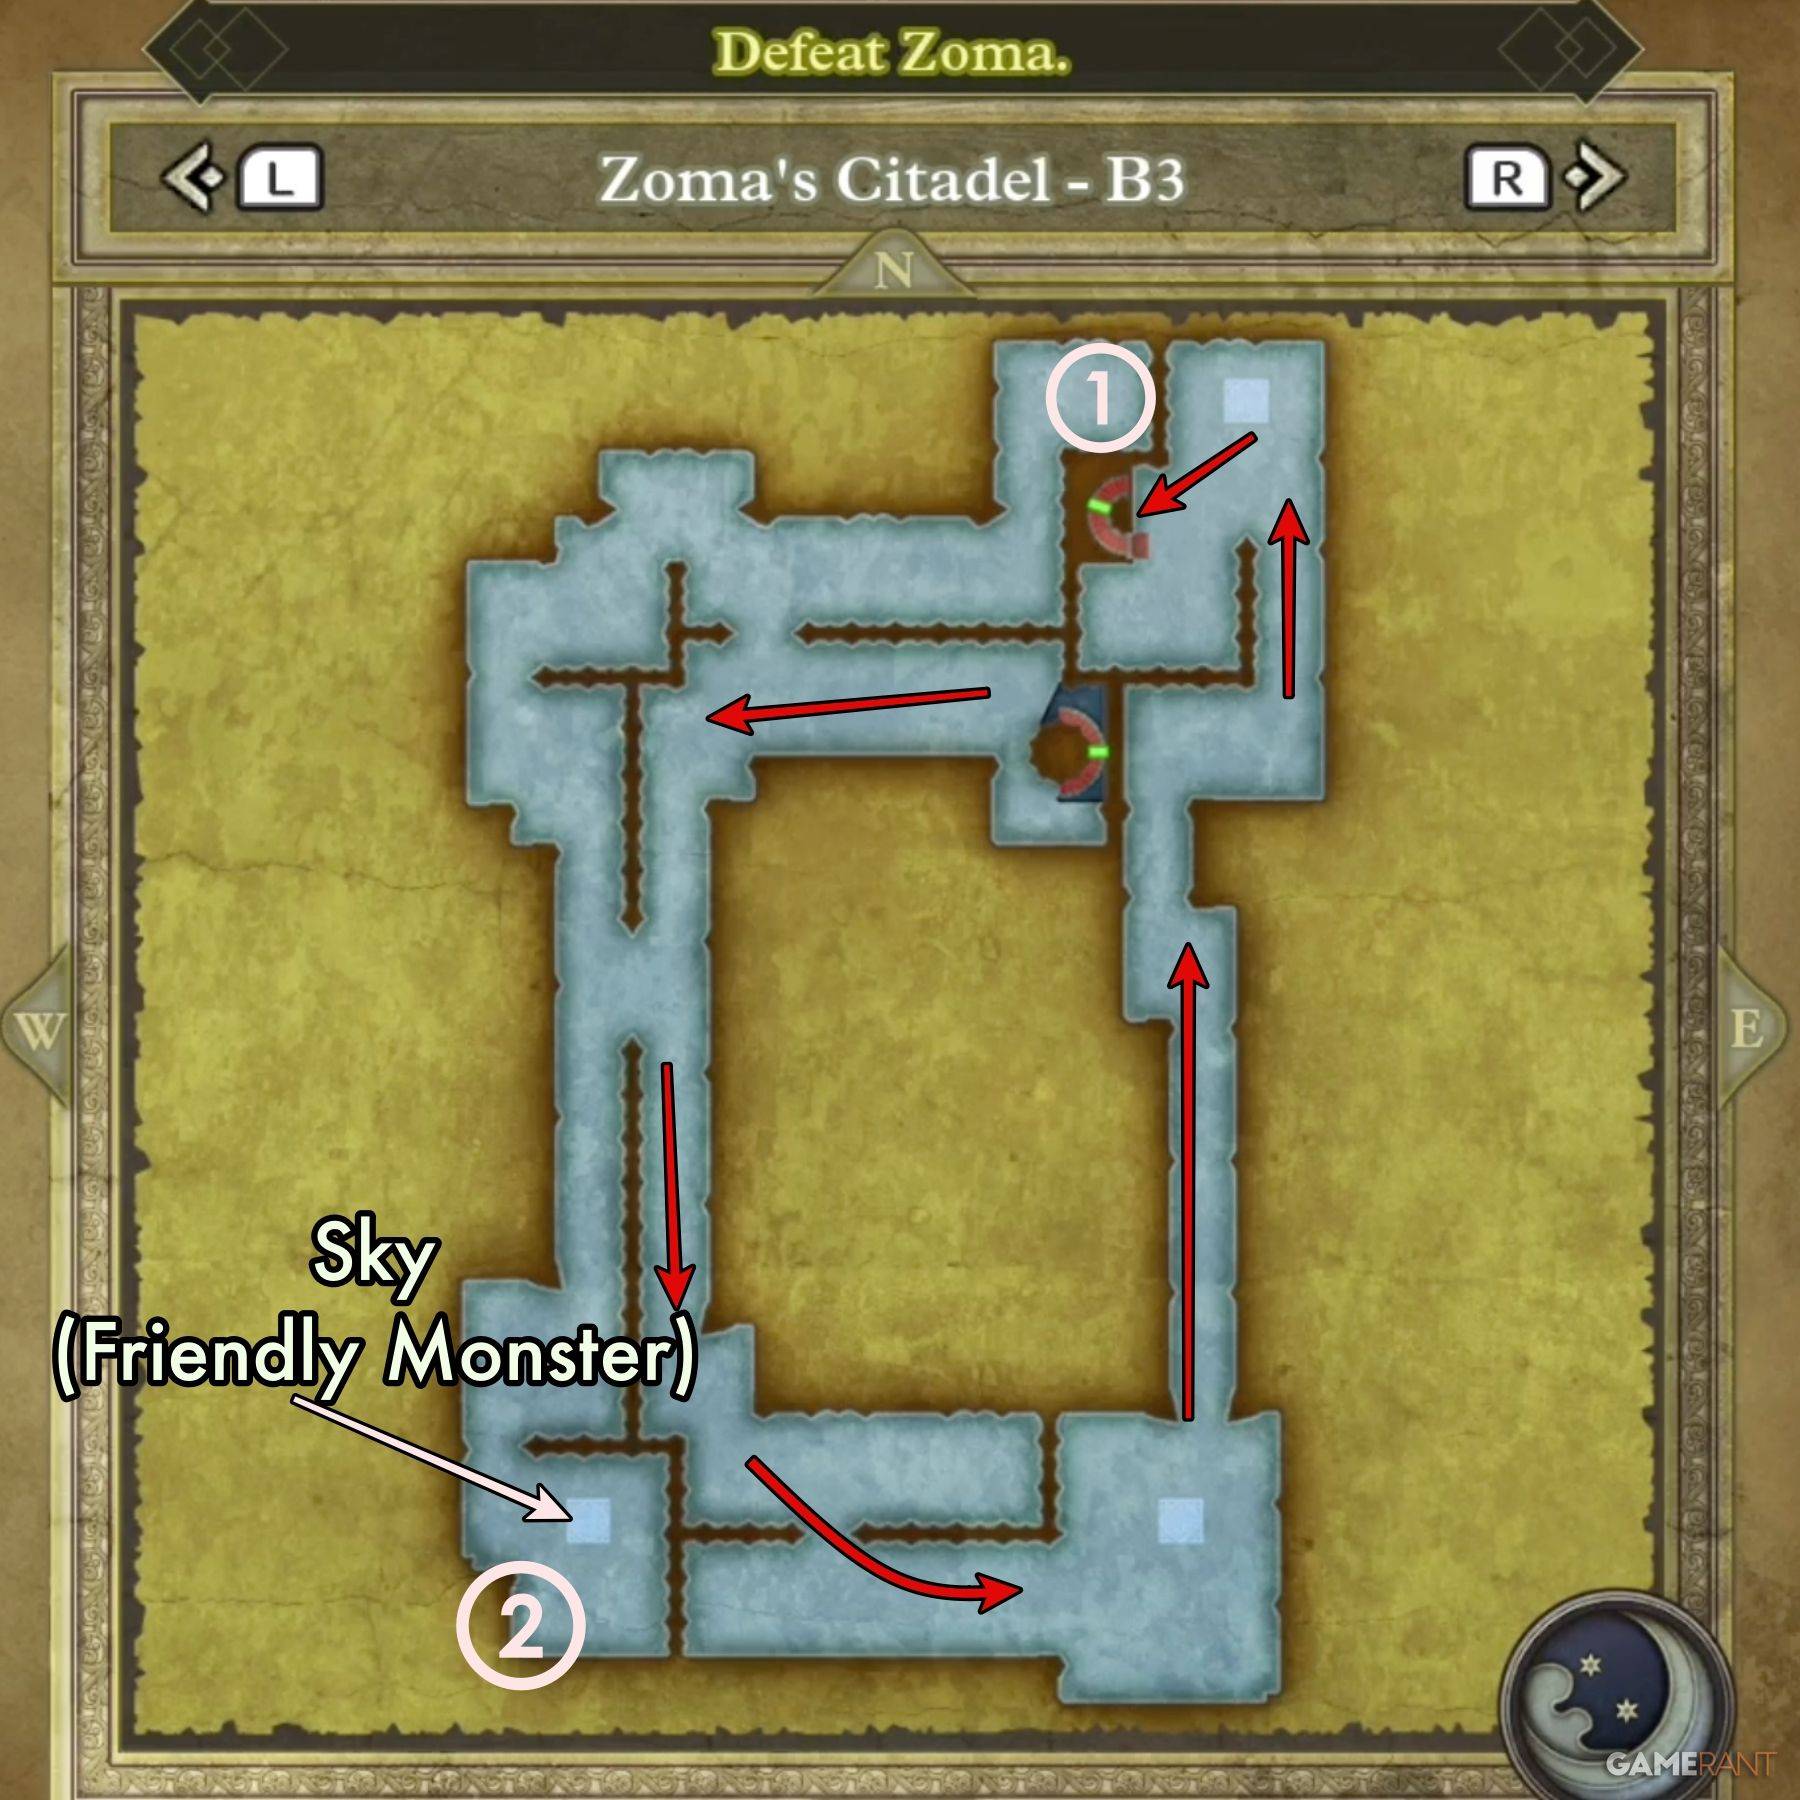
The main path circles the chamber. A detour to the southwest reveals Sky, a friendly Soaring Scourger. Falling through holes on B2 leads to an isolated chamber with another friendly monster, a Liquid Metal Slime, and a chest containing:
- Treasure 1 (Chest): Bastard Sword
The main chamber holds:
- Treasure 1 (Chest): Dragon Dojo Duds
- Treasure 2 (Chest): Double-Edged Sword
B4 Walkthrough
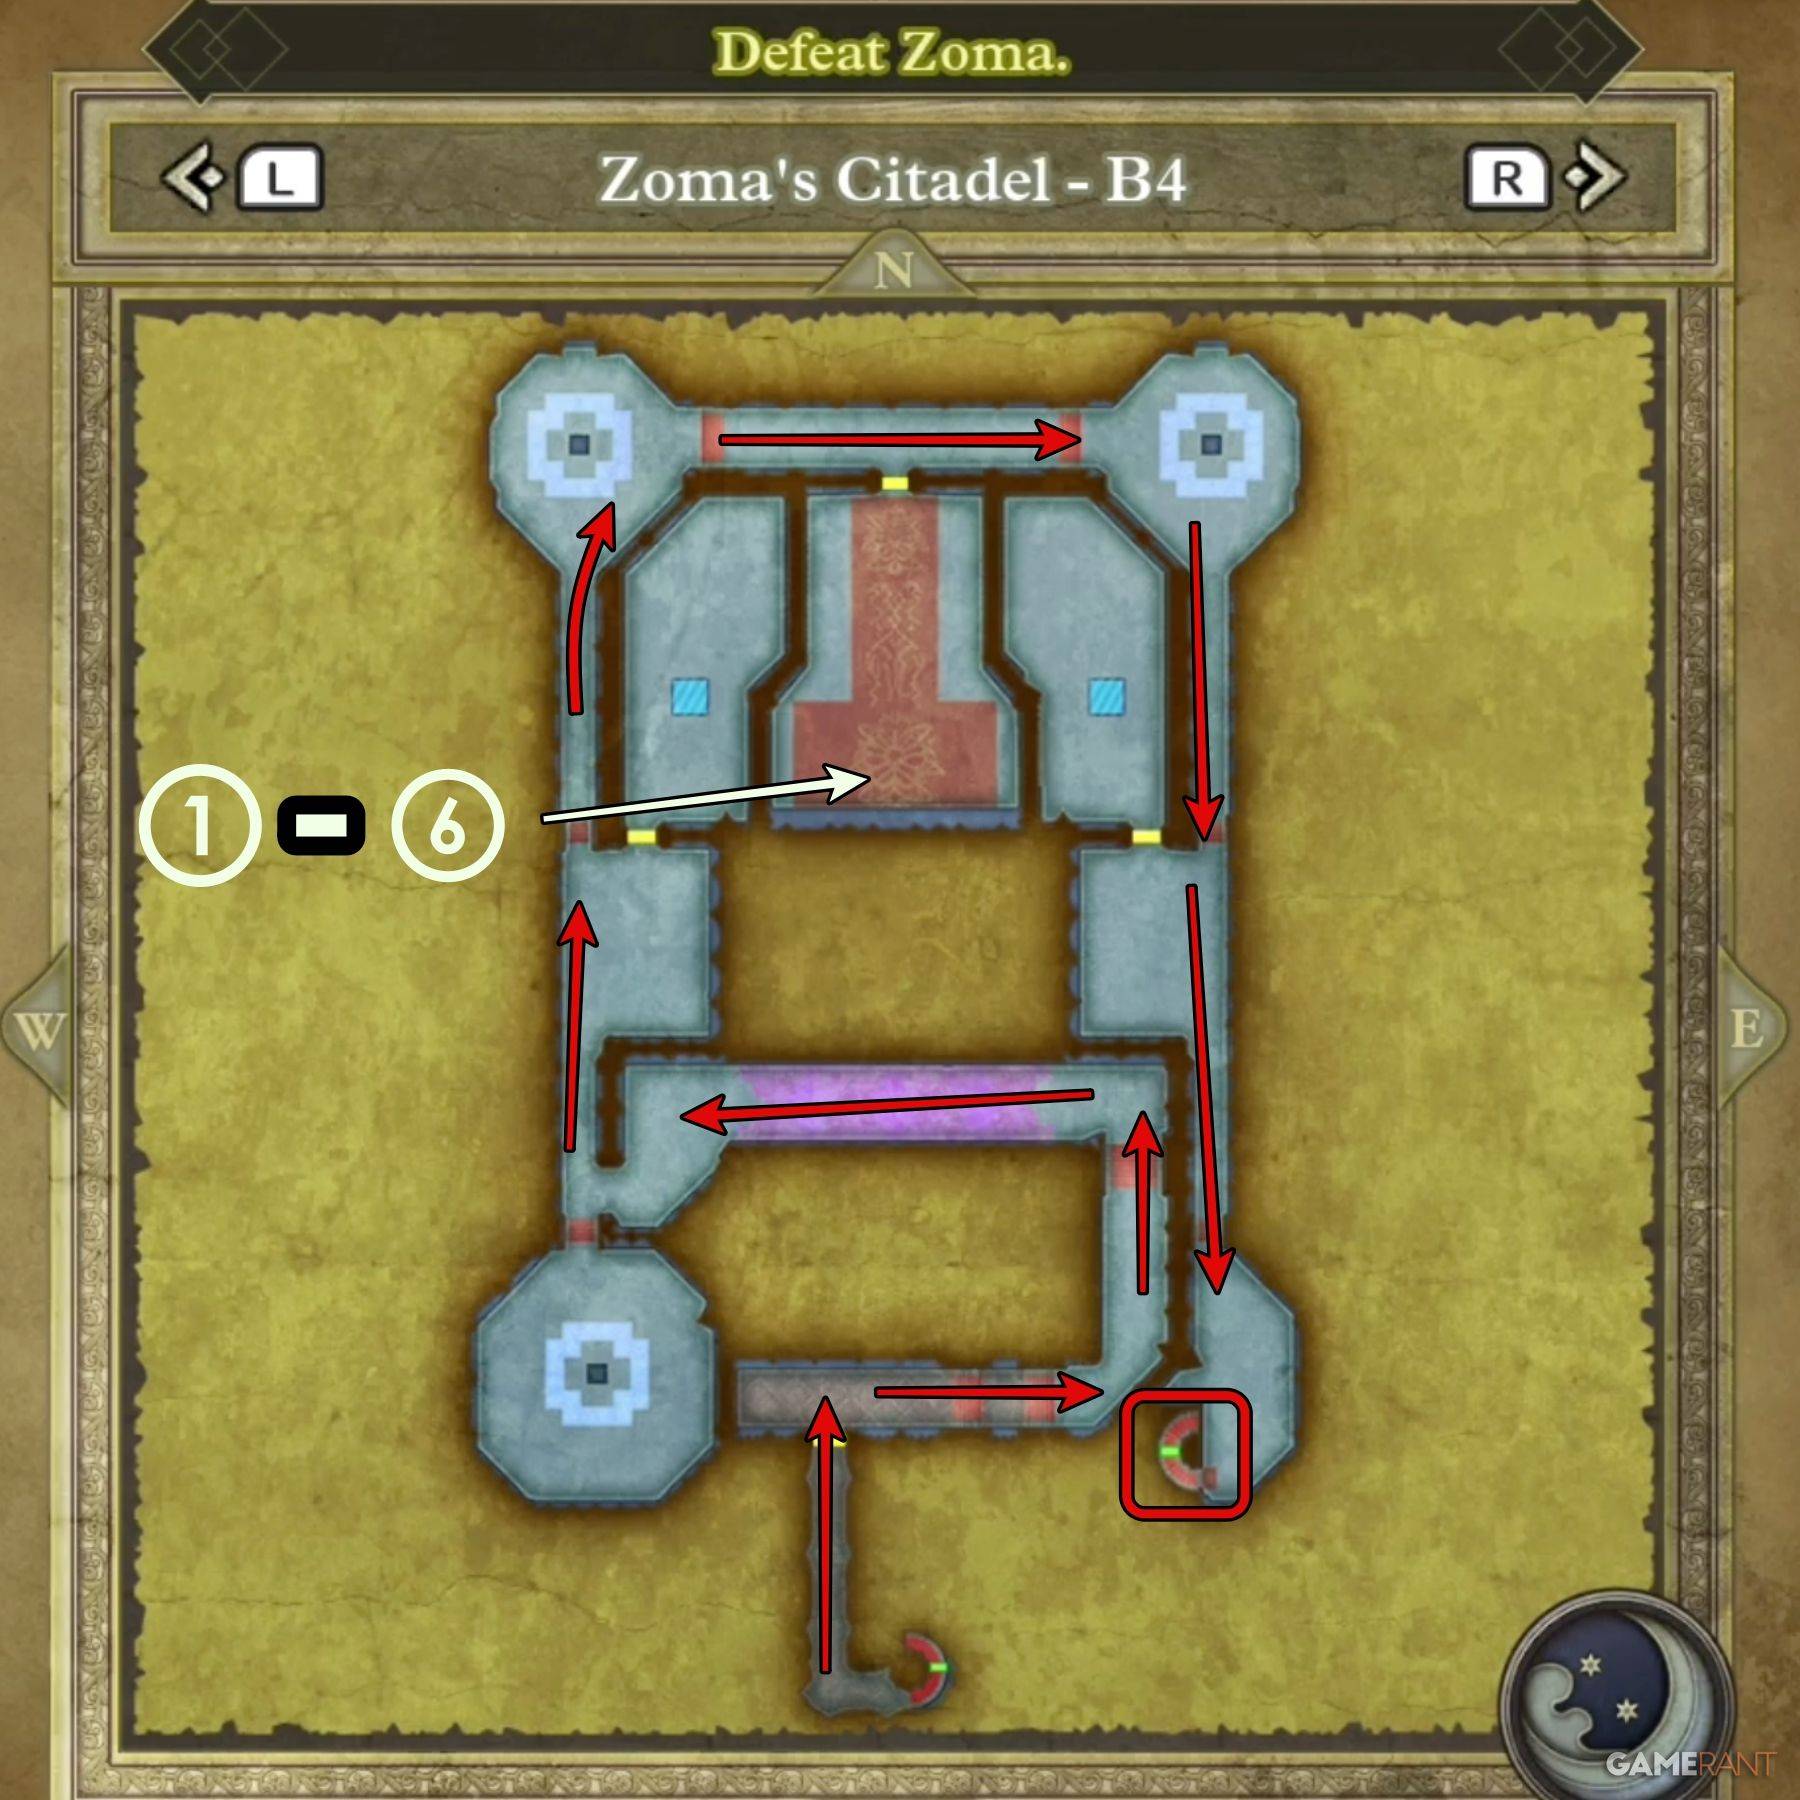
The final floor before Zoma. Follow the path, starting from the center-south, and don't miss the important cutscene upon entry. A single chamber contains six chests:
- Treasure 1 (Chest): Shimmering Dress
- Treasure 2 (Chest): Prayer Ring
- Treasure 3 (Chest): Sage's Stone
- Treasure 4 (Chest): Yggdrasil Leaf
- Treasure 5 (Chest): Diamond
- Treasure 6 (Chest): Mini Medal
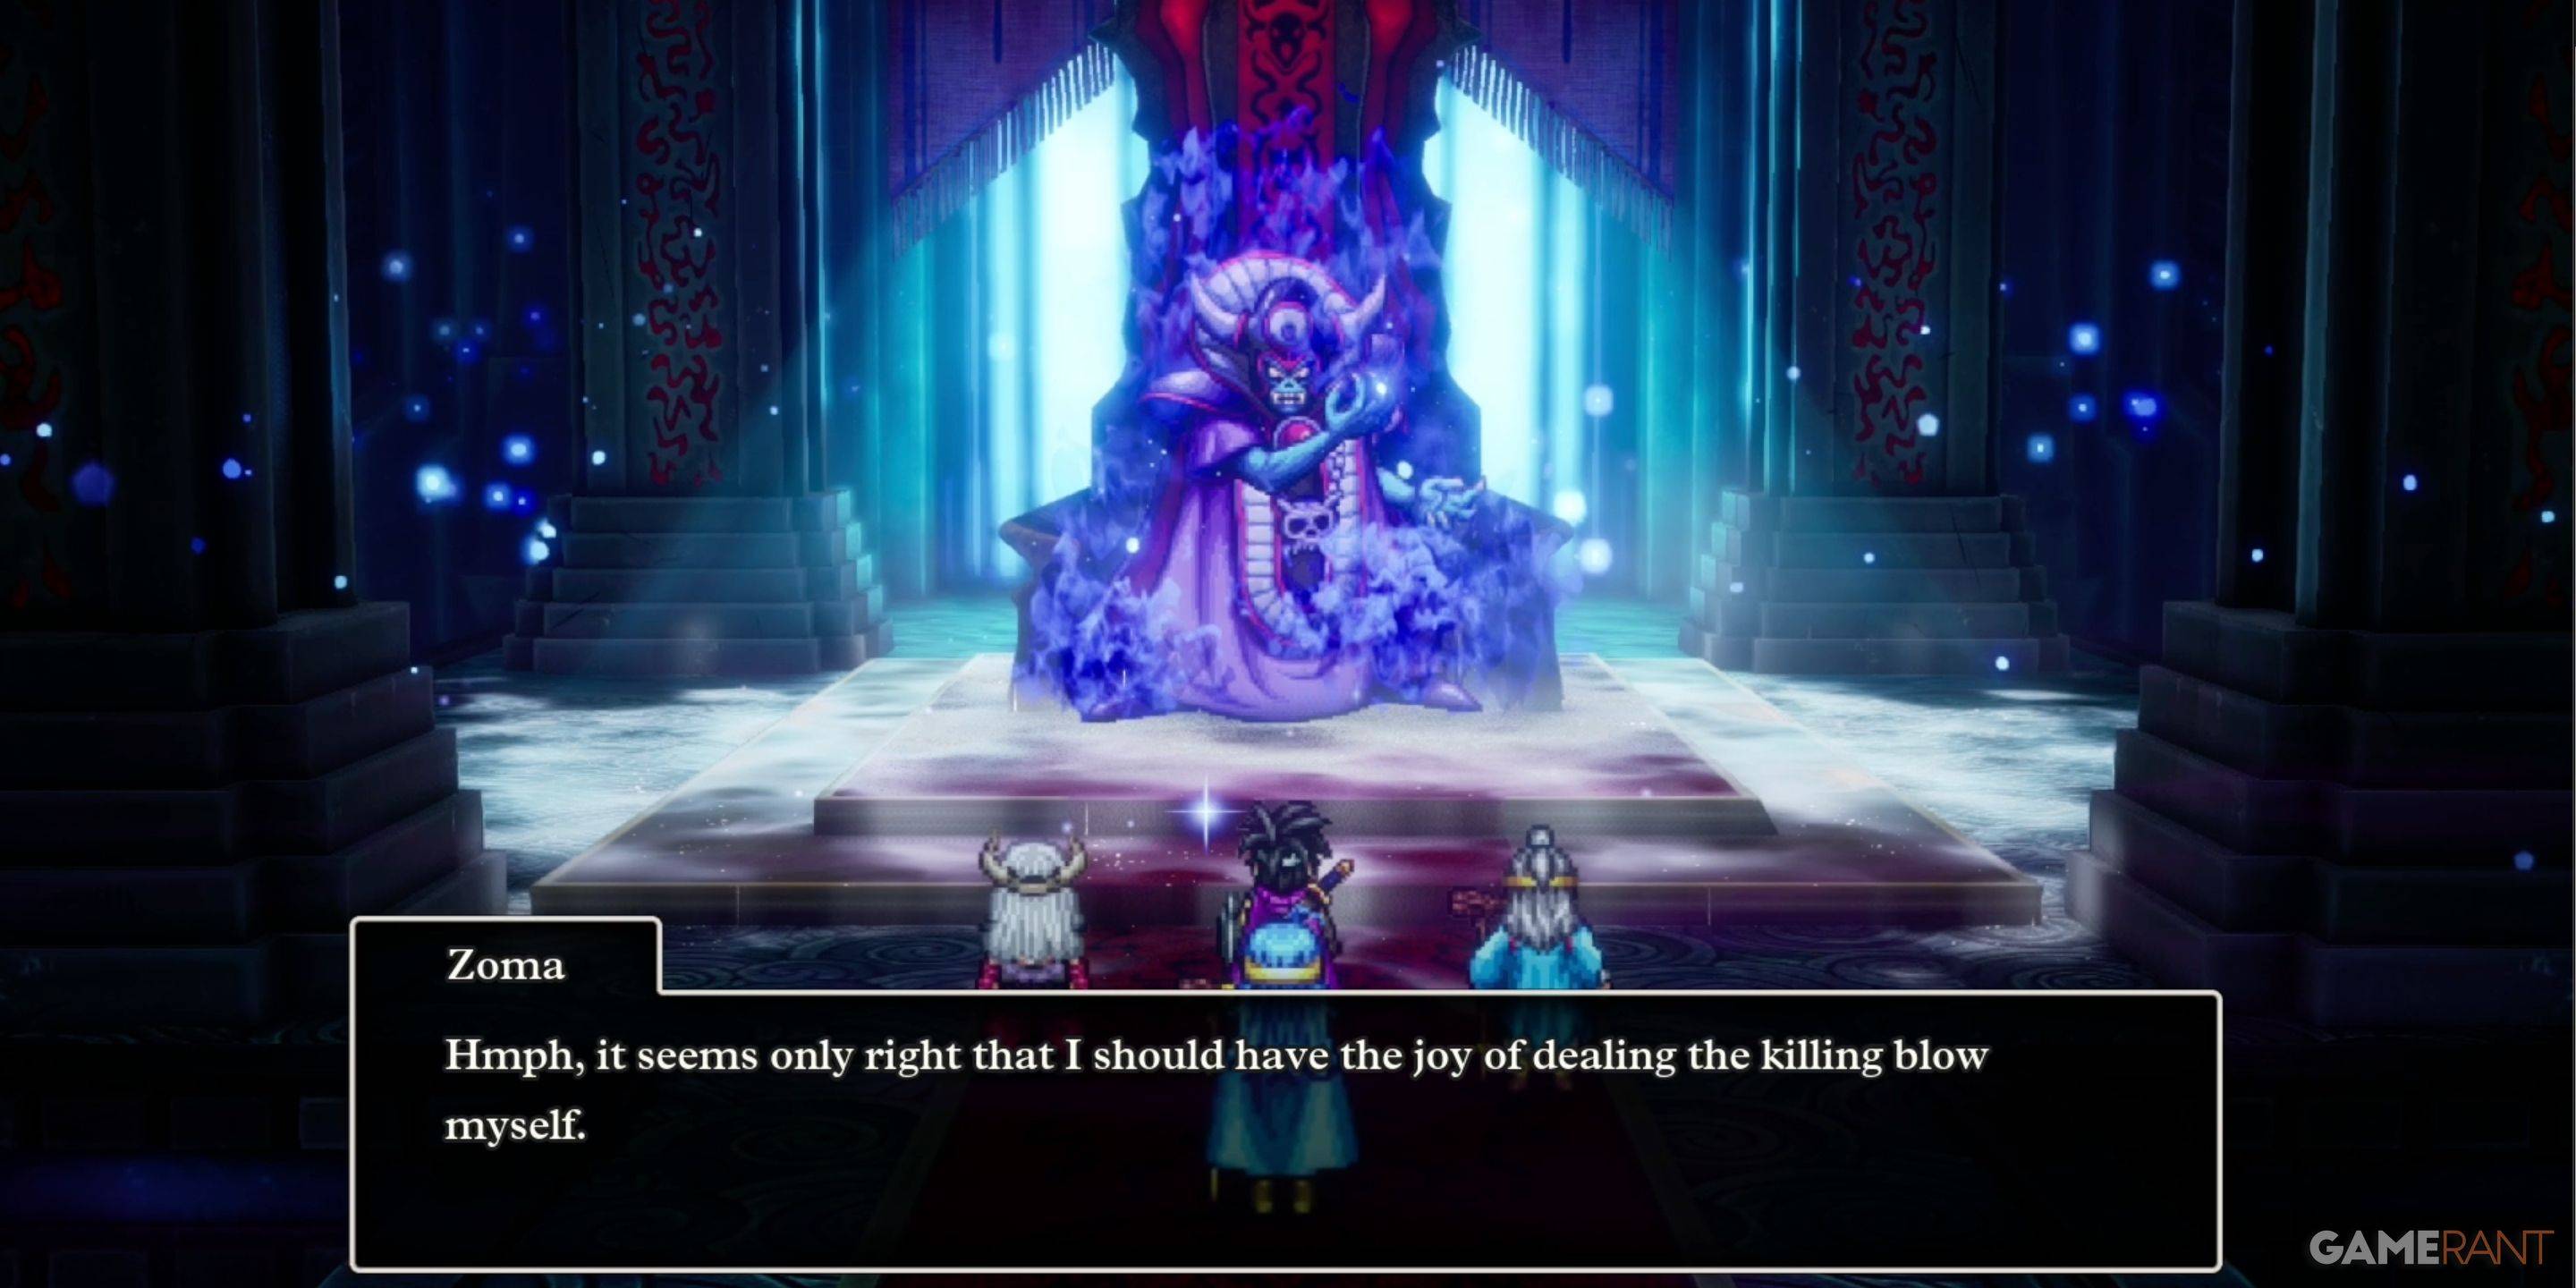
Defeating Zoma
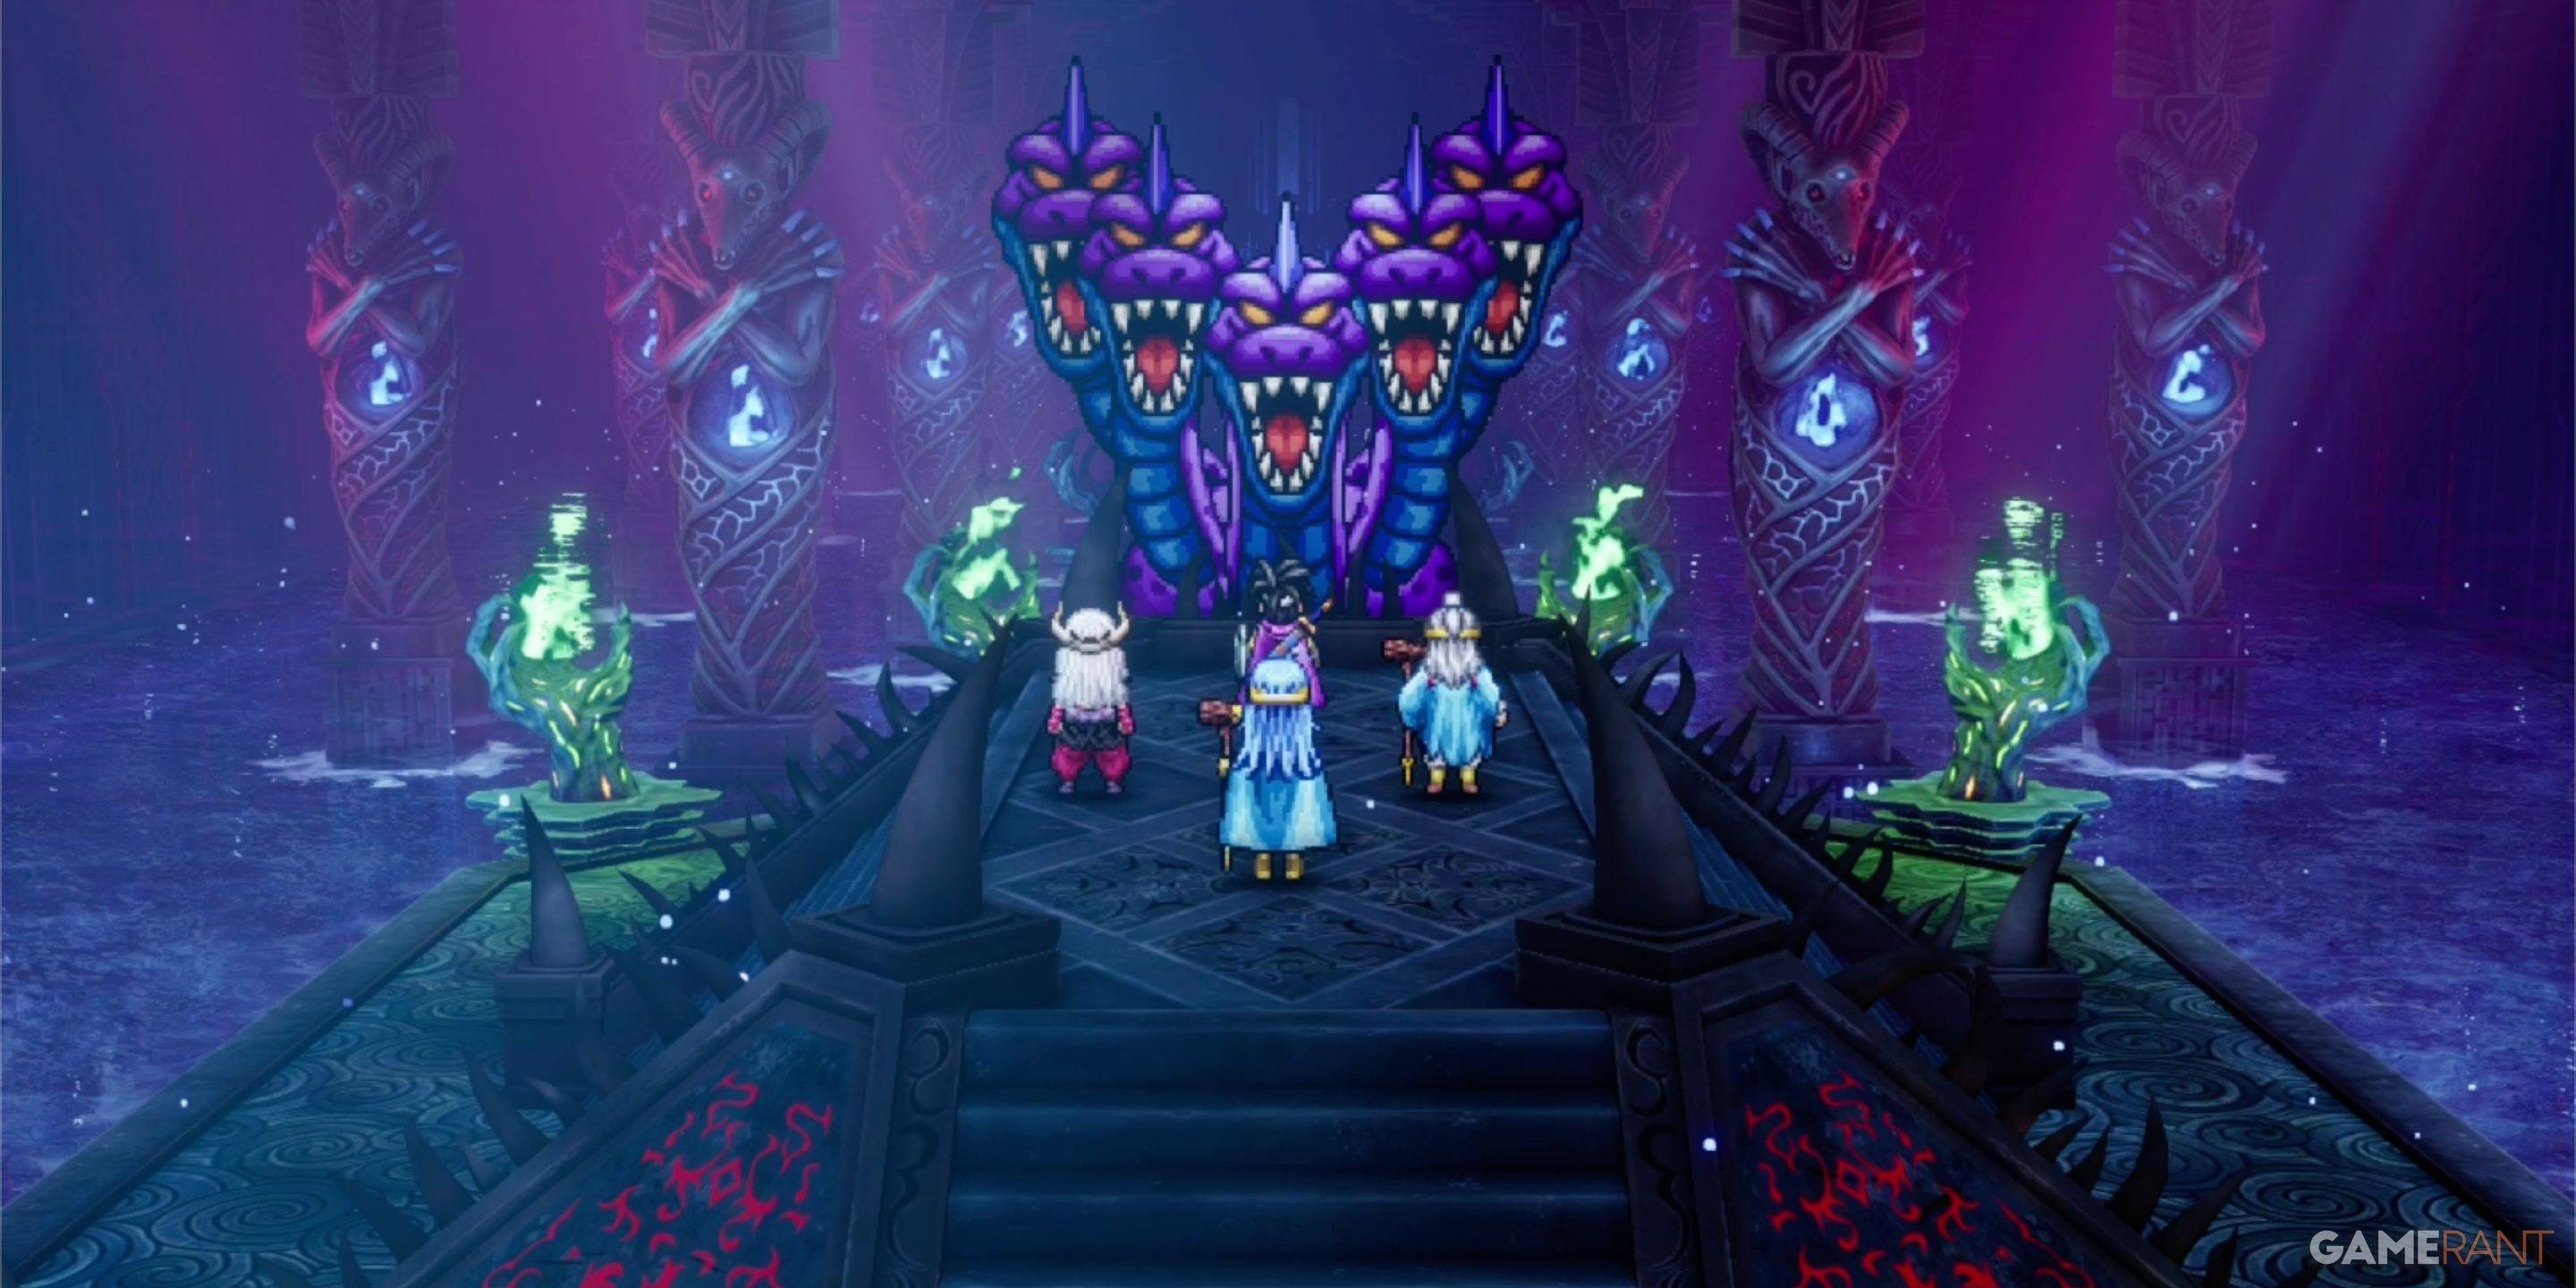
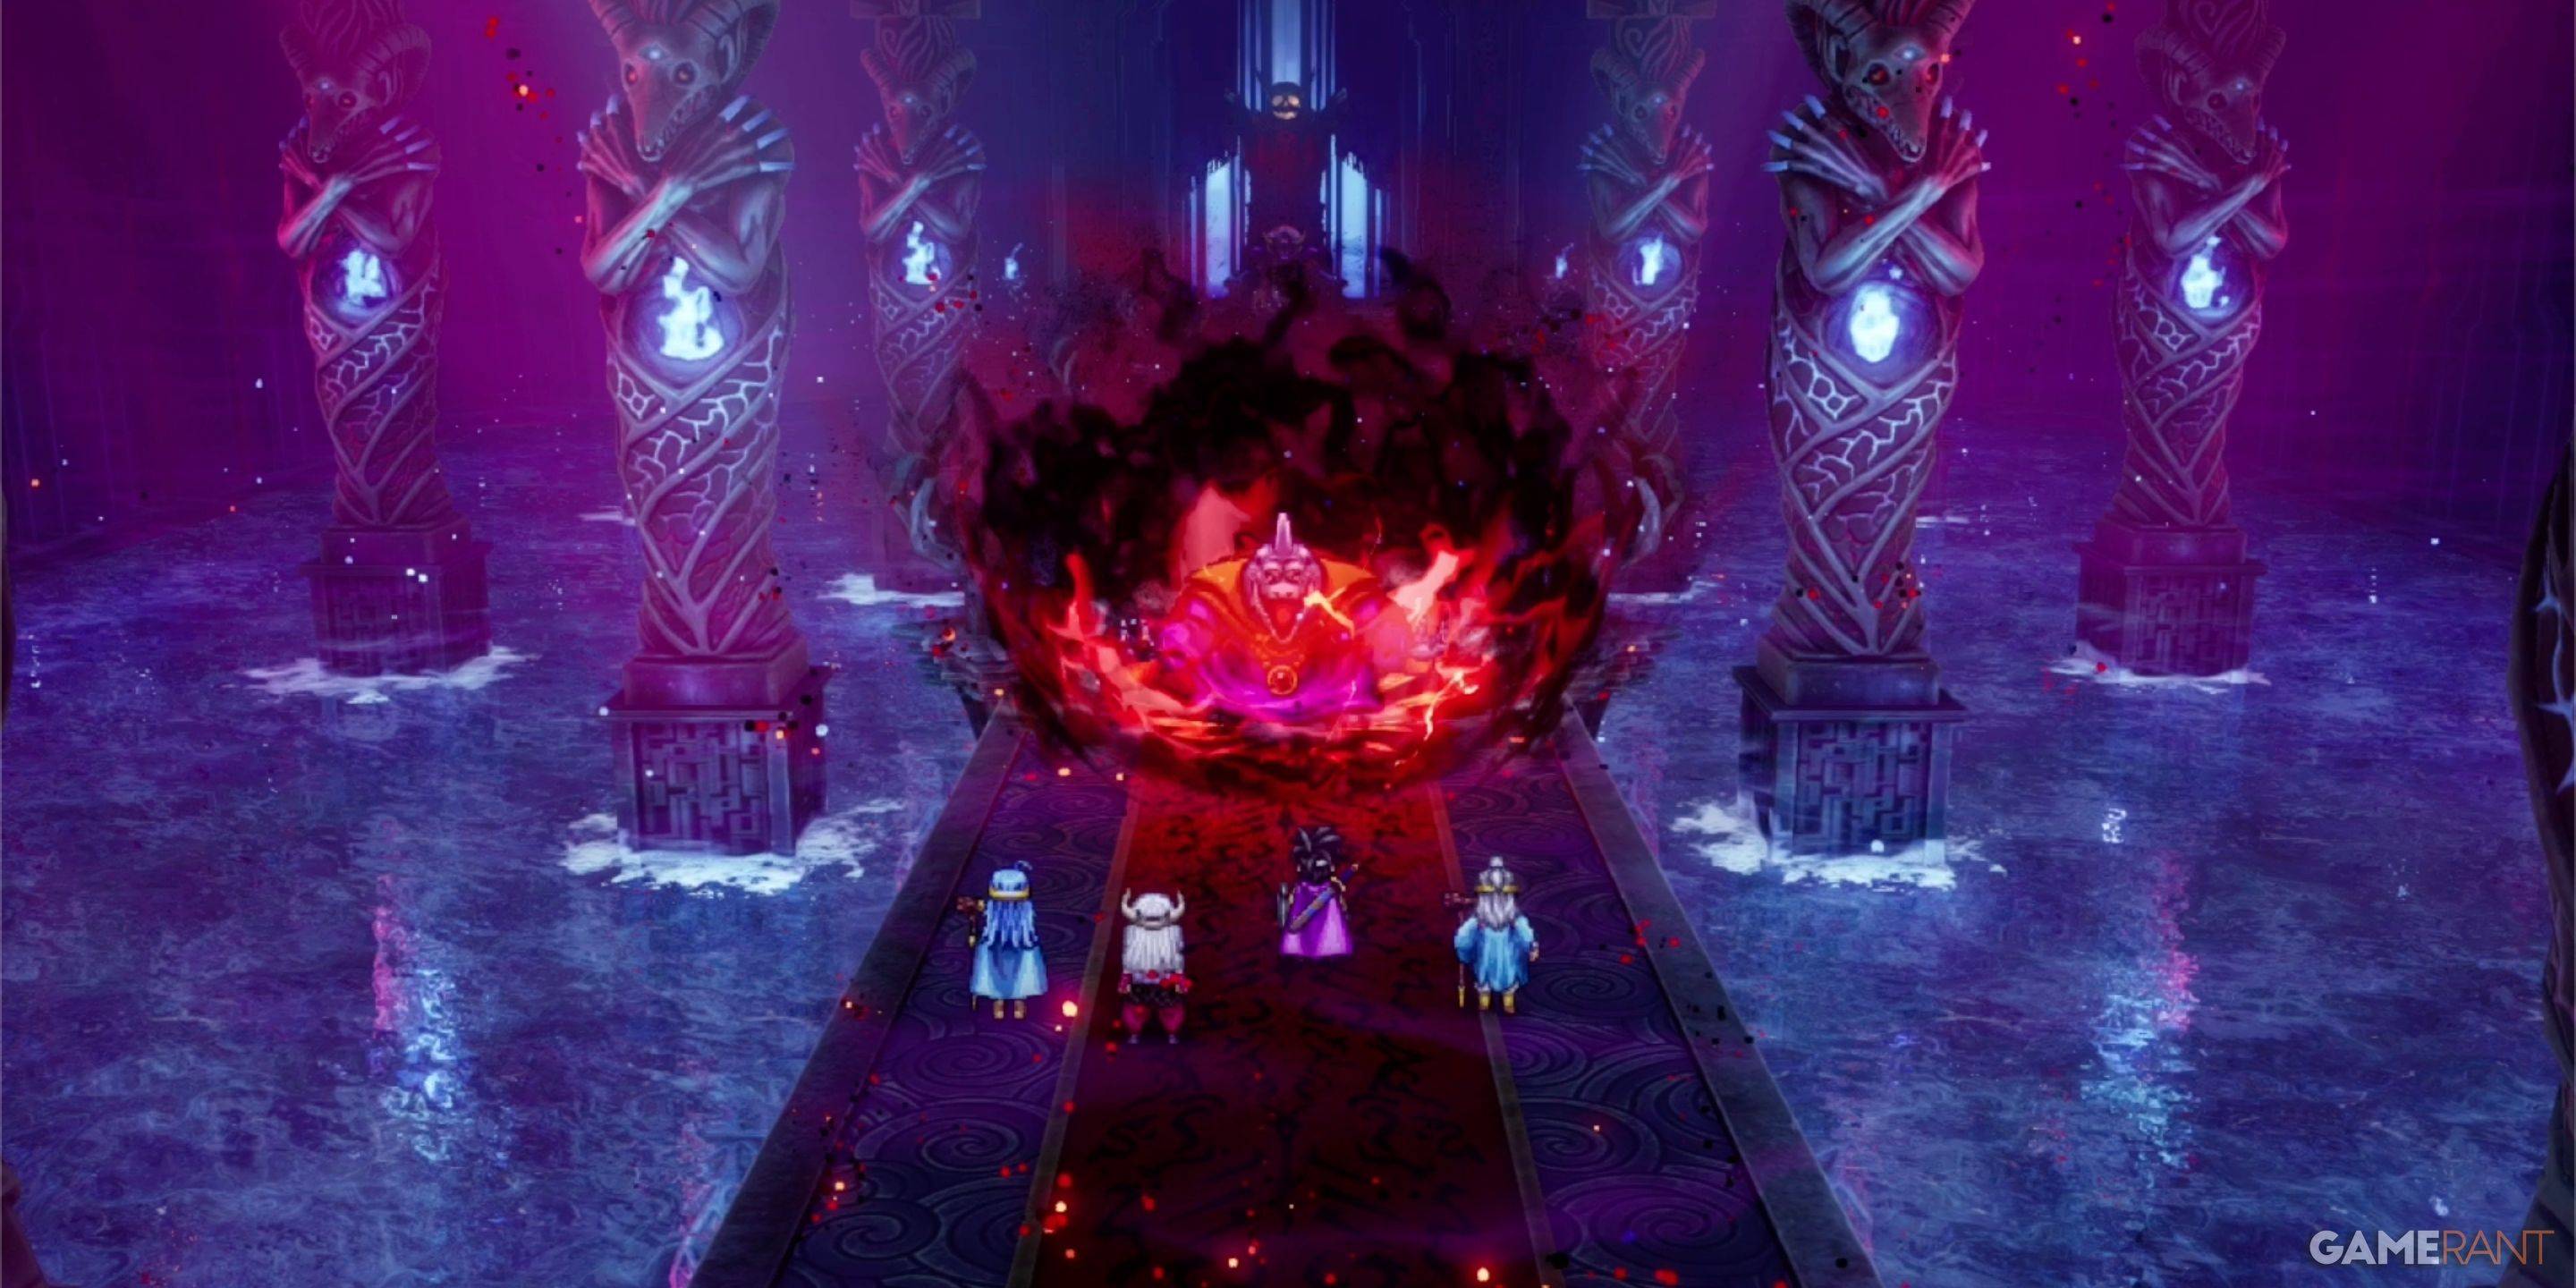
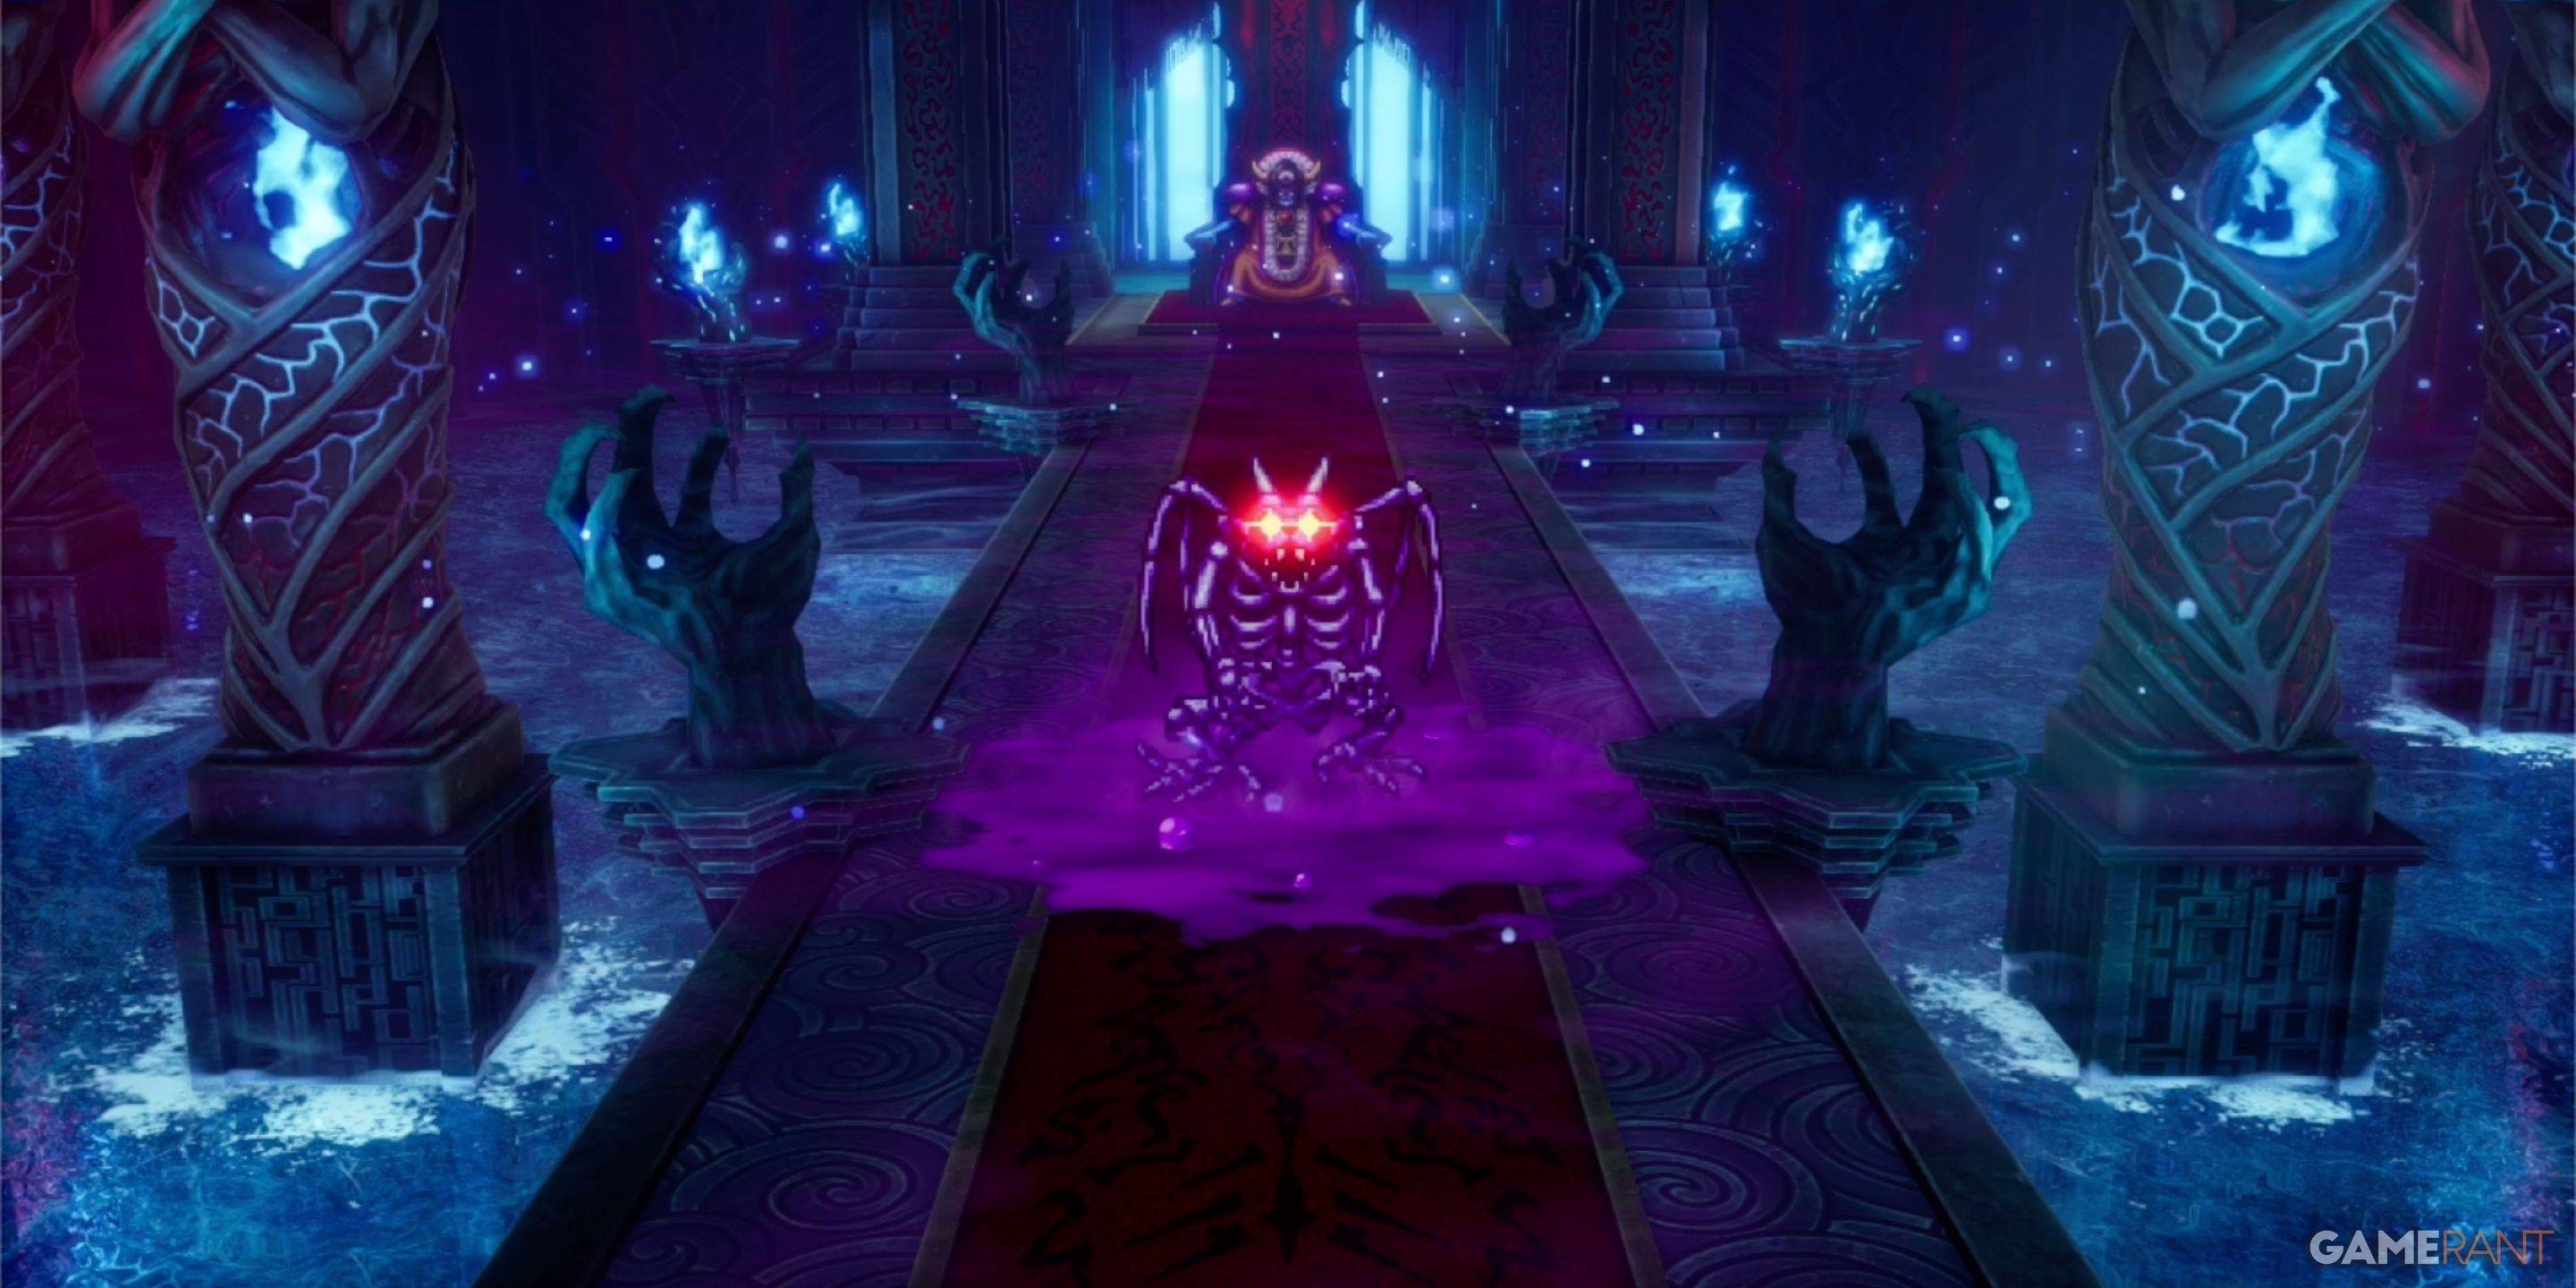
This final section is a boss gauntlet: King Hydra, Soul of Baramos, Bones of Baramos, and finally, Zoma. You can use items between fights.
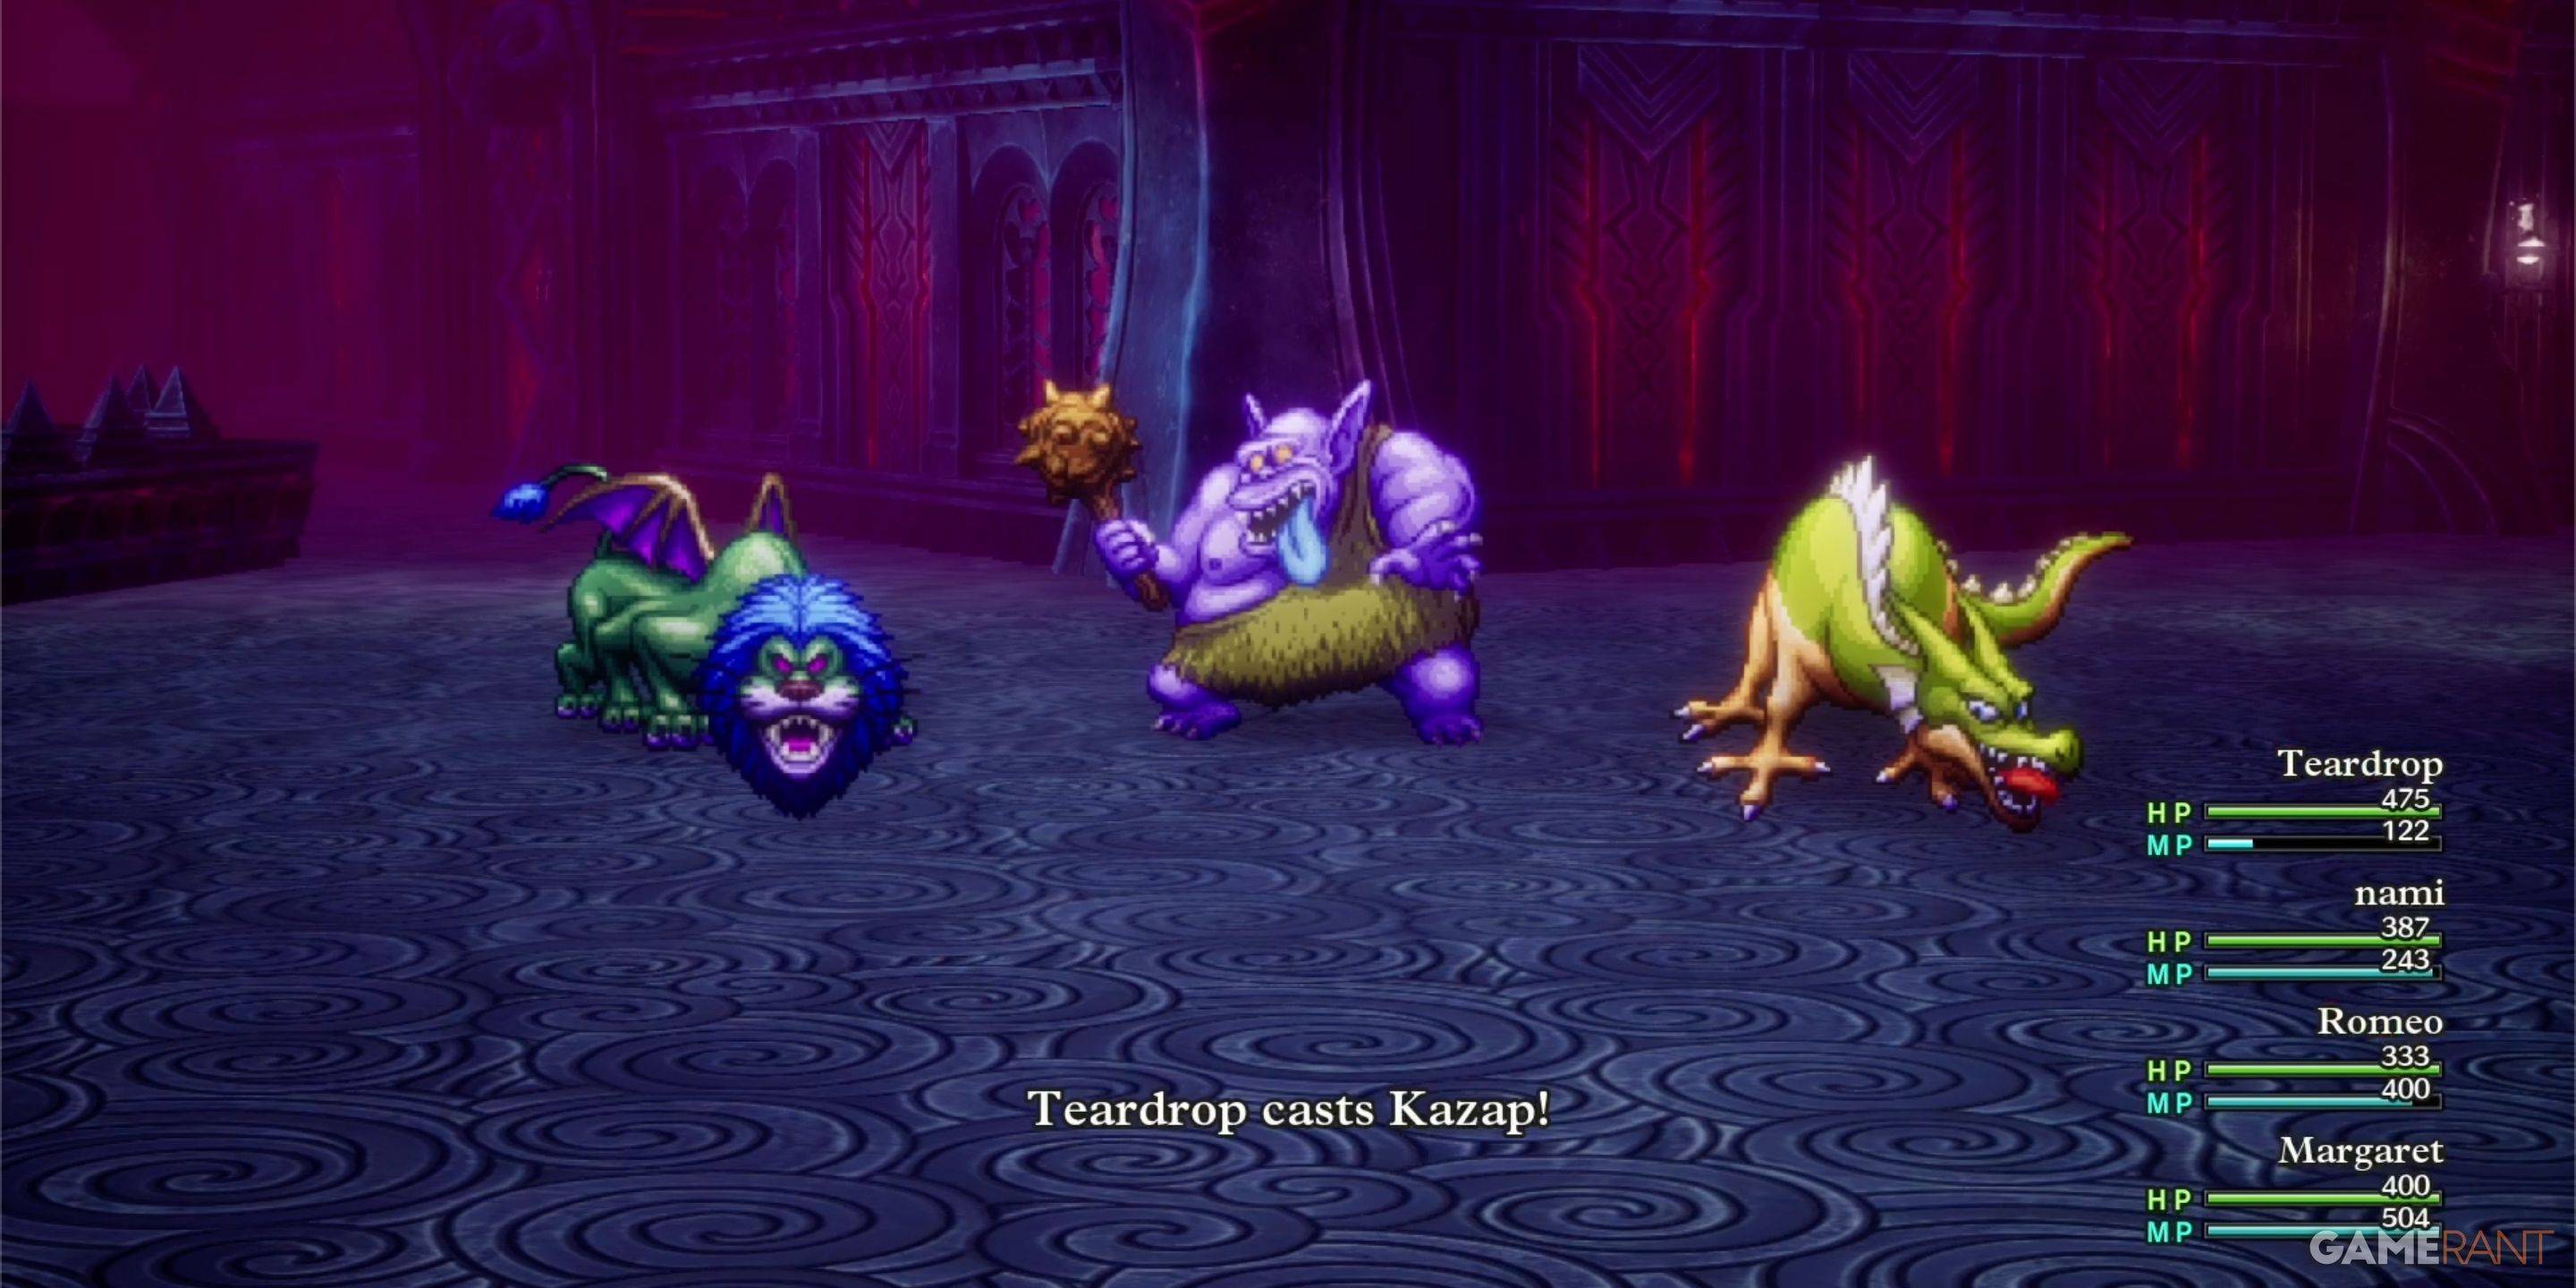
King Hydra: Aggressive tactics are recommended; Kazap spells are highly effective.
Soul of Baramos: Weak to Zap attacks.
Bones of Baramos: Similar weaknesses to the Soul; Kazap and Monster Wrangler combos are effective.
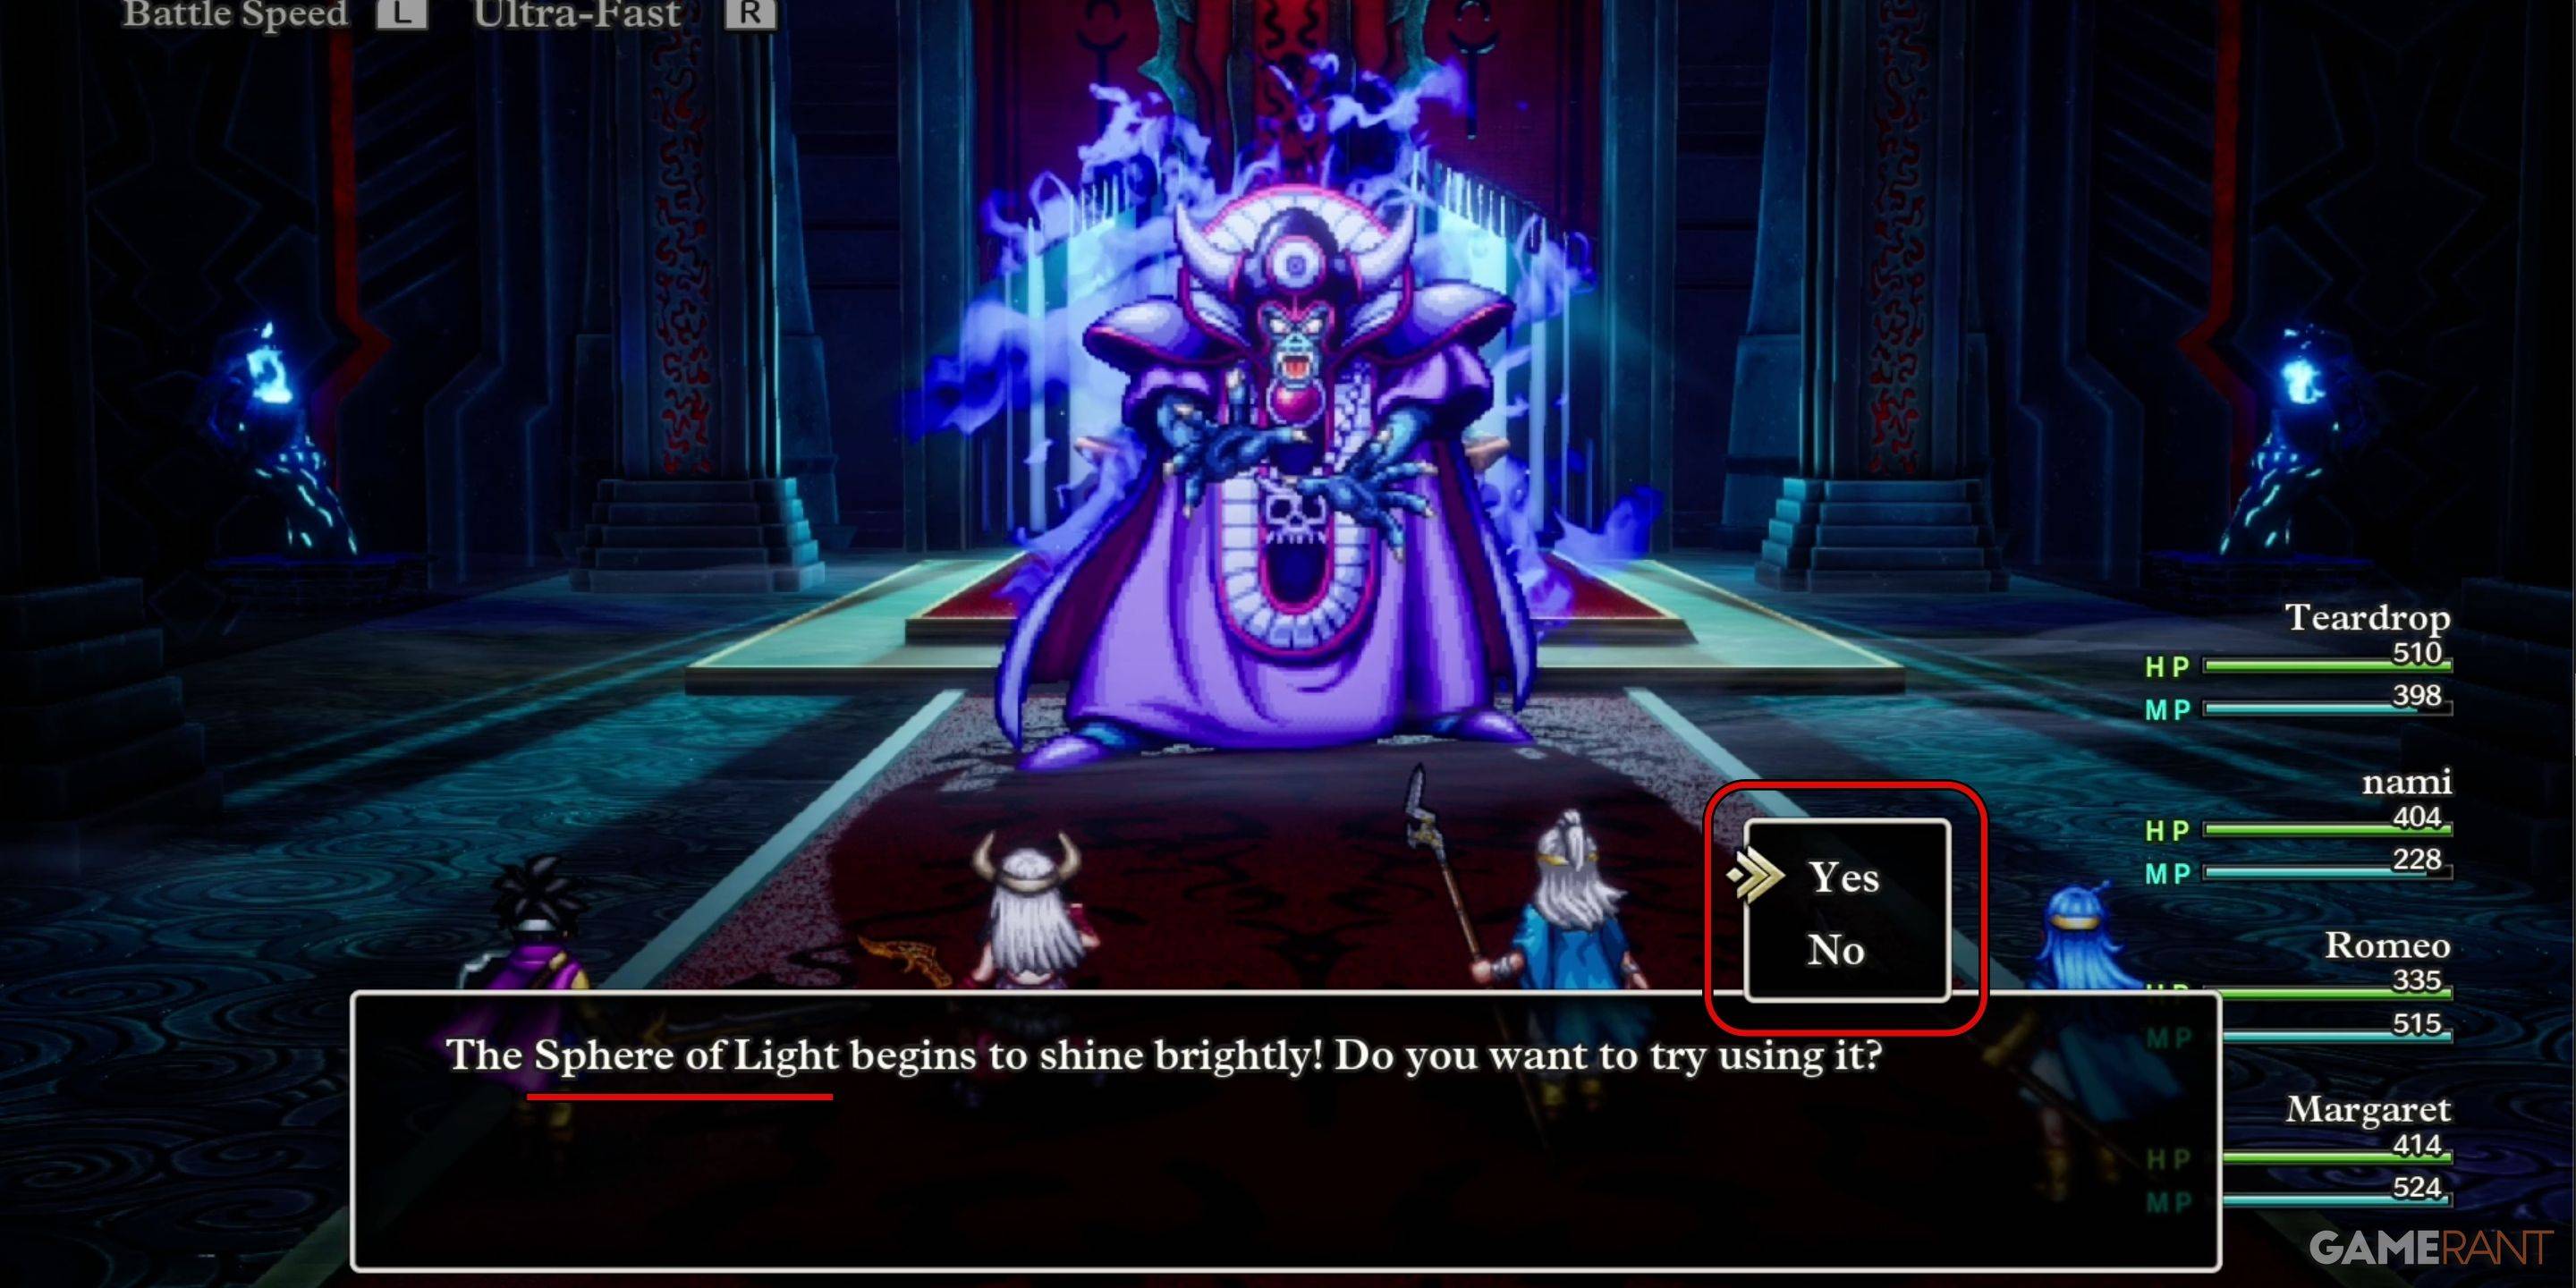
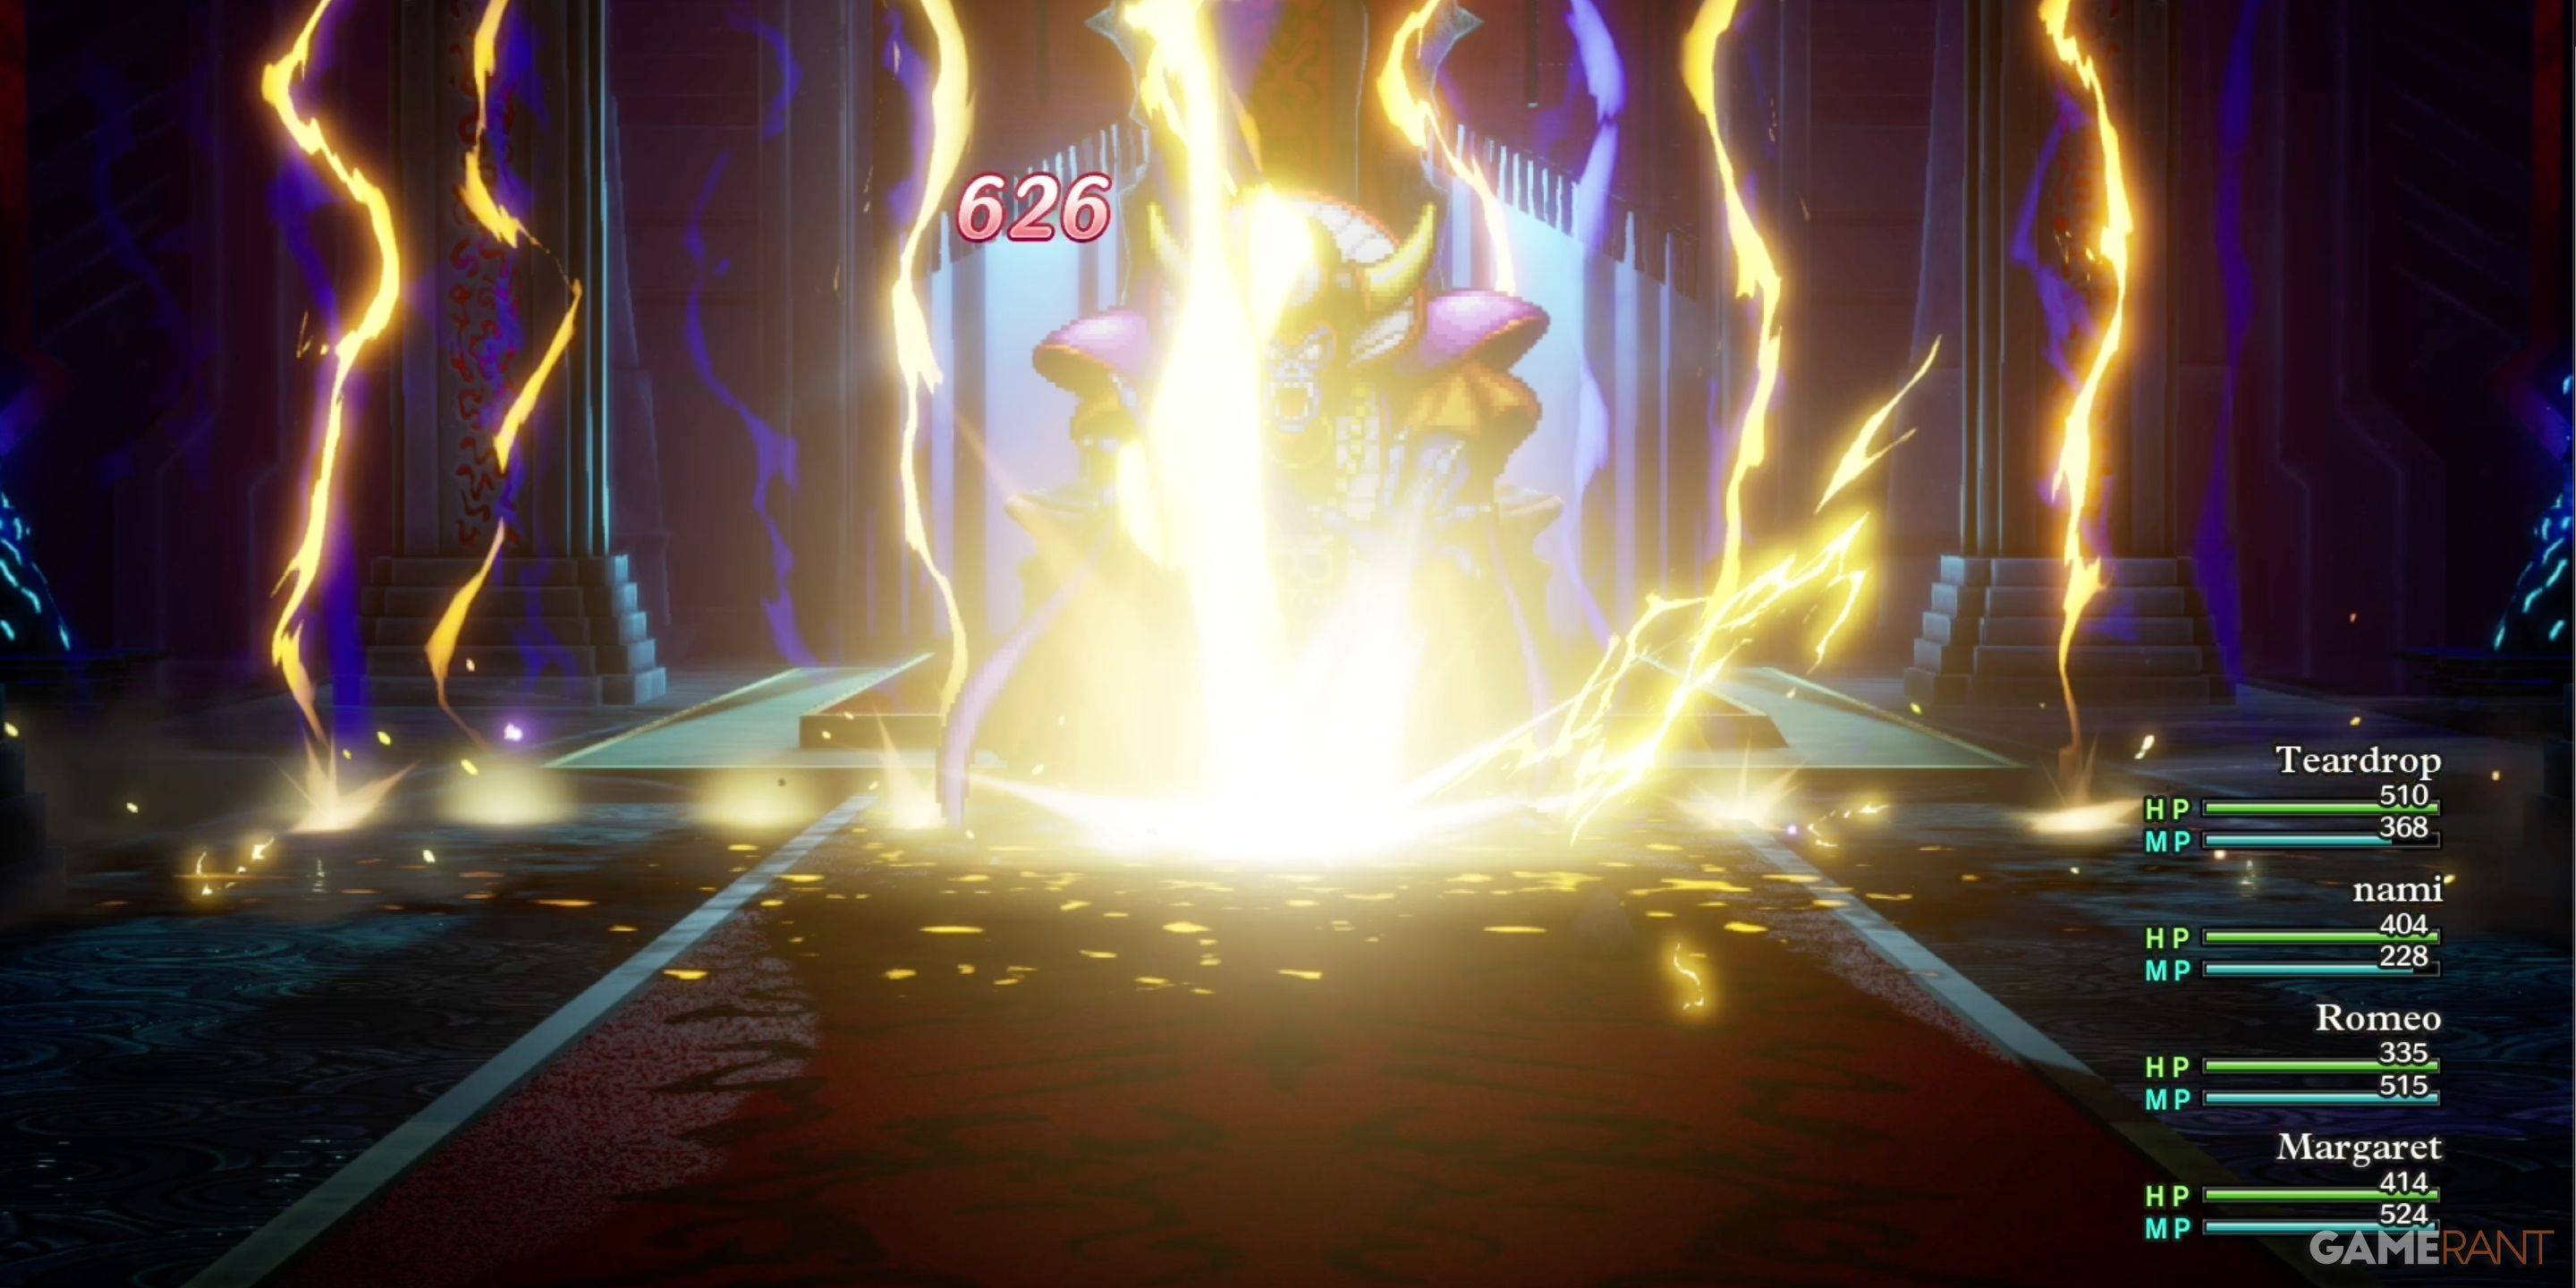
Zoma: A strategic fight. Conserve MP initially. Use the Sphere of Light to break his magic barrier, then unleash Zap attacks. Prioritize HP and revive fallen party members as needed. Reflect damage spells and equipment are beneficial.
Citadel Monsters
| Monster Name | Weakness |
|---|---|
| Dragon Zombie | None |
| Franticore | None |
| Great Troll | Zap |
| Green Dragon | None |
| Hocus-Poker | None |
| Hydra | None |
| Infernal Serpent | None |
| One-Man Army | Zap |
| Soaring Scourger | Zap |
| Troobloovoodoo | Zap |
This detailed guide should equip you to conquer Zoma's Citadel and complete Dragon Quest 3 Remake! Remember to adapt strategies based on your party composition and equipment. Good luck!
Latest Articles
Walmart's GeForce Week Sale Sees the First Ever Discounts on Nvidia RTX 50 Series Graphics Cards
Walmart has launched an exclusive "GeForce Week" sale, marking the first time ever that select GeForce RTX 50 series graphics cards are priced below MSRP. For months, these new Nvidia GPUs were sold at steep premiums due to high demand, limited stock
Konami Livestream: Metal Gear Solid Delta, Silent Hill f Details Revealed This Week
Play I'm particularly hopeful that Konami’s mention of "and more" will include No Code’s Silent Hill Townfall. It’s been years since we’ve received meaningful updates, and I’m eager to learn more. I’m also still waiting for news on future remakes or
Black Ops 7 Rating Hints at Premium Content Continuation
Call of Duty fans think they've found evidence suggesting that Call of Duty: Black Ops 7 will let players transfer their cosmetic skins from Black Ops 6.The ESRB rating has confirmed Black Ops 7 will be rated M for Mature 17+ and release on PC, PS5,

My Little Pomodoro Boosts Focus, Hits Android
Most productivity timers demand your focus. Devfloor's new release, My Little Pomodoro: Focus, actually gives something in return. This charming Android app transforms concentration into a rewarding experience rather than a tedious obligation.Underst
Tekken 8 Director Slams Fan Over Anna Williams' New Look: 'Unconstructive and Pointless'
Play
Tekken 8 veteran Anna Williams is making her return to the roster, and while her redesigned look has been well received by the majority of fans, it has also sparked some debate—particularly over comparisons of her new outfit to Santa Claus.
When a fan asked Tekken game director and chief prod
Ready or Not Shares Update in Censorship and Review-Bomb Fight
VOID Interactive has responded to player criticism following updates to the PC version of its controversial shooter Ready or Not, implemented to secure its console release. The studio clarified there have been "misconceptions and misinformation" rega
Latest Games

Tank Warfare: PvP Battle Game
Strategy丨148.4 MB

Star hunter
Adventure丨39.06MB
Combat Master
Action丨1.13GB

Dreamweavers Curse
Casual丨470.30M

Euro Train Simulator 2
Simulation丨124.55M

Stenciletto
Educational丨107.65MB


Top News
MORE +

01
01-07
BREAKING: Flight Simulator 2024 Login Woes Ground Players
Flight Simulator 2024 Launch Plagued by Technical Difficulties
The highly anticipated launch of Flight Simulator 2024 has been significantly hampered by widespread technical problems, leaving many players grounded before they could even take to the virtual skies. This article details the reported d
02
01-06
CDPR acknowledged weak gameplay in The Witcher 3
The Witcher 3, while critically acclaimed, wasn't without its flaws. Many fans felt the combat system fell short.
In a recent interview, Witcher 4's game director, Sebastian Kalemba, acknowledged weaknesses in the previous game's gameplay, specifically highlighting the need for significant improvem
03
11-17
Hogwarts Legacy 2 is "One of the Biggest Priorities" for WB Games
Following the successful launch of Quidditch Champions this week, Warner Bros. Discovery has confirmed its plans for a sequel to last year's Harry Potter-based action RPG hit Hogwarts Legacy—2023's best-selling game.Hogwarts Legacy Sequel Plans Confirmed by Warner Bros. DiscoveryExpected in
04
11-16
Airplane Chefs Brings The Ultimate Snack, Pringles, On Board!
Buckle up for some snacks as Nordcurrent has just dropped an exciting event for their cooking game. It’s the most unexpected collab of Airplane Chefs and Pringles. If you’ve been enjoying your virtual life as a flight attendant, things are about to get a lot tastier.The game developer behind p
05
11-16
Play Together to collaborate with Sanrio and introduce new My Melody and Kuromi content
Play Together is bringing back its Sanrio collab with the appearance of My Melody and KuromiYou can collect coins by completing their themed missions that can then be used to draw exclusive itemsAs a bonus there's also new summer-themed content and events, including a major bug huntPlay Together, th
Topics
More +