Dota 2 Patch: 16 Pro Player Defense Strategies
Author : Nova
Mar 12,2025
In the dynamic world of Dota 2, controlling vision remains paramount. Each patch presents new strategic opportunities, and recent innovations in warding, highlighted by Adrian's insightful YouTube video showcasing DreamLeague S25 pro gameplay, are game-changers. PC Gamer delves into these advanced ward placements, analyzing their strategic value and offering alternative positions to enhance your gameplay.
As Dota 2 evolves, professional teams are redefining Observer ward placement. These aren't random; they're calculated positions maximizing utility while minimizing detection risk. Below are 16 groundbreaking ward placements used by top players, complete with analysis and alternatives.
Table of Contents
- Mid Lane Jungle Extension
- Radiant Ancient Riverbank
- Dire Top Tier 2 Bushes
- Radiant Bottom Secret Shop Monitor
- Dire Bottom Tier 2 Fog Corner
- Radiant Roshan Pit Entrance
- Dire Mid Lane High Ground
- Radiant Top Tier 2 Backdoor Path
- Dire Bottom Ancient River Bend
- Radiant Mid Lane Jungle Passage
- Dire Top Secret Shop Approach
- Radiant Bottom Tier 3 Side Path
- Dire Roshan Pit Exit
- Radiant Top Ancient Cliffside
- Dire Mid Lane Jungle Overlook
- Radiant Bottom Tier 2 Rear Flank
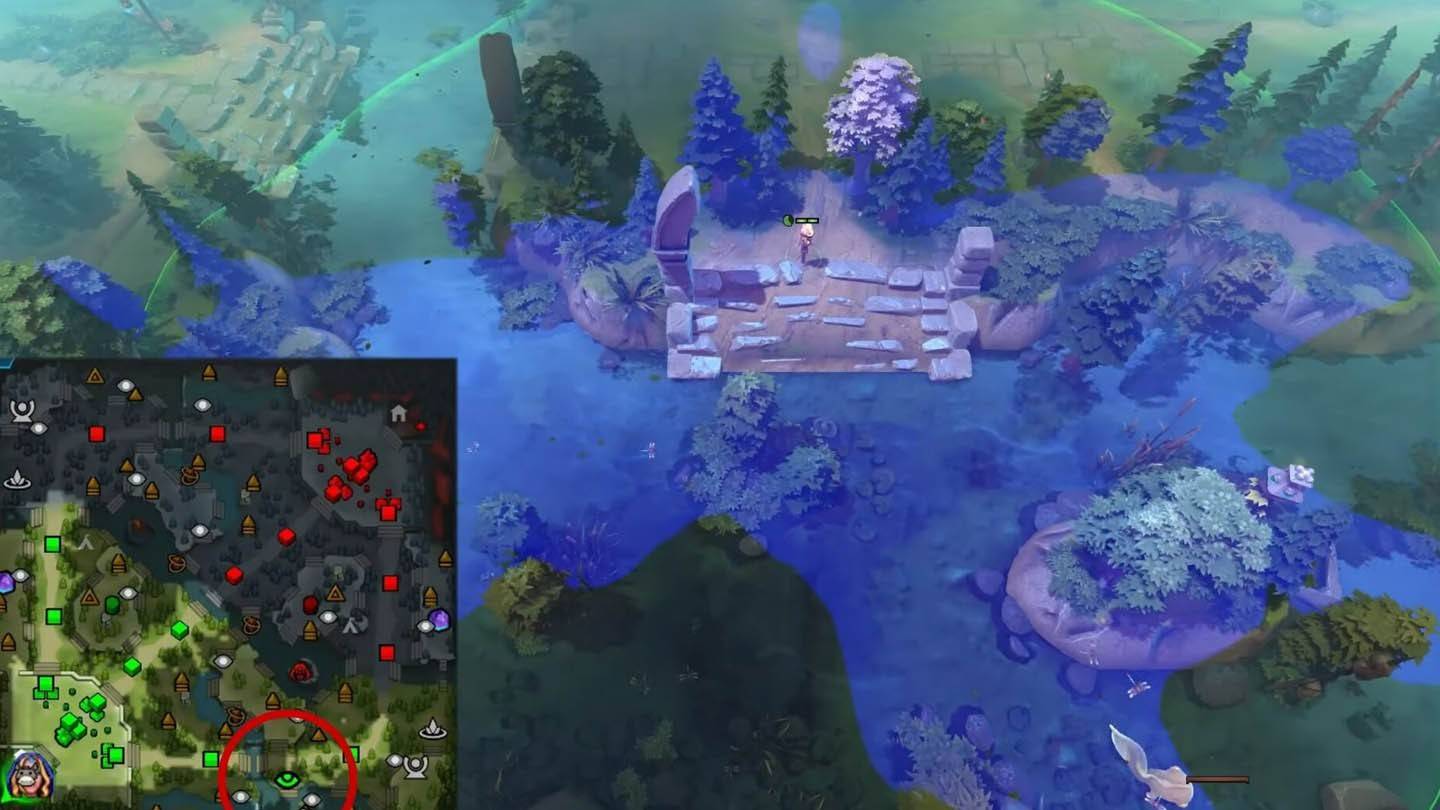
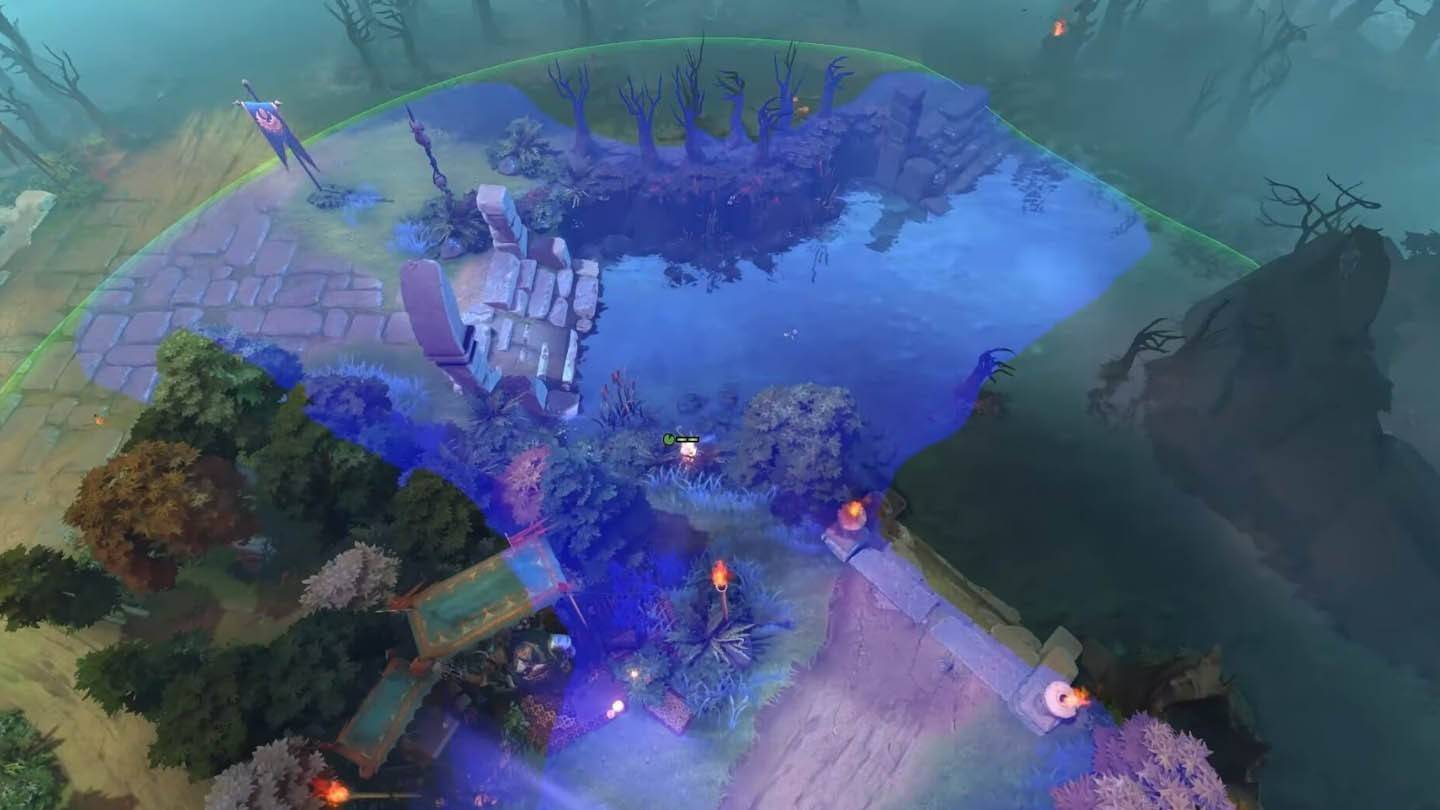
Mid Lane Jungle Extension
Early Game Domination: Positioned slightly deeper than traditional mid lane jungle wards, this provides superior vision early game. It secures runes and reveals enemy jungle movements. Alternative: Shifting slightly towards the Radiant side adds secret shop approach coverage.
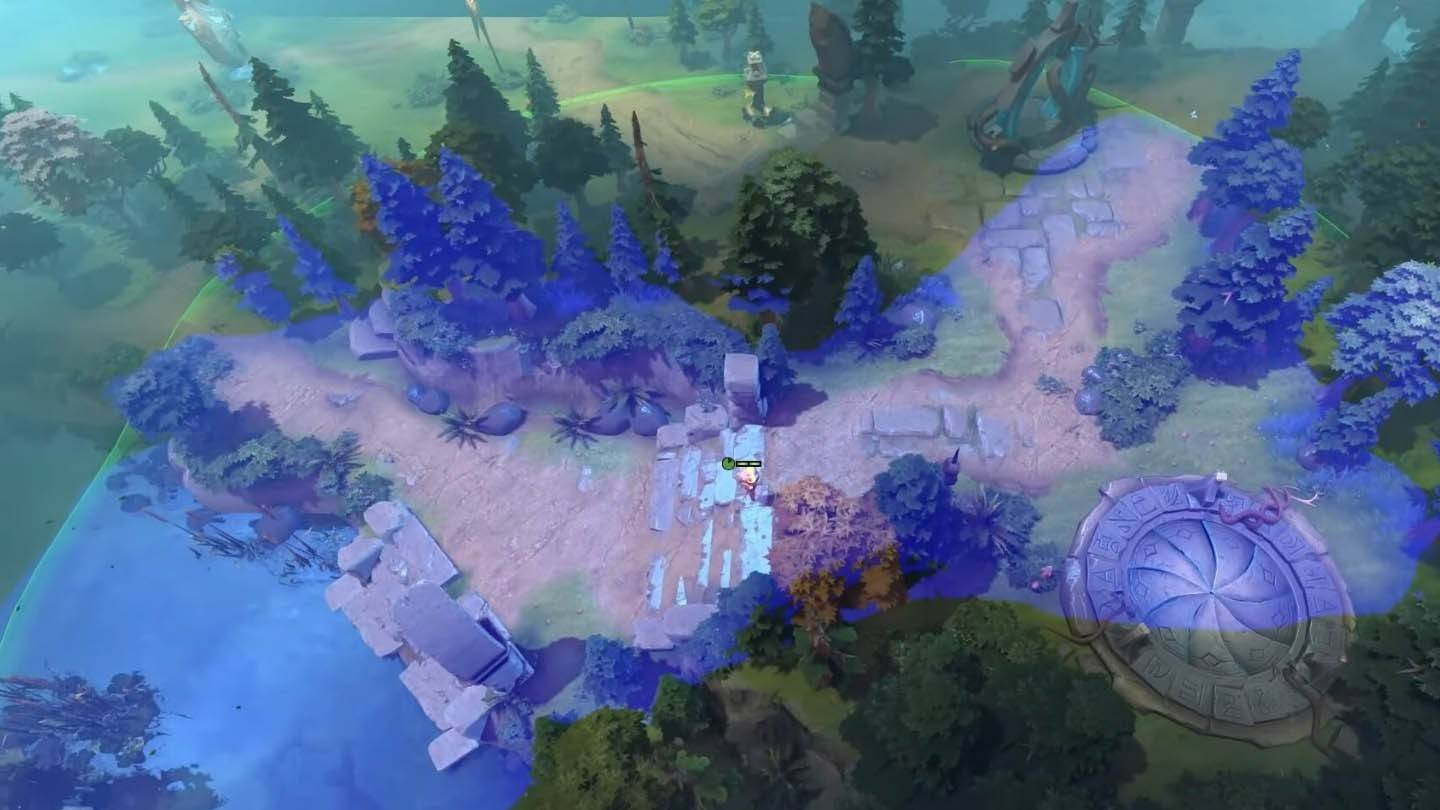
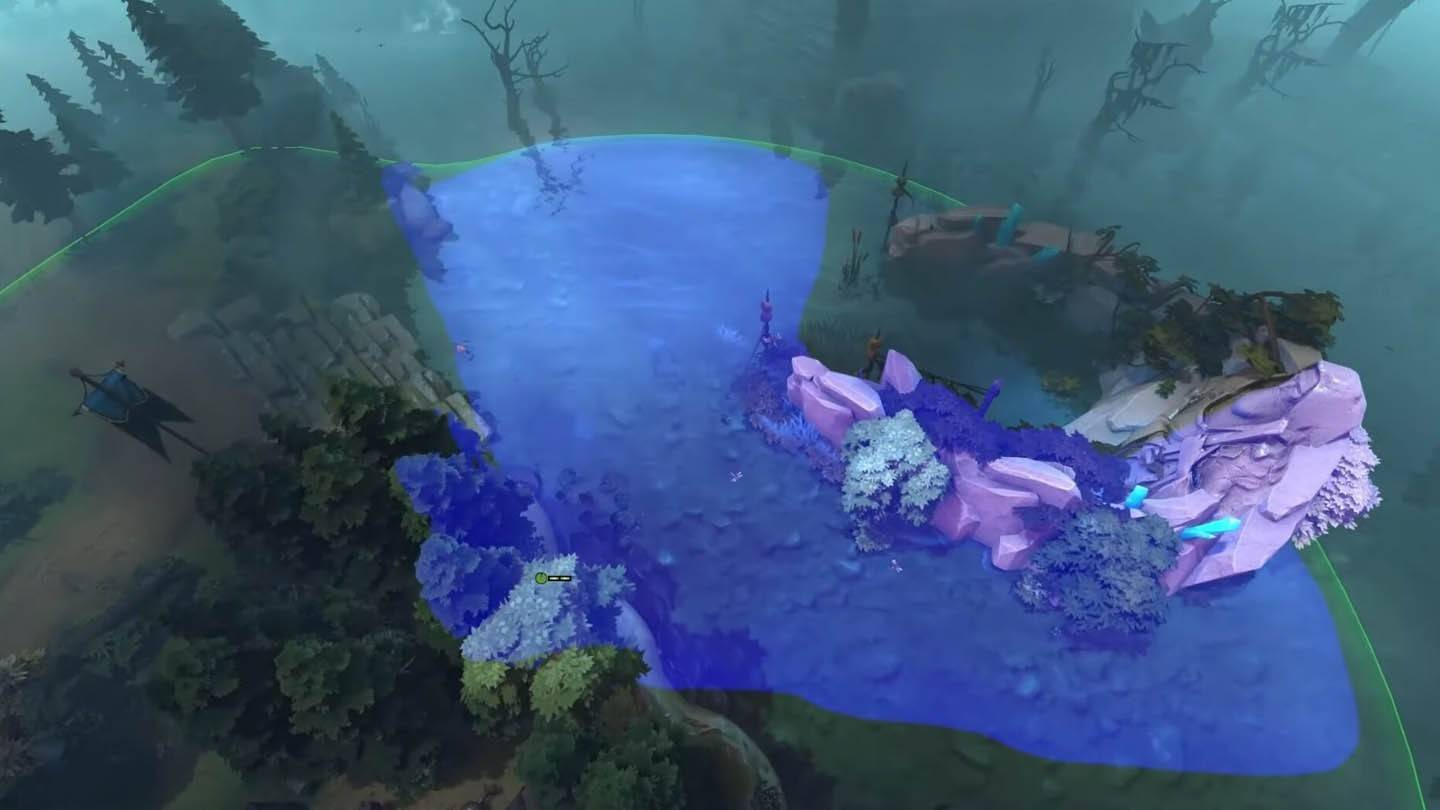
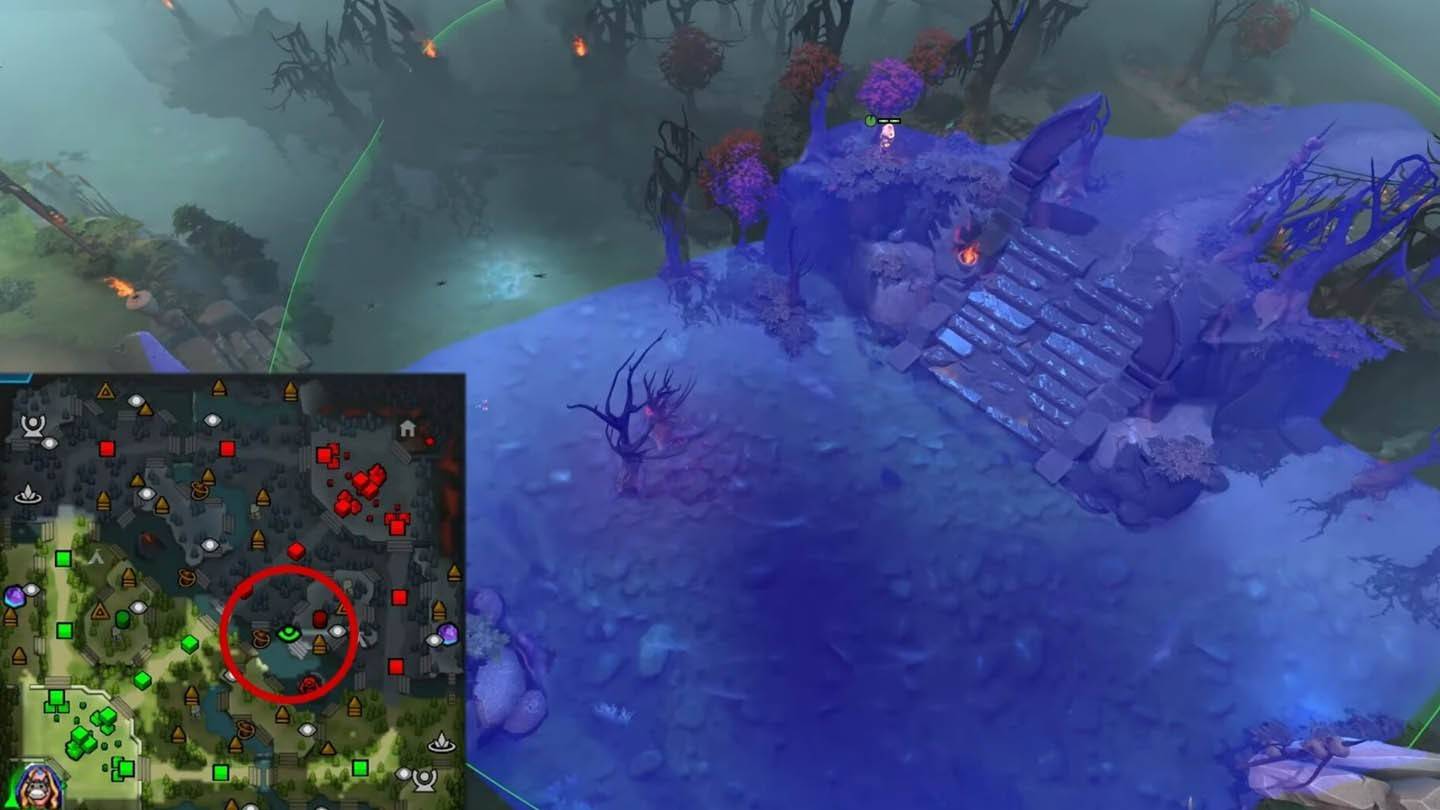
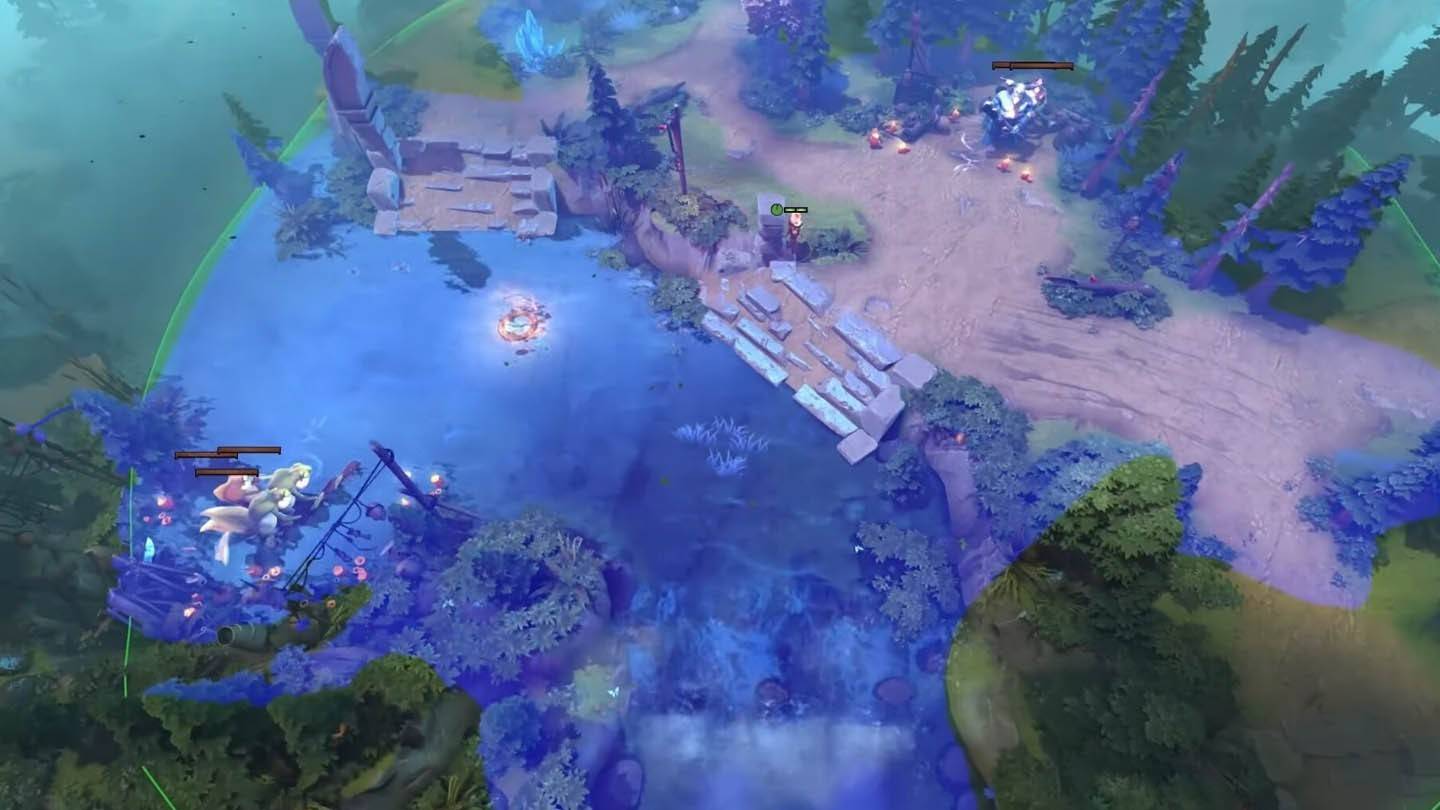
Radiant Ancient Riverbank
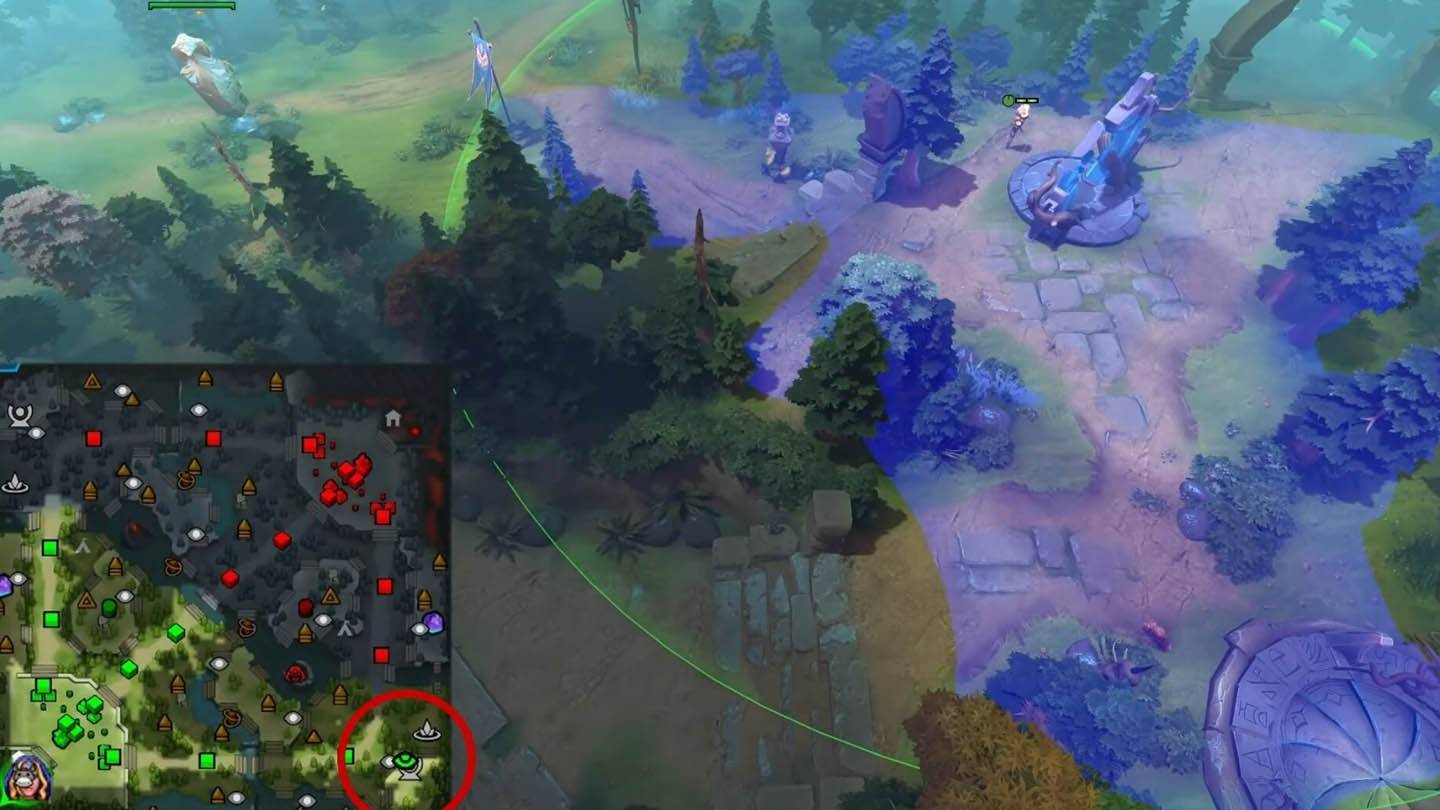
Strategic Depth: This ward provides deep vision into the Radiant base from an unexpected angle, harder to spot and destroy. Bonus Tip: Combine with a nearby Sentry ward for enhanced defense.
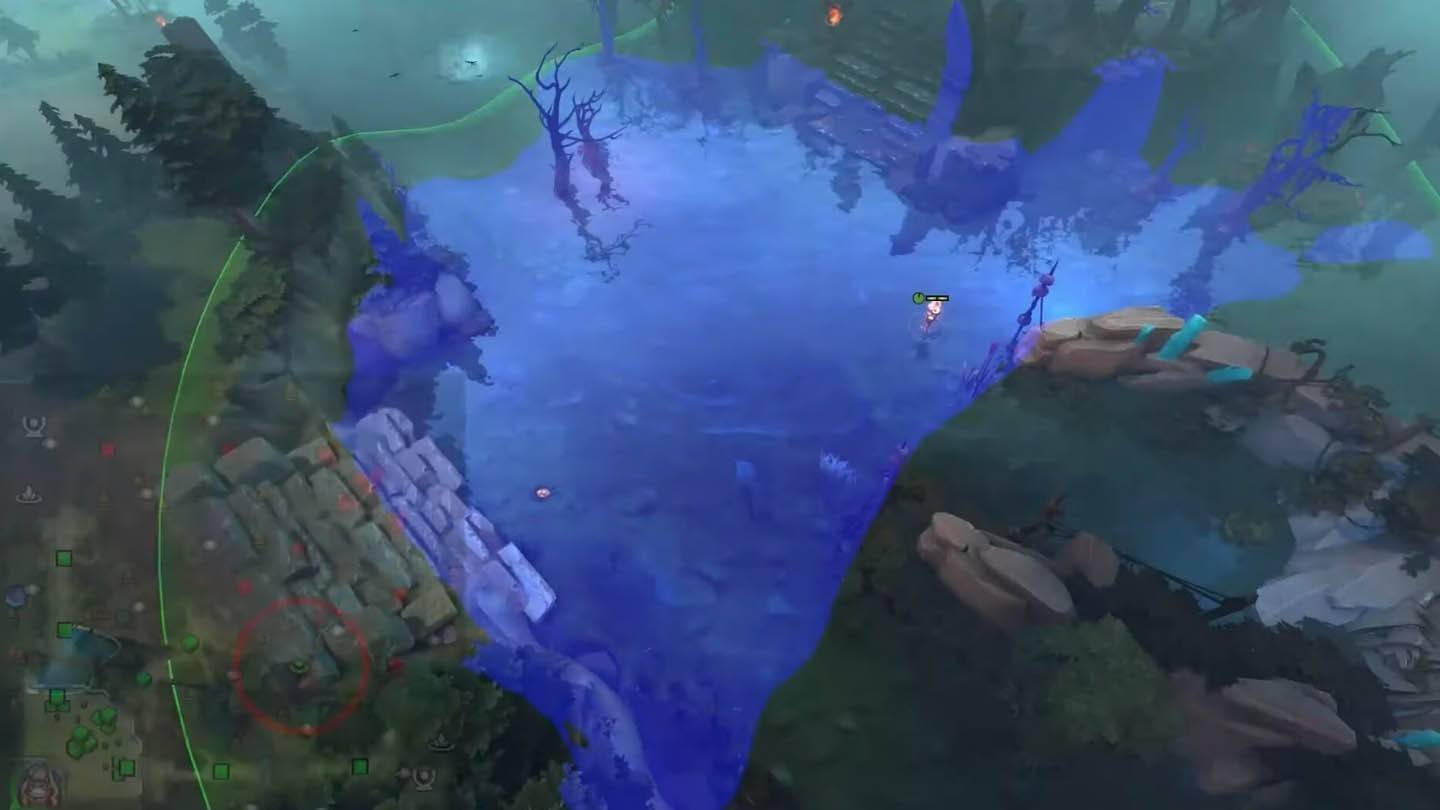
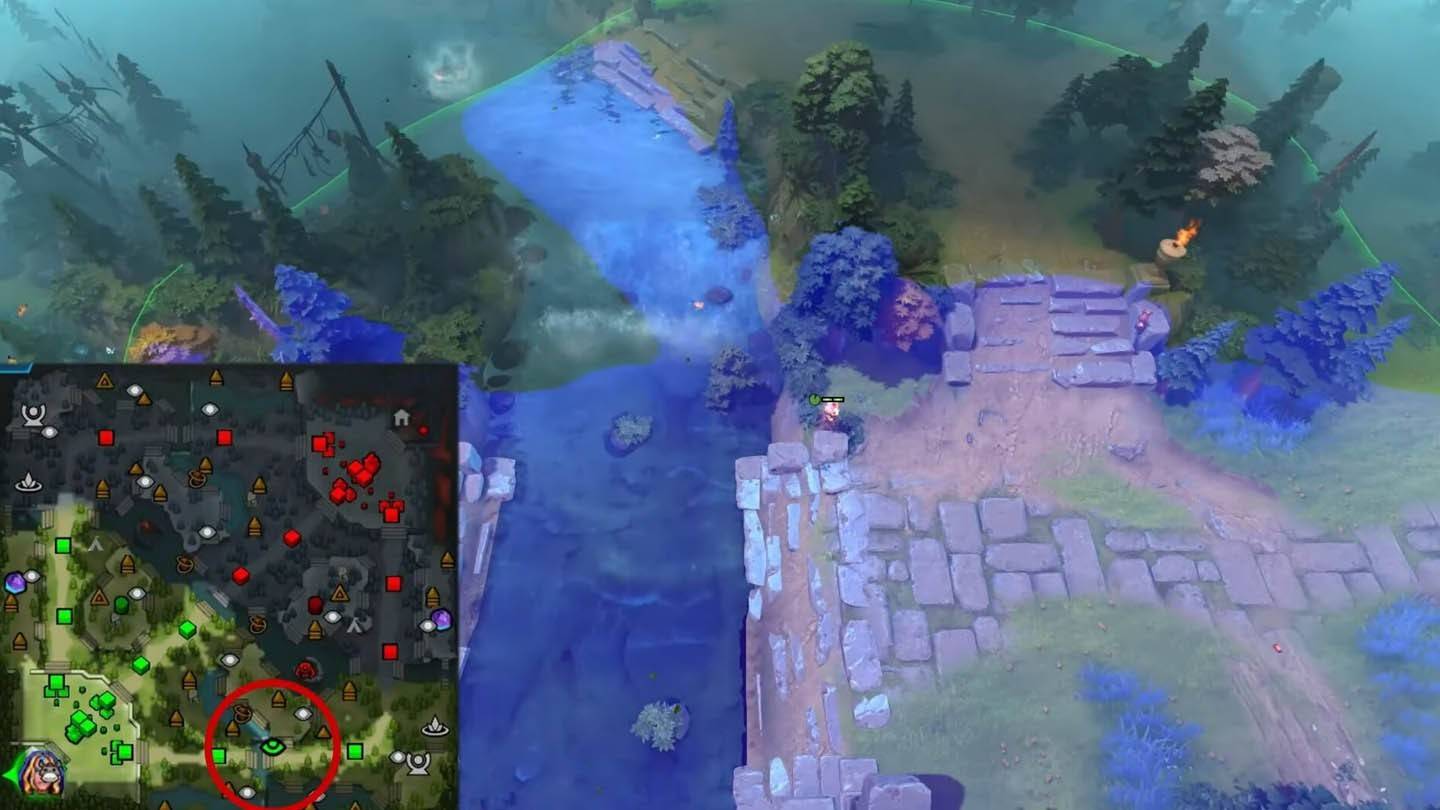
Dire Top Tier 2 Bushes
Tower Protection: Reveals critical areas around Dire's tier two towers, aiding defense and offense, especially during teamfights. Pro Tip: Rotate this ward to avoid predictability.
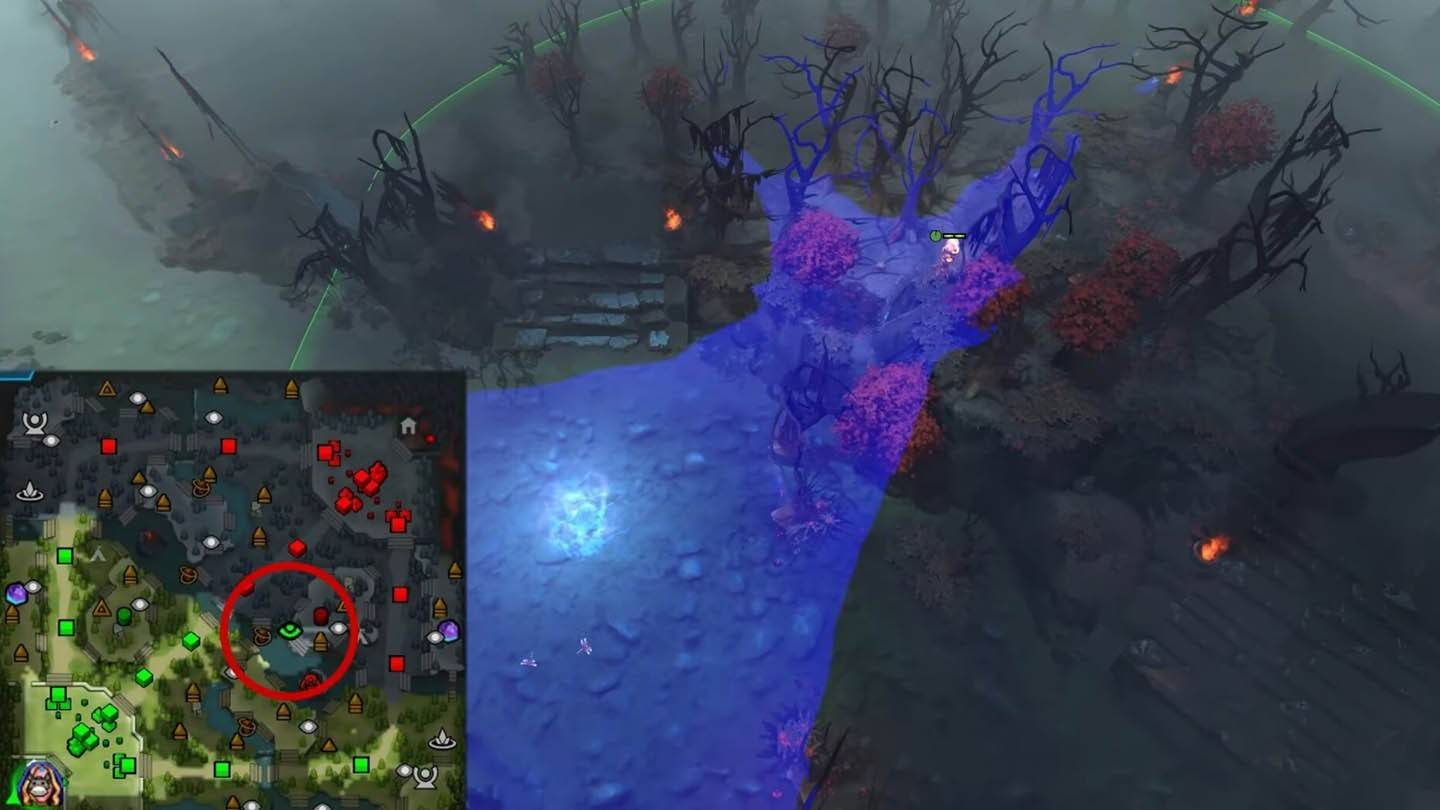
Radiant Bottom Secret Shop Monitor

Economic Intelligence: Monitors enemy secret shop activity, revealing item purchases and timing. Advanced Strategy: Combine with vision denial wards to disrupt buybacks.
Dire Bottom Tier 2 Fog Corner
Ambush Preparation: Provides vision in foggy areas near the Dire's bottom tier two tower, facilitating ganks and ambushes. Expert Advice: Use with smoke for surprise attacks.
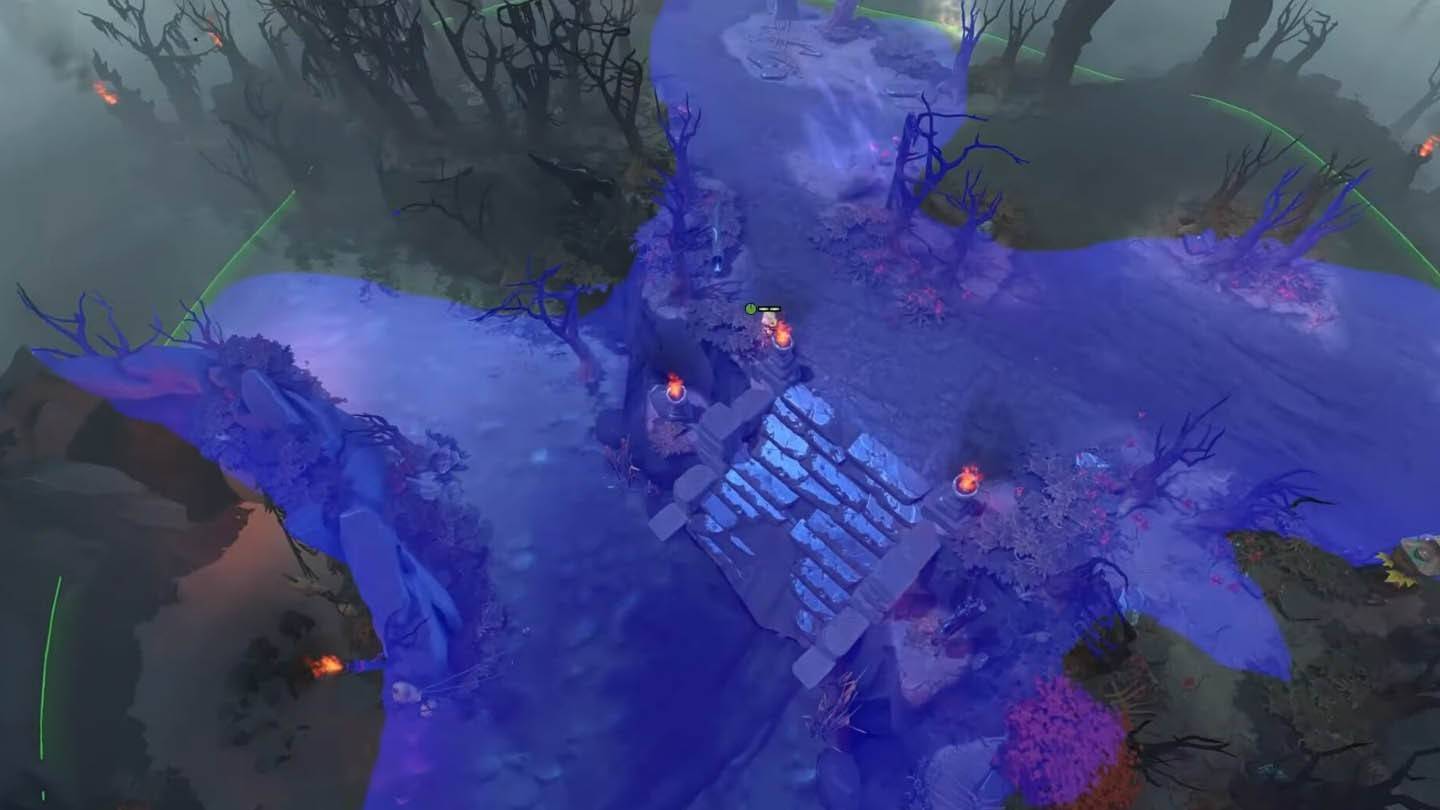
Radiant Roshan Pit Entrance

Timing is Everything: Enables early detection of Roshan attempts, allowing timely responses and counter-attacks. Tactical Insight: Frequent rotation maintains surprise.
Dire Mid Lane High Ground
Elevated Awareness: Offers extended vision along the mid lane high ground, increasing awareness of approaching enemies. Strategic Note: Ideal for mid lane control during crucial moments.
Radiant Top Tier 2 Backdoor Path
Security First: Monitors backdoor paths to the Radiant's top tier two tower, preventing surprise attacks. Defensive Tip: Place a Sentry ward nearby to catch invisible heroes.
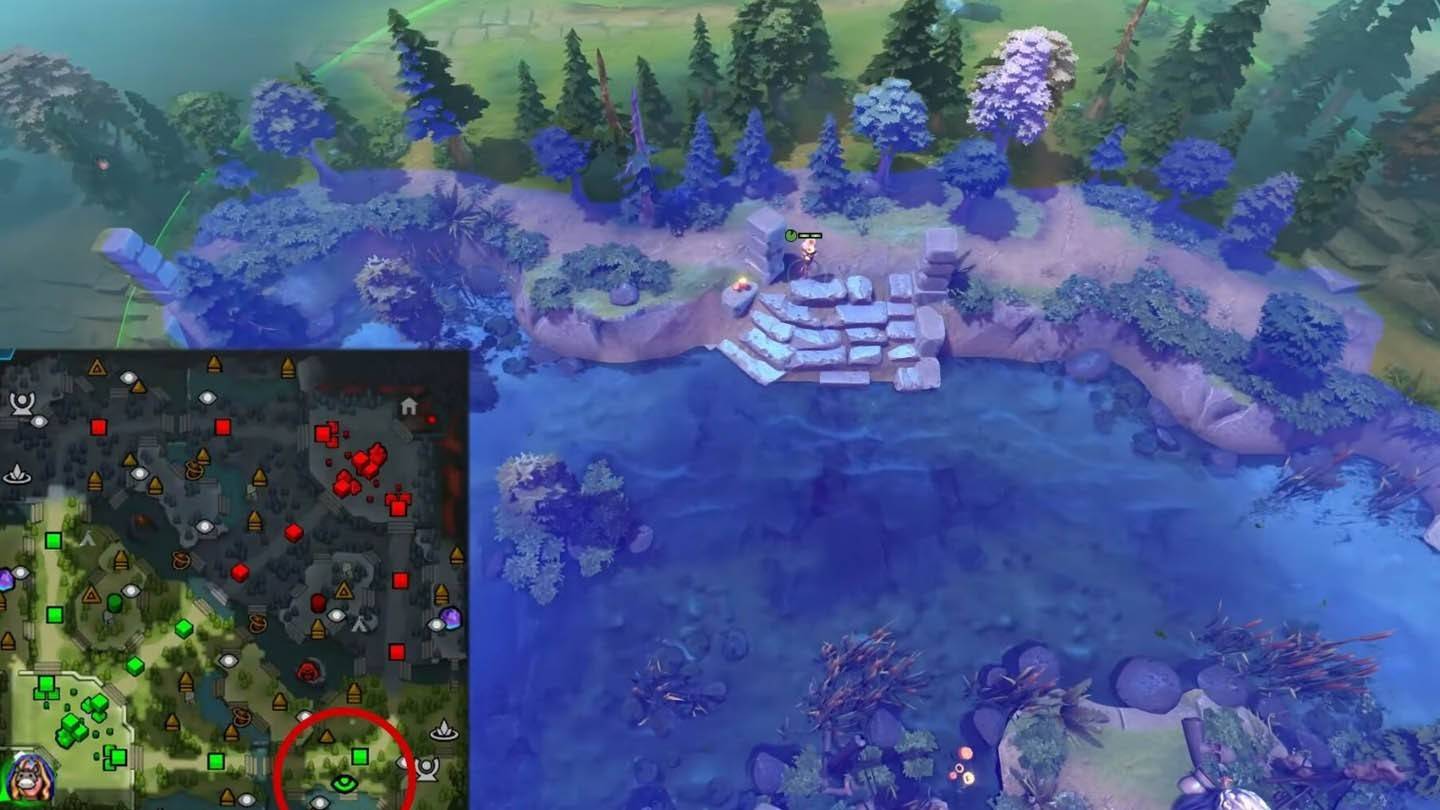
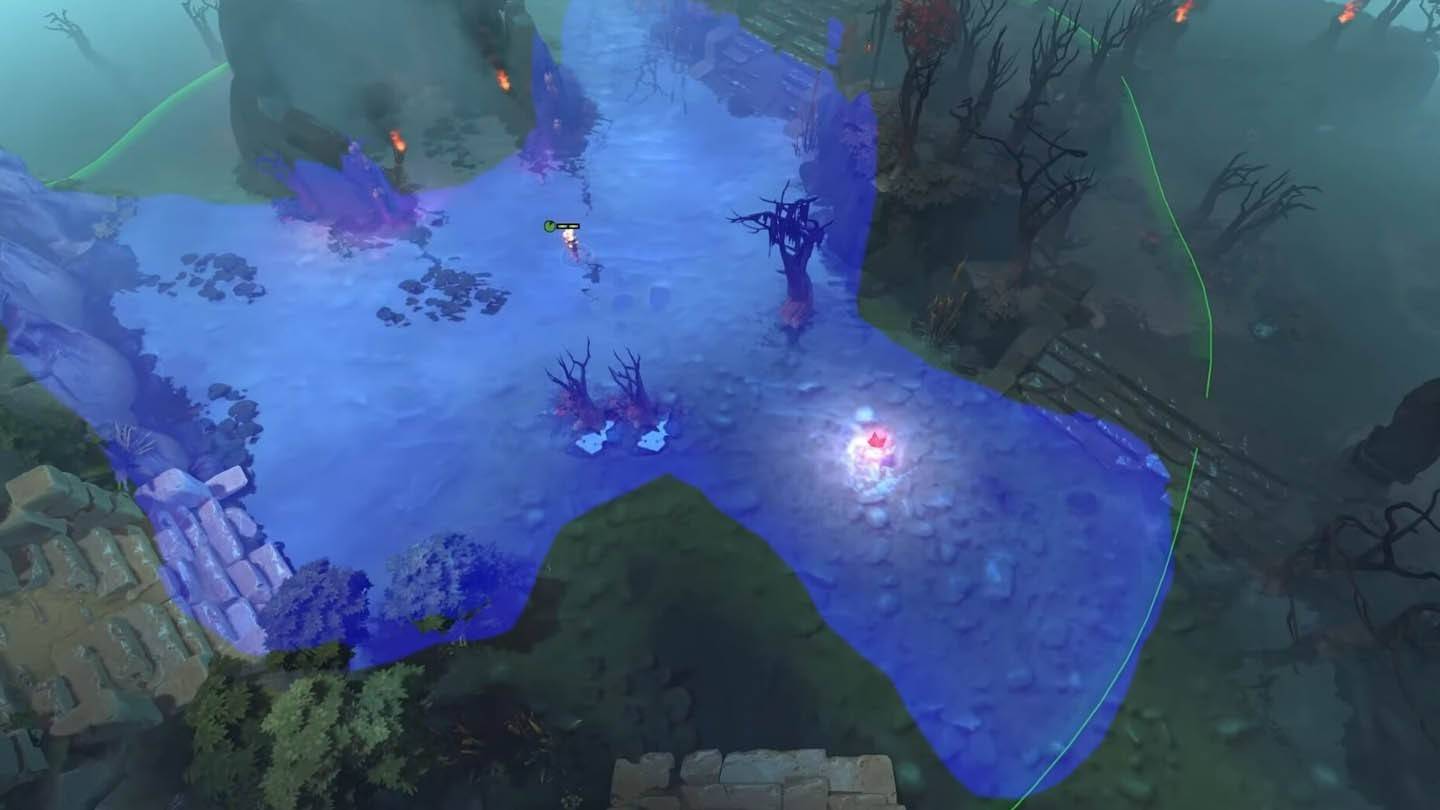
Dire Bottom Ancient River Bend
Deep Vision Mastery: Provides deep vision into the Dire base via an unconventional river bend. Advanced Placement: Experiment for optimal coverage.
Radiant Mid Lane Jungle Passage
Comprehensive Coverage: Reveals key jungle passages near the mid lane, enhancing map awareness. Professional Recommendation: Rotate between jungle entrances.
Dire Top Secret Shop Approach
Economic Surveillance: Alerts when enemies approach or leave the Dire's secret shop, offering economic intelligence. Competitive Edge: Time pushes effectively.
Radiant Bottom Tier 3 Side Path
Flank Detection: Monitors side paths to the Radiant's bottom tier three tower, warning against flanking maneuvers. Team Coordination: Share this vision for coordinated responses.
Dire Roshan Pit Exit
Counterplay Opportunity: Detects enemy movements exiting the Roshan pit from the Dire side, enabling timely reactions. Strategic Positioning: Essential during late-game Roshan battles.
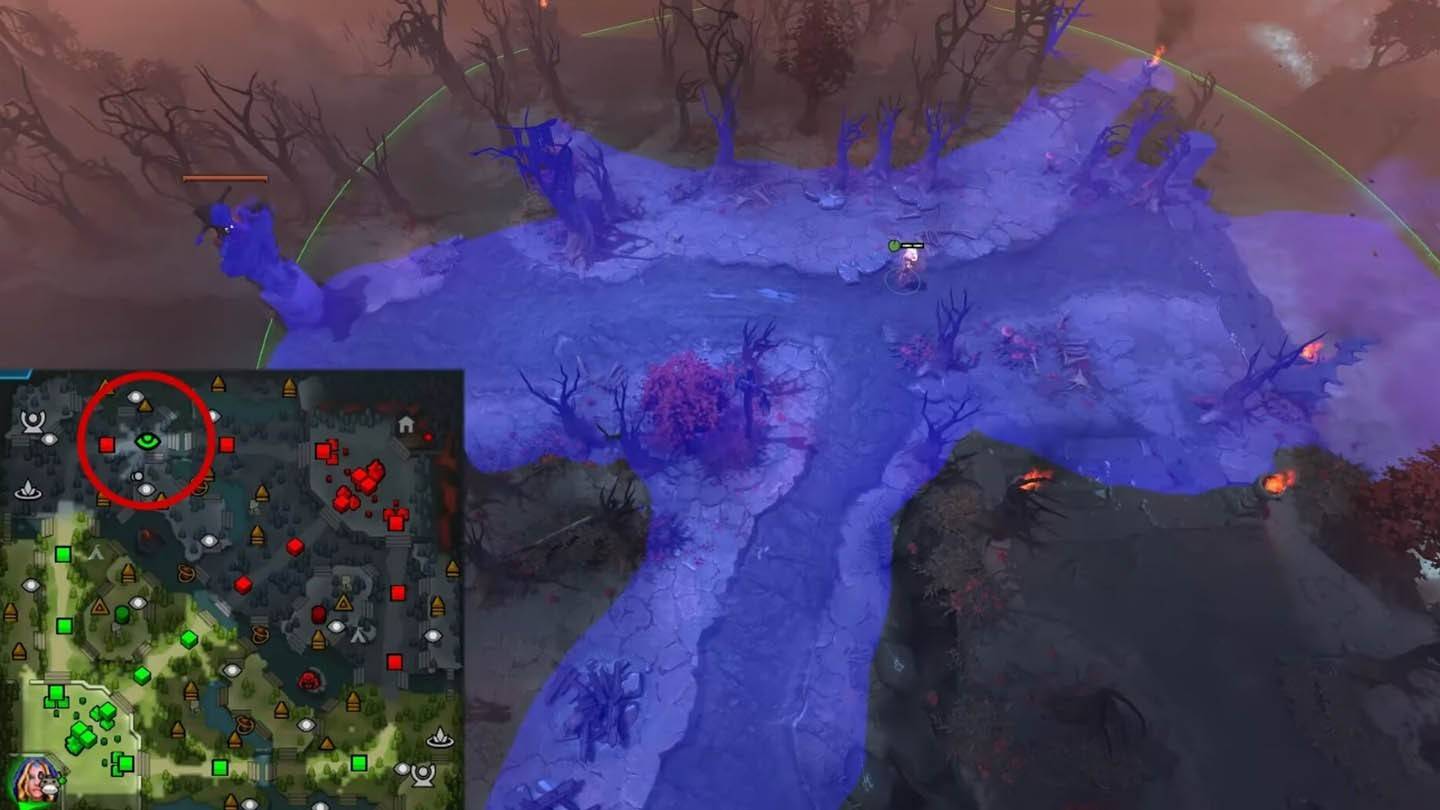
Radiant Top Ancient Cliffside
Hidden Vantage Point: Offers hidden vision into the Radiant base from a cliffside, surprising opponents. Elite Placement: Requires precise execution.
Dire Mid Lane Jungle Overlook
Elevated Advantage: Provides elevated vision over the Dire's mid lane jungle, improving situational awareness. Advanced Technique: Combine with other mid lane wards.
Radiant Bottom Tier 2 Rear Flank
Preventive Measures: Monitors rear flanks near the Radiant's bottom tier two tower, preventing sneak attacks. Defensive Mastery: Critical for tower integrity.
These advanced ward placements represent the highest level of Dota 2 vision control. By studying and applying these strategies, you'll gain a significant advantage in both casual and competitive play. Effective warding goes beyond placement; it's about understanding map control and adapting to changing situations.
Latest Articles

2025 Roblox Forsaken Characters Tier List
Forsaken is a Roblox game that captures the thrilling killer-versus-survivor gameplay seen in titles like Dead by Daylight, while adding its own unique spin. It delivers an exhilarating and highly replayable experience by refining this asymmetric sur
Goblin Valley: Cozy Home Game Opens Pre-Registration
Build and expand your thriving goblin farm villageInteract with quirky goblins, each with unique personalitiesMonitor and fulfill your goblin residents' needsUnimob Global has recently launched pre-registrations for Idle Goblin Valley: Chill Farm, of

Heartopia is kicking off its first closed beta test next month
The initial CBT runs from November 4th through the 18thEngage in hobbies such as fishing, birdwatching, and cookingAdopt pets, customize your home interior, and design unique outfitsHeartopia, XD Games’ highly anticipated life simulation title announ
Summoners War set to host collaboration with the iconic fantasy book series The Lord of the Rings
Summoners War: Sky Arena has teamed up with none other than The Lord of the Rings.
Set to launch later this month, the collaboration brings iconic characters from the Fellowship and beyond into the game.
The Lord of the Rings needs no introduction—it
Another Eden expands its Chrono Cross collaboration content with Glenn and new story
Another Eden is introducing fresh content to its existing Chrono Cross collaboration materialThe release includes a beloved character named Glenn from The Cursed DragoonA new character and upcoming events are also being added to honor Japan Cat DayAl

The $13 FrSara Portable Neck Fan Is an Inexpensive Solution to Beating the Summer Heat
Summer has arrived, and neck fans are seeing a surge in popularity. These portable fans offer a simple, effective, and affordable way to stay cool and comfortable. Amazon is currently offering 50% off the FrSara Rechargeable Portable Neck Fan with th
Latest Games


DIY Cake Maker
Casual丨66.0 MB

Rise Up: Fun Strategy Game
Casual丨13.6 MB

Lyriko
Educational丨121.7 MB

Farm animals
Educational丨83.1 MB

Scube
Educational丨55.44MB


Lenguaje 6 años
Educational丨33.7 MB

Squla
Educational丨60.6 MB


Top News
MORE +

01
01-07
BREAKING: Flight Simulator 2024 Login Woes Ground Players
Flight Simulator 2024 Launch Plagued by Technical Difficulties
The highly anticipated launch of Flight Simulator 2024 has been significantly hampered by widespread technical problems, leaving many players grounded before they could even take to the virtual skies. This article details the reported d
02
01-06
CDPR acknowledged weak gameplay in The Witcher 3
The Witcher 3, while critically acclaimed, wasn't without its flaws. Many fans felt the combat system fell short.
In a recent interview, Witcher 4's game director, Sebastian Kalemba, acknowledged weaknesses in the previous game's gameplay, specifically highlighting the need for significant improvem
03
11-17
Hogwarts Legacy 2 is "One of the Biggest Priorities" for WB Games
Following the successful launch of Quidditch Champions this week, Warner Bros. Discovery has confirmed its plans for a sequel to last year's Harry Potter-based action RPG hit Hogwarts Legacy—2023's best-selling game.Hogwarts Legacy Sequel Plans Confirmed by Warner Bros. DiscoveryExpected in
04
11-16
Airplane Chefs Brings The Ultimate Snack, Pringles, On Board!
Buckle up for some snacks as Nordcurrent has just dropped an exciting event for their cooking game. It’s the most unexpected collab of Airplane Chefs and Pringles. If you’ve been enjoying your virtual life as a flight attendant, things are about to get a lot tastier.The game developer behind p
05
11-16
Play Together to collaborate with Sanrio and introduce new My Melody and Kuromi content
Play Together is bringing back its Sanrio collab with the appearance of My Melody and KuromiYou can collect coins by completing their themed missions that can then be used to draw exclusive itemsAs a bonus there's also new summer-themed content and events, including a major bug huntPlay Together, th
Topics
More +